Harley Trike Reverse Motor Removal Guide: What I Do on Tri Glide & Freewheeler
Table of contents
- Introduction: Why I remove a Harley trike reverse motor
- What I check before I pull the motor
- Tools and materials I actually use
- Safety first: My pre-removal checklist
- Preparation: Gaining access on Tri Glide (FLHTCUTG) and Freewheeler (FLRT)
- Step-by-step: How I remove the reverse motor or gearbox assembly
- Inspecting the removed unit: What I look for
- Reassembly: What I never skip
- Post-installation testing: How I verify the fix
- Time, difficulty, and costs: Realistic expectations
- Model and kit differences you should know
- Troubleshooting FAQs I get all the time
- Final thoughts: When to DIY and when to hire it out
Introduction: Why I remove a Harley trike reverse motor
I do not yank a reverse motor just for fun. I pull one when it fails or when I need access for other repairs. On Harley-Davidson trikes like the Tri Glide Ultra Classic (FLHTCUTG) and the Freewheeler (FLRT) the reverse system makes life easier in tight driveways and on slopes. When it quits you feel it. Common complaints sound like “No reverse,” “It just clicks,” or “It grinds.” I have seen reverse motor failure blamed on a lot of things. Sometimes it is a solenoid. Sometimes it is brushes or a tired armature. Sometimes it is wiring. I have also pulled the unit to reach a differential, a driveshaft coupling, or to remove exhaust for unrelated work.
This guide shares exactly how I approach removal on Harley trikes. I will walk you through tools, jack points, bodywork that needs to come off, electrical disconnects, mounting bolts, and real-world gotchas. I will also show you how I inspect the reverse motor once it is on the bench. If you want a single, no-drama playbook for “how to remove reverse motor on Harley trike” this is it.
A quick word of caution. The reverse unit sits in tight quarters near the differential and exhaust. Access is the real battle. This job lands in the Moderate to High difficulty range for a first-time DIYer. You can do it with patience, a lift or stable jack, and the right tools. If any step below makes you uneasy stop and consult a service manual or a pro.
What I check before I pull the motor
Before I spin a single nut I try to confirm I actually need to remove the reverse motor. A little diagnosis up front can save a full day.
- Reverse just clicks. I suspect the solenoid first. I check the reverse motor fuse location and the relay. I confirm battery state of charge. I test the reverse switch. I also measure voltage at the motor during a reverse command.
- No sound at all. I look for wiring harness issues. Loose ground wire. Corrosion at electrical connectors. I run a quick wiring continuity test end to end.
- Weak or intermittent reverse. I do a voltage drop test under load. A bad ground or crusty connector can starve the motor. High amperage draw with low torque points to worn brushes or a failing armature.
- Grinding or burning smell. I stop and avoid continued testing. You can damage gears. I plan for removal and inspection of the gearbox and drive gear.
If the solenoid tests bad I replace it first. It is cheaper and often fixes the “clicking” complaint. If the motor itself tests open or shorted or if the unit grinds I move on to removal.
Tools and materials I actually use
You do not need a warehouse. You do need the right mix.
- Hand tools: Full SAE and metric socket set, box-end wrenches, Allen/hex keys, Torx bits if needed, screwdrivers, and a torque wrench.
- Specialty tools: Motorcycle lift or stable jack with stands. A pry bar helps with exhaust brackets. A paint pen for marking bolt positions.
- Safety gear: Gloves and eye protection. I keep a catch pan and a small fire extinguisher nearby.
- Consumables: Penetrating oil, blue threadlocker (Loctite 243 or similar), anti-seize for exhaust studs, shop rags, zip ties, masking tape and a Sharpie for labels, and new gaskets or seals if the reverse gearbox uses them.
- Electrical/diagnostic: Multimeter and test leads. A fused jumper lead set for bench tests.
- Documentation: Service manual for torque specs, wiring diagrams, and the exploded view. I pull this out on every job.
A quick note on tools. I have used fancy and basic. A good torque wrench matters most. Use any quality sockets and wrenches that fit well.
Safety first: My pre-removal checklist
I never shortcut safety on a trike. It weighs a lot and it sits wide.
- Park on a level surface.
- Chock the front wheel and one rear wheel.
- Let the exhaust cool fully. I make this the first note because I have burned my knuckles on a heat shield before.
- Disconnect the battery. Negative terminal first then positive if needed. Tape the negative cable so it cannot spring back and touch the post.
- Verify lift points and jack stability. Harley trike jack points differ slightly by model. I place the lift under the frame rails. I avoid the exhaust. I check balance before I start crawling underneath.
- Keep wiring clear. Have zip ties ready. You do not want a harness snagging as you lower the unit.
Preparation: Gaining access on Tri Glide (FLHTCUTG) and Freewheeler (FLRT)
Access defines how long this job takes. Harley trike reverse motor access is tight. I work from the outside in.
1) Remove rear bodywork
- Saddlebags off first. Disconnect any bag lighting if fitted. Bag removal frees up space for exhaust work and gives you room to see connectors.
- Remove the tour pack if your Tri Glide is equipped. It is optional based on your setup but it helps in some cases.
- Rear fender and fascia panels may need to come off for better access to the reverse drive unit service points. On some years I only pull the rear fascia. On others I loosen the fender to reach fasteners.
- Passenger floorboard removal helps with heat shield access. Quick job that often saves knuckles later.
2) Remove exhaust components
- Mufflers off. This is almost always required. Loosen the clamps. Support each muffler and slide it rearward. Keep an eye on gaskets.
- Headers next if they block the reverse unit. Freewheeler and Tri Glide layouts vary. I remove heat shields and exhaust brackets if they limit clearance. Heat shield removal takes patience. Use painter’s tape on your wrench jaws to avoid scratching chrome.
- If you disturb exhaust gaskets plan to replace them on reassembly.
3) Lift and support the trike
- Position the motorcycle lift under the frame. Lift only as high as needed for access to the differential area. I like a low comfortable working height so the trike stays stable.
- Add stands or blocks for redundancy. Stability beats speed.
4) Drain fluids if your unit has them
- Some reverse gearboxes have fluid. Many Harley trike reverse systems use a gear reduction drive without a separate oil circuit. Check your service manual for your specific model year. If there is a drain plug use a catch pan and record what comes out.
5) Clear nearby components
- Check brake caliper and lines. I have removed a rear brake caliper to gain an extra inch of room on one setup. Hang the caliper with a strap so it does not dangle by the brake line.
- Verify drive belt and tension. You may not need to touch the belt. If you do remove the rear wheel or the differential for any reason remember the belt alignment and tension spec for later.
Step-by-step: How I remove the reverse motor or gearbox assembly
This is the heart of the job. Procedures vary a bit between FLHTCUTG and FLRT. Aftermarket conversions like Champion or Lehman may place the unit differently. The core approach stays the same.
A) Disconnect electrical connections
- Label everything. I put masking tape flags on every connector and ground wire. Write where it goes. Future you will thank you.
- Unplug the reverse motor electrical connections. This includes the main positive lead, the solenoid control wires, and any connector in the reverse motor wiring harness. Use a pick for stubborn locking tabs.
- Remove the reverse motor ground wire from the frame. Clean the ring terminal if it is corroded. Keep the bolt and any star washer in a labeled bag.
- Follow the harness and free any clips or zip ties. I like to clear an extra foot of slack so the harness does not snag as I lower the unit.
B) Remove driveshaft/coupling if applicable
- Some Harley trike reverse systems tie into the final drive near the differential with a coupling or gear set. If the driveshaft blocks removal loosen the coupling bolts at the differential or at the reverse gear unit.
- Mark the driveshaft relationship to the flange with a paint pen. It helps preserve balance on reassembly.
- Slide the driveshaft back or remove it fully if the service manual calls for it. Keep an eye on shims and spacers. Do not lose them.
C) Detach ancillary brackets and lines
- Remove any exhaust brackets still in the way. A small pry bar helps persuade rusted sleeves after penetrating oil sets in.
- Disconnect nearby sensors if they are attached to the reverse motor housing or bracket. I have seen speed sensor wiring zip-tied to a bracket. Free it now.
- Check for a manual reverse handle linkage on some conversion kits. Remove linkage pins and set aside.
D) Unbolt the reverse motor/gearbox assembly
- Identify all mounting bolts. There may be a mix of bolt lengths. I take a quick photo and sketch a simple bolt map on a notepad.
- Support the reverse unit from below with a small floor jack or a transmission jack if you have one. A helper can cradle the unit while you remove the last bolts.
- Crack each mounting bolt loose in a cross pattern. This avoids binding. Remove them one by one. Note any spacers or sleeves between the mounting ears and the frame or transmission case.
- If threadlocker is present you will feel extra resistance. Heat helps. A controlled application from a small torch can break bond on stubborn bolts. Keep heat away from wiring and seals.
E) Extract the unit
- Lower the jack a hair. Check all around the unit. Make sure no wiring, hoses, or brackets still tie it to the frame.
- Tilt and rotate the assembly to snake it out past the frame and differential. Clear heat shields and brake lines. Take your time. The unit is heavier than it looks.
- Set the reverse motor or combined reverse gearbox and motor on a clean bench. Inspect the mounting area on the trike for damage or wear.
Inspecting the removed unit: What I look for
Once the reverse motor lands on the bench I do a quick visual then a focused tear-down if needed.
- Housing and gear inspection. I check for cracked housing, stripped drive gear teeth, chipped pinion gear, or damage to the crown wheel if part of the assembly. A grinding symptom often points here.
- Brushes and armature. I remove the end cap if the motor is serviceable. I inspect the brushes for wear and spring tension. I look for a burnt or grooved commutator on the armature. A reverse motor with intermittent operation often shows carbon buildup and uneven wear.
- Bearings and seals. I check for play and roughness in the bearings. I look for oil seepage around seals. Seal replacement and bearing replacement restore smooth operation in many cases.
- Electrical smell and heat marks. A burnt smell means the motor saw high amperage draw. Darkened insulation or heat marks under the solenoid cover confirm overload.
- Bench tests. I measure continuity of the windings and check for shorts to housing. I run a brief bench power test with a fused jumper. I do not run the unit without the gearbox engaged for long. You can overspin a gear and cause damage.
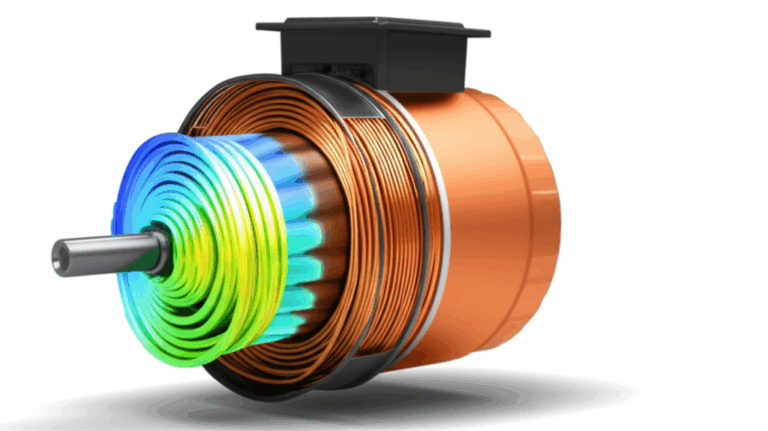
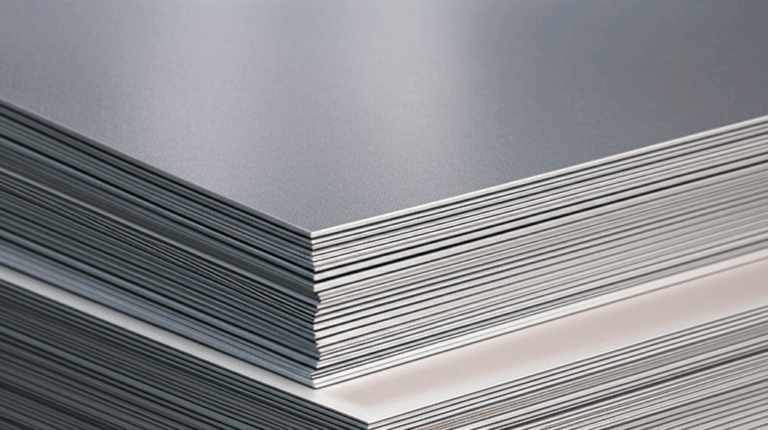
If you like to understand the guts of small motors it helps to know how a stator and rotor work together and why laminations matter for efficiency and heat. If you want a deeper dive you can read about stator and rotor basics. You can also explore how motor core laminations and the choice of electrical steel laminations affect performance and noise. For rotors specifically this quick primer on rotor core lamination gives context. You do not need to be an engineer. Understanding the pieces helps you spot wear patterns with confidence.
Reassembly: What I never skip
Reassembly runs in reverse order. I slow down and focus on details that prevent repeat failures.
- Clean mating surfaces on the frame, transmission case, and the reverse unit. A clean base stops wobble and vibration.
- Replace gaskets and seals as needed. If your unit uses a gasket or O-ring do not reuse a crushed one. Cheap insurance.
- Apply threadlocker where the service manual calls for it. I use blue threadlocker on mounting bolts unless the manual specifies otherwise.
- Torque fasteners to factory specifications. Do not guess. Over-torque can crack a housing. Under-torque can loosen a mount and cause vibration.
- Reinstall ancillary brackets and lines. Double-check sensor clips and the manual reverse linkage if your kit uses one.
- Route the wiring harness exactly as it was. Use the same retention points. Keep wires away from hot exhaust and moving parts. Replace chafed loom sections.
- Reinstall the driveshaft and coupling. Align paint marks. Use new hardware if the manual calls for single-use bolts. Torque in sequence.
- Refit exhaust headers and mufflers. Use new exhaust gaskets if you removed the headers. Apply anti-seize to studs. Align heat shields carefully to avoid rattles.
- Reinstall rear fascia, fender, saddlebags, and the tour pack if removed. Confirm all lighting plugs are reconnected.
Post-installation testing: How I verify the fix
I test early before all the pretty panels go back on. It saves time.
- Reconnect the battery. Positive first then negative. Verify tight clean terminals.
- Cycle the ignition and confirm no warning lights that indicate a wiring issue in the rear.
- Test the reverse function with the trike still on the lift or stands. Keep the rear wheels just clear of the ground. Engage reverse and listen. It should engage smoothly without grinding or bogging.
- Check current draw if you have a clamp meter. A motor that draws abnormally high current under no load hints at internal wear.
- Lower the trike. Test reverse on level ground with a spotter. Apply gentle throttle in reverse. No grinding. No burning smell. No ugly noises. If it passes this test button it up.
Time, difficulty, and costs: Realistic expectations
Everyone wants a clean number. Real life varies by model year, access, and how much rust you fight.
- Difficulty. Moderate to High. If you maintain your own trike you can do it. If you rarely turn a wrench consider professional help.
- Time. Removal only takes 3 to 6 hours for an experienced DIYer. Plan a full day for your first time. Removal and replacement takes 5 to 10 hours once you add reassembly, exhaust work, and testing.
- Parts cost. OEM Harley reverse motor assemblies run roughly $700 to $1200 or more. Aftermarket reverse motor options land around $400 to $900 depending on brand and kit. A solenoid alone costs about $50 to $150.
- Shop labor. Labor for diagnosis, removal, installation, and testing often ranges from $600 to $1500. It depends on rate and how tightly packed your trike is.
- Hidden costs. Exhaust gaskets, new hardware, threadlocker, and your time. Also any seals or bearings you replace once you inspect the unit.
Model and kit differences you should know
Tri Glide (FLHTCUTG) vs Freewheeler (FLRT)
- Both models use similar reverse motor concepts in the Harley-Davidson trike lineup. Packaging differs. The Freewheeler often gives a bit more access due to fewer body panels. The Tri Glide may require extra fascia steps.
- Exhaust path and heat shields change the order of removal. On some years I can leave the headers in place. On others I cannot reach key bolts without pulling a header.
Factory vs aftermarket trike conversions
- Kits from Champion, Lehman, and Frankenstein use different brackets and may add a manual reverse handle. The reverse drive unit service steps stay similar. Watch for unique linkage hardware and custom mounting spacers.
- Independent suspension conversions create unique frame clearance spots. Expect more time spent on bodywork removal.
Specific model year notes
- Bolt sizes, wire routing, and torque specs change. A 2014 Tri Glide may not match a 2019 Freewheeler. The service manual is your referee. Follow it.
Troubleshooting FAQs I get all the time
My reverse motor just clicks. What is wrong
- Likely a solenoid issue or low voltage. Confirm battery voltage under load. Check the reverse motor fuse and relay. Test the solenoid trigger wire. If the solenoid works and the motor still does not spin check for seized motor brushes or a bad ground.
How long does this job take
- A motivated DIYer can remove the unit in 3 to 6 hours. Plan a day the first time. Shops often estimate half a day for removal and a full day for R&R with testing.
Can I bypass the reverse motor
- You can freewheel the trike and push it if the drivetrain allows it. I do not recommend using a hacky electrical bypass to “force” the motor. You can fry wiring or the motor. Bypass the solenoid only for controlled testing with proper protection. If the motor is dead replace or rebuild it.
Do I need to remove the exhaust
- Almost always remove the mufflers. Headers come out on many setups for real access. The time spent on exhaust saves time on the reverse unit bolts. You will fight less and break fewer knuckles.
What torque specs should I use
- Use the Harley-Davidson service manual for your specific model year. Do not guess. Torque values differ across fasteners and years.
What if the motor smells burnt
- Stop testing. A burnt smell and heat marks call for a teardown. Check brushes, armature, and the gear set. Plan for replacement if the windings are cooked.
Can I rebuild the reverse motor
- Sometimes yes. If the housing is sound and parts like brushes and bearings are available you can rebuild. If the gear set is stripped or the armature is burnt beyond spec I replace the unit. Weigh the cost of parts and your time against a new or reman unit.
Where is the reverse motor fuse located
- Location varies by year. Check the service manual diagram. The panel labeling helps but I always confirm with a meter.
What tests should I do before removal
- Voltage drop test from battery positive to the motor positive under load. Ground side voltage drop test from motor case to battery negative under load. Continuity test on the switch circuit. Amperage draw test during a brief reverse command. These tests point you toward wiring vs solenoid vs motor.
How do I keep track of bolts and spacers
- I use zip-top bags with labels. I also sketch a simple bolt map and take photos during disassembly. I never rely on memory.
Final thoughts: When to DIY and when to hire it out
You can remove the reverse motor on a Harley trike at home. I have done it in a garage with a basic lift, a solid tool set, and a plan. The job is more about access and patience than exotic skills. Label wires. Support the unit before removing the last bolts. Use threadlocker where required and torque to spec. Test before you button up the bodywork. If anything feels unsafe stop.
Here is my quick decision rule. If your tests point to a simple solenoid failure and access is clear go for it. If the unit grinds or the hardware looks seized and your lift setup feels sketchy call your local independent motorcycle shop. Paying for two hours of a pro’s time costs less than a cracked housing or a bruised shoulder.
Before you go, let me recap the biggest lessons I have learned:
- Diagnose first. A $100 solenoid can save a $1000 motor.
- Make space. Removing exhaust and heat shields early makes everything easier.
- Label everything. Your future self will grin when wires click right back in.
- Torque with purpose. Fasteners hold your investment together.
- Test smart. Verify reverse operation before the pretty pieces go back on.
With a clear plan and the right mindset you can handle this job. You will know your Tri Glide or Freewheeler better than ever. That confidence pays dividends the next time a rattle or a warning light shows up.
Internal link count and uniqueness check:
- Used 4 unique links.
- None repeated.