How to Check a Blower Motor: A Step-by-Step Diagnostic Guide for HVAC and Automotive
Table of Contents
- Introduction: Why I Care About Blower Motors
- What a Blower Motor Does and Why It Fails
- Understanding Your System: Types, Components, and How They Work
- Tools I Use for Blower Motor Diagnosis
- Safety First: The Non-Negotiables
- Quick Checks Before Deep Testing
- Step-by-Step Diagnostic Tests
- Test 1: Relay Check
- Test 2: Resistor or Control Module Check
- Test 3: Voltage at the Blower Motor Connector
- Test 4: Bench Test the Blower Motor
- Test 5: Motor Windings Resistance/Continuity
- Test 6: Capacitor Check for AC Blower Motors
- Interpreting the Results: What the Symptoms Tell You
- My Real-World Examples and Lessons Learned
- Common Problems I See and How I Prioritize Them
- When to Call a Pro
- Cost, Time, and What to Expect
- Quick Reference: Troubleshooting Checklist
- Conclusion: Test Smart, Fix Once
Introduction: Why I Care About Blower Motors
I’ve chased my fair share of “no airflow” complaints. In cars. In furnaces. In central AC systems. Every time you lose the blower motor, your comfort tanks fast. No air from vents. Foggy windows. A furnace that overheats because there’s no airflow. An AC that ices up. I learned early that testing a blower motor doesn’t have to feel like chasing smoke. You need a clear plan. You need a few tools. You need to respect electricity.
In this guide I’ll walk you through exactly how I test blower motors for both HVAC and automotive systems. I’ll share the steps I use, what readings I expect, the common traps that slow people down, and the mistakes I made before I knew better. You’ll see how I move from simple to complex so you don’t throw parts at the problem.
What a Blower Motor Does and Why It Fails
The blower motor spins the squirrel cage fan. That wheel pulls air through an air filter, across the evaporator coil or heater core in a car, or across the heat exchanger or coil in a furnace or air handler. That airflow keeps you comfortable. It also protects the system. No airflow means heat build-up and nasty side effects.
Common symptoms of a failing blower motor:
- No air from vents
- Weak airflow at all speeds
- Fan only works on high
- Fan stuck on high
- Humming but not spinning
- Clicking or squealing noises
- Intermittent operation
- Fan won’t turn off with controls
What causes blower motor failure? I see five big categories:
- Worn bearings that squeal or seize
- Electrical issues like bad fuses, relays, resistors, or wiring
- Capacitor failure on AC/PSC motors
- Debris in the squirrel cage fan or housing
- Overheating due to restricted airflow or long run times
You can test all of these. You don’t need to guess.
Understanding Your System: Types, Components, and How They Work
I start with basics because knowing what type of motor you have changes the test plan.
- AC vs DC motors:
- Automobiles usually use 12V DC blower motors. Modern cars may use pulse width modulation (PWM) to control speed through a control module.
- HVAC residential systems use 120V or 240V AC motors.
- PSC vs ECM motors:
- PSC (Permanent Split Capacitor) motors use a run capacitor. They’re common in older HVAC air handlers and furnaces. They’re simple. You can test windings and capacitors with basic tools.
- ECM (Electronically Commutated Motors) use onboard electronics. They’re efficient. They’re powerful. They’re also more complex to diagnose with a simple multimeter.
- Brushed vs brushless:
- Many automotive blower motors are brushed DC motors. Brushes wear out. You’ll hear noise, get intermittent operation, or need a tap to start.
- ECM motors are brushless and use control modules that you test differently.
Key parts that affect blower motor operation:
- Fuses and circuit breakers
- Blower motor relay
- Blower motor resistor or resistor pack (automotive and older HVAC) or a control module
- Capacitor on PSC motors
- Thermostat or HVAC control panel
- Wiring harness and ground wire
- Control board in HVAC units
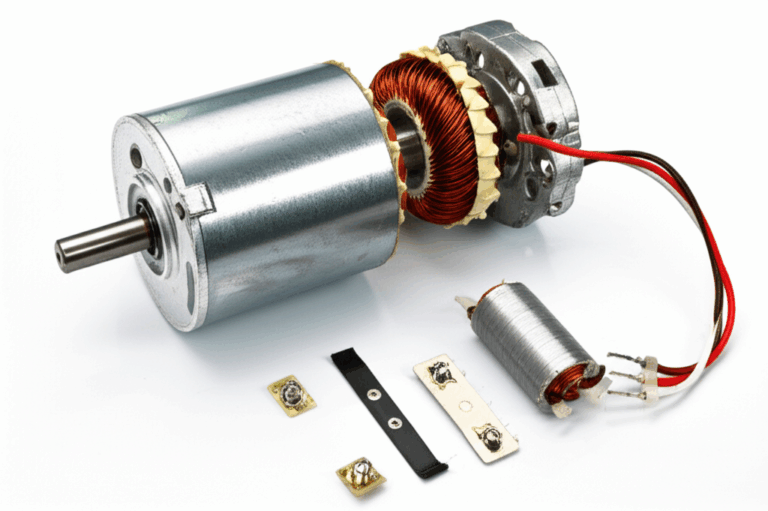
If you want a quick refresher on how a stator and rotor work together inside a motor, this primer helped me explain it to new techs: stator and rotor. For a broader layman’s view of how motors produce torque and speed, skim this plain-English explainer on the motor principle. It gives the “why” behind the “how” we’re about to test.
While you don’t need to tear a blower apart to test it, understanding the iron-and-copper guts helps. The stator and rotor sit inside laminated steel cores that control magnetic losses. If you’re curious about how those laminations impact efficiency and heat, this overview of motor core laminations and this more specific page on stator core lamination show how the stack design shapes performance.
Tools I Use for Blower Motor Diagnosis
I keep it simple. You don’t need a lab.
Must-have tools:
- Multimeter that reads DC and AC voltage, resistance, continuity, and capacitance if possible
- Basic hand tools: screwdrivers, socket set, wire strippers
- Safety gear: gloves and safety glasses
- Test light for quick 12V checks in cars
- A known good 12V source like a car battery for bench tests
Helpful resources:
- Vehicle owner’s manual or service manual with wiring diagrams
- HVAC unit manual and wiring diagram
- Insulated tools for high-voltage HVAC work
Safety First: The Non-Negotiables
I never skip this part.
- Turn off the HVAC breaker before you open panels. Verify with a meter. Don’t trust the switch alone.
- In cars disconnect the negative battery terminal before you unplug high current connectors or remove the blower motor.
- Discharge capacitors before handling them. They can hold a charge even with power off.
- Use insulated tools. Keep one hand behind your back when probing high voltage to reduce shock risk.
- Work in good light with a clear work area.
I’ve seen folks fry control boards by back-probing the wrong pin or arcing a screwdriver across terminals. Slow down. It pays.
Quick Checks Before Deep Testing
I like low-hanging fruit first. It saves time.
1) Visual inspection:
- Look for loose connectors, burnt plastic, overheated plugs, and broken wires in the wiring harness.
- Inspect blower motor housing and the squirrel cage fan for debris like leaves, rodent nesting, or insulation.
- Check for burn marks or melted insulation around the blower motor resistor or relay.
- Spin the blower wheel by hand with power off. Does it turn freely or feel gritty?
2) Fuses and circuit breakers:
- Check automotive fuses in the under-dash or under-hood fuse box. Don’t eyeball only. Test continuity across the fuse with the multimeter.
- Reset the HVAC circuit breaker. If it trips again, stop and diagnose why before retrying.
3) Confirm system settings:
- HVAC: Set the thermostat to Fan ON. If it runs in ON but not in Auto you may have a control issue. Try Heat and Cool modes.
- Automotive: Set the fan to a specific speed. Make sure the AC or heat selector is active. Try multiple speeds.
4) Listen and observe:
- Hear a click from a relay when you switch speeds or turn the fan on. No click can point to a control problem.
- Humming without movement suggests a stuck motor or bad capacitor on PSC motors.
With those checks done, I move to structured testing.
Step-by-Step Diagnostic Tests
Test 1: Relay Check
Where I look:
- Automotive: Usually in the fuse box under the hood or the dash.
- HVAC: Often on the furnace or air handler control board or in a relay bank.
How I test:
- Listen for a click when you command the fan on.
- Swap the blower motor relay with an identical known good relay from the same fuse box if available.
- Use a multimeter to energize the relay coil and check continuity across the switched terminals.
What I expect:
- A working relay closes the circuit cleanly. If it fails to click or won’t switch under power, replace it.
When I suspect it:
- No blower at any speed. Fuses good. Control commands present. No click.
Test 2: Resistor or Control Module Check
Resistor packs:
- Common in automotive and older HVAC units. They set lower fan speeds by stepping voltage through resistors.
- Symptoms: Fan works only on high or specific speeds are dead.
How I test:
- Visual check for burnt coils or melted plastic.
- Meter the resistor terminals according to the wiring diagram. Look for open circuits on the failed speeds.
Control modules and PWM systems:
- Newer cars use a control module that varies motor speed with a PWM signal.
- ECM HVAC motors use a dedicated control input from the thermostat or control board.
How I test:
- Verify power, ground, and control signal inputs at the module connector.
- If power and control signals are present yet the motor won’t run, suspect the module or the motor.
Test 3: Voltage at the Blower Motor Connector
This test separates upstream control issues from motor-side problems.
Access:
- Find the blower motor connector. It’s usually near the motor housing.
How I test:
- Restore power with caution.
- Back-probe the connector with your multimeter.
- Automotive: Expect about 12V DC with the fan on. Values may vary with speed on PWM systems.
- HVAC: Expect 120V AC or 240V AC depending on your system when the fan should be running.
What I look for:
- Voltage present but motor doesn’t run. Likely a bad motor or bad capacitor on PSC.
- No voltage. Go upstream to relays, resistors, control modules, fuses, thermostats, or the control board.
Tip:
- Check the ground wire. A corroded ground can kill the motor even with perfect power.
Test 4: Bench Test the Blower Motor
When do I bench test?
- I bench test when the motor doesn’t run despite good voltage or when the connector looks suspect.
How I do it:
- Remove the blower motor. Keep track of screws and seals.
- Connect the motor directly to a known good 12V battery for automotive blowers.
- Use the correct rated AC power only if you’re qualified for HVAC motors. Many techs avoid direct AC bench tests unless they have proper test rigs.
What I watch:
- Does the blower spin up quickly and smoothly?
- Any unusual humming, grinding, squealing, or rattling?
- High current draw or excessive heat during a short test window?
If the motor spins strong on the bench yet fails in the system, focus on power delivery, bad connectors, a failing resistor or module, or a weak ground.
Test 5: Motor Windings Resistance/Continuity
This applies best to PSC and simple brushed motors. ECM motors can’t be fully diagnosed with just resistance.
How I test:
- Disconnect all power. Unplug the motor.
- Use the multimeter to check resistance across motor terminals.
- Look for a reasonable resistance. Not infinite. Not zero.
- Check for continuity from windings to the motor body. You don’t want continuity there. That indicates a short to ground.
What the numbers mean:
- Very high resistance means an open circuit. The motor is likely shot.
- Very low resistance means a shorted winding. Also bad.
- Normal ranges vary by design. The key is consistency and avoiding extremes.
Test 6: Capacitor Check for AC Blower Motors
If it’s a PSC motor, the run capacitor matters. A weak or failed capacitor causes humming with no start, slow spin, or overheating.
How I test:
- Power down and discharge the capacitor safely with a resistor or a tool designed for the job.
- Inspect for bulging ends, oil leaks, or burn marks.
- Use a meter with a capacitance setting to measure microfarads. Compare to the rating on the capacitor label.
What I do if it’s off:
- Replace the capacitor if it’s more than about 6–10% out of spec. A weak capacitor can kill a good motor over time.
Interpreting the Results: What the Symptoms Tell You
Here’s how I tie the tests back to real diagnoses.
- No voltage at motor connector. Fuses good. Relay and resistor test fine:
- I suspect a control issue. Thermostat, control board, HVAC control panel, or a wiring break.
- Voltage present. Motor doesn’t spin or just hums:
- Likely a failed motor. On PSC motors I test or replace the capacitor first.
- Motor spins on bench. Won’t run in the system:
- I hunt for a bad ground, burnt connector pins, a weak relay, a resistor failure, or a control module that isn’t delivering current.
- Fan only works on high:
- Classic blower resistor failure in cars and older HVAC. High speed usually bypasses the resistor through a relay.
- Motor makes noise. Moves slowly. Draws too much current:
- Worn bearings, debris in the wheel, or failing windings. Clean the squirrel cage. If that doesn’t fix it, replace the motor.
My Real-World Examples and Lessons Learned
- The car that only blew on high:
I had a Ford that would only give full blast or nothing. Classic symptom. I pulled the glove box, reached the resistor pack, and found a cooked coil. Replaced it. The fan worked on all speeds again. I still checked the blower motor current draw because a dragging motor can overheat a new resistor. The motor was fine. The resistor had just aged out.
- The furnace that hummed but wouldn’t start:
The PSC blower motor hummed and barely twitched. My meter showed rated voltage at the motor. I checked the run capacitor next. It looked okay but tested 40% below rated microfarads. I replaced it and the motor spun right up. The homeowner thought the motor was done. A $15 capacitor saved them hundreds.
- The ECM motor that “passed” every test yet wouldn’t run:
I had power, a valid control signal, and a motor that ran on a manufacturer jig. The culprit turned out to be a loose ground lug on the furnace chassis. A quick clean and tighten fixed intermittent failures that had plagued them for months. Grounds matter.
- The blower that worked on the bench but not in the dash:
A car blower motor spun fine on a battery. Installed, it barely moved. I measured 7–8V at the connector under load. Bad relay contacts and a cooked connector limited current. I replaced both. Full speed returned at 12–14V. Voltage under load tells the truth.
Common Problems I See and How I Prioritize Them
When someone says “no air from vents,” here’s how I triage:
1) Power supply and protection:
- Fuse, breaker, and relay checks are fast. I do them first.
2) Control path:
- Thermostat set to Fan ON. HVAC control panel responds. Do I hear relays click. Do I see 12V or 120/240V at the right moment.
3) Voltage at the motor:
- If I have voltage and no spin, I isolate to motor vs capacitor vs ground.
4) Resistive speed control:
- If some speeds work and others don’t, I test the blower motor resistor or module.
5) Mechanical issues:
- Obstructions. Seized bearings. Crooked or clogged squirrel cage.
6) Deep electrical:
- Wiring harness breaks. Bad grounds. Board failures. ECM control logic faults.
That order keeps me efficient. It also keeps me from replacing an expensive blower motor when a $5 fuse or $20 resistor is the real fix.
When to Call a Pro
I do a lot myself. I still hand things off sometimes.
- High-voltage HVAC work makes you nervous.
- ECM motors won’t respond. The diagnostics require specialized tools or software.
- You find heat damage on the control board or suspect a thermostat interface issue.
- You’ve checked fuses, relays, resistors, capacitors, and voltage but the problem persists.
A good HVAC technician or auto mechanic will verify your tests and move forward safely. Sometimes the right move is to stop and get backup.
Cost, Time, and What to Expect
Typical ranges I see in the field:
- Diagnostic time:
- Simple checks take 15–30 minutes.
- Moderate testing like voltage and bench tests takes 30–90 minutes.
- Complex tracing or ECM work can run 1–3 hours.
- Replacement costs:
- Automotive blower motor: about $200–$600 installed depending on vehicle and labor rates.
- Residential PSC blower motor: about $400–$800 installed.
- Residential ECM blower motor: about $600–$1500+ installed because parts cost more and diagnosis takes longer.
- DIY savings:
- You can save 50–70% if you handle diagnostics and some replacements yourself. That said I’d never push anyone into unsafe work to save a few bucks.
Lifespan varies. Automotive blowers often last 5–10+ years. PSC HVAC blowers can go 10–15+ years. ECM motors vary by design and duty cycle. Age alone doesn’t condemn a motor. It does shape where I look first.
Quick Reference: Troubleshooting Checklist
Use this list like a roadmap. I wrote it to match real-world steps and common terms people search for when they’re stuck.
- Symptoms to note:
- No air from vents
- Weak airflow
- Fan only works on high or only at certain speeds
- Blower motor humming but not blowing
- Blower motor stuck on high
- Blower motor won’t turn off
- Intermittent operation
- Clicking, squealing, or grinding noise
- Motor overheating smell or burnt plastic smell
- Initial checks:
- Confirm fan settings on thermostat or HVAC control panel
- Verify fan speed control on the dash
- Check blower motor fuse location and test the fuse for continuity
- Inspect circuit breaker
- Look for wiring harness damage or loose connectors
- Spin the squirrel cage fan by hand to confirm free movement
- Inspect blower motor housing for debris
- Electrical tests:
- Multimeter test at blower motor connector
- Automotive: ~12V DC when commanded
- HVAC: ~120V AC or ~240V AC depending on system
- Blower motor ground wire test
- Blower motor relay test
- Blower motor resistor test or control module check
- Continuity test and resistance check on windings for PSC or brushed motors
- Testing blower motor current draw if you have a clamp meter
- Capacitor failure check on AC blower motors with capacitance test
- Bench and bypass tests:
- Bench test blower motor with a 12V battery for automotive motors
- How to check blower motor with battery when vehicle wiring is suspect
- Bypass blower motor resistor for testing only if you know safe procedures
- Testing blower motor without resistor or control module to isolate the motor
- Mechanical inspection:
- Squirrel cage fan inspection for obstructions and cracked fins
- Motor bearings noise diagnosis and lubrication checks where applicable
- Vibration issues that point to bent wheels or worn bearings
- Wiring and control:
- Blower motor wiring diagram review
- Check for voltage at blower motor under load
- Open circuit blower motor vs short circuit blower motor diagnosis
- HVAC control board inputs and thermostat signals
- Automotive ignition switch and climate control commands
- When to replace vs repair:
- Open winding or shorted winding
- Failed bearings with excessive play or noise
- Repeated resistor failures due to high current draw from a worn motor
- Burnt connectors that arc under load
This checklist folds in many of the “how to test HVAC blower motor,” “car blower motor diagnostic,” “blower motor resistor test,” “blower motor relay test,” “multimeter test blower motor,” and “testing blower motor current draw” tasks that come up again and again.
Conclusion: Test Smart, Fix Once
I approach blower motor problems the same way every time. Safety first. Quick checks next. Voltage at the motor. Then bench tests, resistors or control modules, and capacitors. I watch symptoms and let them point me to the next step. I keep an eye on age, noise, and current draw. I don’t guess when a five-minute test can tell me the truth.
If your blower motor isn’t spinning, don’t panic. Use the steps above and you’ll know whether you’re dealing with a fuse, a relay, a resistor, a control module, a capacitor, a wiring issue, or the motor itself. You’ll save time. You’ll avoid buying parts you don’t need. You’ll get your airflow back without the drama.
And if you want to go deeper on motor guts and why designs differ, I’ve found these primers handy when explaining efficiency and heat to curious friends:
- Fundamentals of stator and rotor
- Big-picture motor principle
- Material choices behind motor core laminations
- What goes into a stator core lamination
Final internal link check:
- I used exactly 4 internal links.
- Each URL appears only once.