How to Convert Iron into a Permanent Magnet: Your Comprehensive Guide
Have you ever wondered about the invisible force that holds a note to your refrigerator? Or the fundamental principle that drives the electric motors in everything from your car to your computer’s cooling fan? It often starts with a simple yet profound question: how can an ordinary piece of iron become a magnet?
If you’ve found yourself pondering the leap from a non-magnetic metal to an object with a persistent magnetic field, you’re in the right place. This isn’t just a kitchen science experiment; understanding this conversion is the bedrock of advanced engineering. It’s a concept that scales from a simple DIY project to the high-stakes design of sophisticated electrical machines.
This guide will walk you through the entire process. We’ll start with the foundational science, explore practical, hands-on methods for magnetizing iron, and then connect these principles to the high-performance materials and applications that engineers and designers work with every day.
What We’ll Cover
- Understanding the Basics: What Makes a Magnet Permanent?
- Essential Materials and Tools for Your Experiment
- Method 1: The Simple Stroking/Rubbing Technique
- Method 2: Electrical Induction with a Solenoid
- Factors Influencing Magnet Strength and Permanence
- How to Test Your New Permanent Magnet
- Common Pitfalls and Troubleshooting
- Beyond Iron: Advanced Permanent Magnet Materials
- Real-World Applications of Permanent Magnets
Understanding the Basics: What Makes a Magnet Permanent?
Before we start turning iron into a magnet, let’s explore what’s happening on a microscopic level. The “magic” of magnetism is really a story of order versus chaos within the material itself.
The Science of Ferromagnetism
Materials like iron, nickel, and cobalt are special; they’re known as ferromagnetic materials. Imagine your piece of iron is like a massive stadium filled with countless tiny, spinning compass needles. Each of these “compasses” is called a magnetic domain.
In a normal, unmagnetized piece of iron, these domains are all pointing in random directions. They’re a chaotic crowd, with their individual magnetic forces canceling each other out. The net result? No overall magnetic field.
The process of magnetization is all about getting this crowd organized. By applying an external magnetic field, you’re essentially acting as a drill sergeant, shouting orders for all those tiny domains to snap to attention and point in the same direction. When a majority of them align, their individual magnetic forces add up, creating a strong, unified magnetic field. Voilà, you have a magnet.
Key Magnetic Properties: Retentivity and Coercivity
So, what determines if a magnet is temporary or permanent? It comes down to two critical properties:
A true permanent magnet needs both high retentivity (to be strong) and high coercivity (to be durable).
Iron vs. Steel: A Tale of Two Materials
This brings us to a crucial point. While we talk about magnetizing “iron,” the type of iron makes a huge difference.
- Soft Iron (like a common iron nail) has low coercivity. You can align its domains easily, but they’ll just as easily fall back into random chaos. It’s like writing on a whiteboard—easy to make a mark, but just as easy to erase. This makes soft iron excellent for temporary magnets, or electromagnets, where you want the magnetism to switch on and off.
- Hard Steel (like a screwdriver bit, a steel paperclip, or a file) contains iron mixed with carbon and other elements. These impurities act like microscopic obstacles, pinning the magnetic domains in place once they’re aligned. It’s harder to magnetize steel, but once you do, its high coercivity means it resists demagnetization. It’s more like using a permanent marker—the mark is there to stay.
For our goal of creating a permanent magnet, hard steel is the far better choice.
Essential Materials and Tools
You don’t need a high-tech lab to get started. Most of these items are probably lying around your house or are easily found at a hardware store.
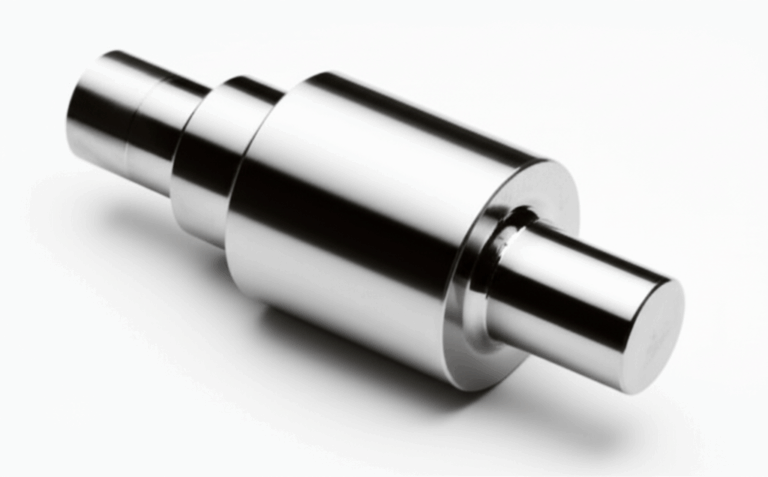
- Choosing Your Iron/Steel Object: A large steel nail, a screwdriver, a steel knitting needle, or a handful of steel paperclips are all excellent candidates.
- Power Source (for Electromagnet Method): A simple D-cell, C, or AA battery will work perfectly. For a stronger field, you can use a 6V or 9V battery. A DC power supply is also an option for more advanced experiments.
- Conductive Wire: About 3 feet (1 meter) of insulated copper wire (22-gauge is a good start) is ideal. The insulation is crucial to prevent short circuits.
- A Strong Existing Magnet: For the stroking method, you’ll need a powerful permanent magnet, like a neodymium magnet from a hardware store or an old speaker.
- Testing Materials: A compass and some small, non-magnetized paperclips are perfect for testing your results.
- Optional: A piece of sandpaper to scuff the ends of your wire for a better electrical connection.
Method 1: The Simple Stroking/Rubbing Technique (DIY Permanent Magnet)
This is the oldest and simplest method, first documented centuries ago. It’s a fantastic way to visualize the principle of aligning magnetic domains.
The Principle
You’ll use a strong permanent magnet to physically “comb” the magnetic domains in your steel object into alignment. Each stroke acts like a wave, encouraging the domains to flip and follow the direction of the strong magnet’s field.
Step-by-Step Guide
Testing Your Newly Magnetized Object
After dozens of strokes, bring the tip of your screwdriver near a small paperclip. If it picks it up, congratulations! You’ve successfully created a permanent magnet. The more paperclips it can hold in a chain, the stronger your magnet is.
Method 2: Electrical Induction with a Solenoid (Stronger Permanent Magnet)
Ready to step it up? Using electricity, we can create a much stronger and more uniform magnetic field, resulting in a more powerful permanent magnet. This is the principle behind industrial magnetizers.
The Principle
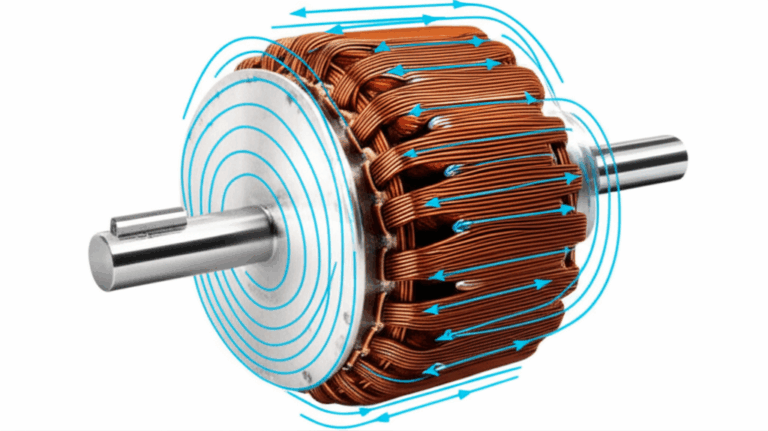
When you pass a direct current (DC) through a coil of wire, it generates a concentrated magnetic field down the center of the coil. This coiled-wire device is called a solenoid. By placing your steel object inside this solenoid, you expose it to an intense field that forces its magnetic domains into near-perfect alignment.
Step-by-Step Guide
Safety Precautions
- Heat: The wire can get quite hot, especially with a higher voltage battery. Avoid touching the coil while it’s connected and don’t leave it connected for more than a few minutes to prevent overheating or draining your battery.
- Short Circuits: Make sure the stripped ends of your wires are only touching the battery terminals. If they touch each other, you’ll create a short circuit.
- Handle with Care: Never use a household AC power outlet for this experiment. Stick to low-voltage DC sources like batteries.
Factors Influencing Magnet Strength and Permanence
You’ve made a magnet, but why is it only so strong? Or why might it lose its charge over time? Several factors are at play.
- Material Choice: As we discussed, hard steel is superior to soft iron for permanence. In industrial settings, engineers use highly specialized alloys. For instance, the performance of a high-speed motor is critically dependent on the magnetic properties of its rotor core lamination, which is made from optimized electrical steels.
- Magnetic Field Strength: A stronger magnetizing field (more strokes with a stronger magnet, or more wire turns/higher current in a solenoid) will align more domains, resulting in a stronger final product.
- Temperature: Heat is the enemy of magnetism. Every magnetic material has a Curie Temperature, a point at which it loses its ferromagnetic properties entirely. For iron, this is a very high 770°C (1418°F), but even moderate heat can provide enough energy for domains to start losing their alignment.
- Physical Shocks and Vibrations: Dropping your magnet or hitting it with a hammer can physically knock the domains out of alignment, weakening it over time. This is why sensitive magnetic components are often protected from mechanical shock.
How to Test Your New Permanent Magnet
Testing is half the fun! Here are two simple ways to check your work.
Simple Paperclip Test
This is a quick and satisfying test of strength. See how many paperclips your magnetized object can pick up in a chain. This gives you a rough but effective measure of its lifting force.
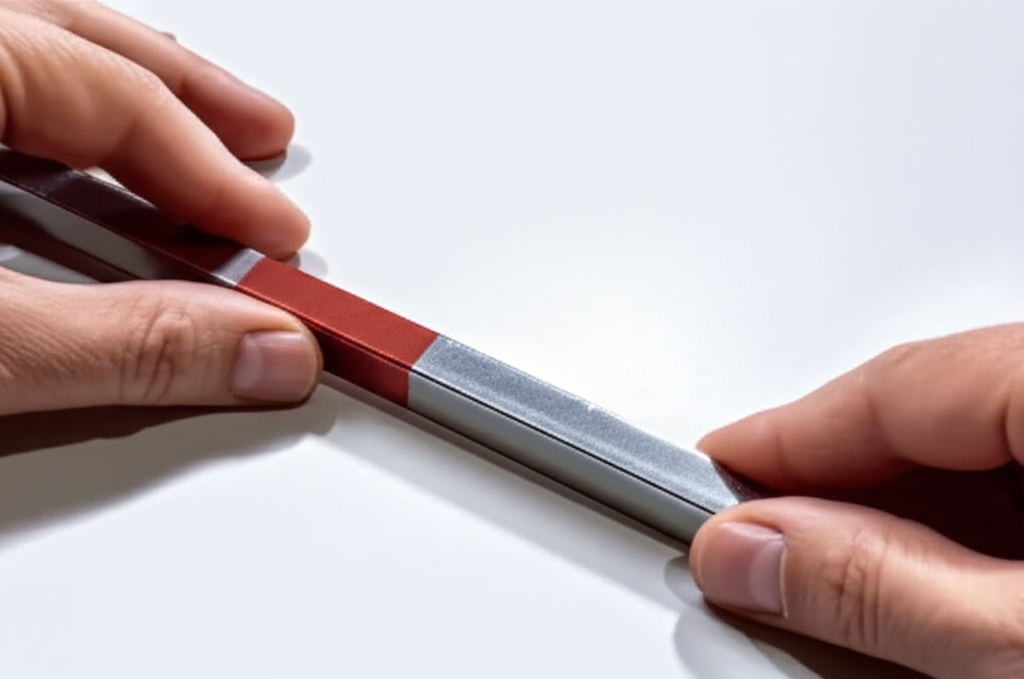
Compass Test (Identifying Poles)
Every magnet has a North and a South pole. To find them, lay your newly magnetized object on the table and bring a compass close to one end.
- If the North-seeking end of the compass needle points toward your object, that end of your object is its South pole.
- If the South-seeking end of the compass needle points toward your object, that end is its North pole.
Remember, opposites attract!
Common Pitfalls and Troubleshooting
“Why isn’t my iron becoming magnetic?”
- Wrong Material: You might be using soft iron, which won’t hold a magnetic charge well. Or you could be using a non-magnetic material like aluminum or certain types of stainless steel. Try a different object, like a high-carbon steel tool.
- Insufficient Force: For the stroking method, you may need more strokes or a stronger source magnet. For the electrical method, try adding more coils or using a fresh, higher-voltage battery.
- Wrong Technique: Ensure you are lifting the magnet away completely after each stroke. Dragging it back will erase the magnetism you just created.
“My magnet is getting weaker.”
This is called demagnetization. It’s caused by the factors we discussed: heat, physical shocks, or exposure to a strong opposing magnetic field. Store your magnets away from high temperatures and avoid dropping them.
Beyond Iron: Advanced Permanent Magnet Materials
While magnetizing steel is a great project, the industrial world relies on far more powerful and stable materials. The fundamental principles are the same—aligning domains—but the materials are engineered for maximum performance. Designing an efficient electric motor, for example, is a balancing act between the magnetic field generated by the windings in the stator core lamination and the permanent magnets in the rotor.
Here’s a look at how different materials stack up:
| Feature/Material Property | Soft Iron | Hard Steel | Alnico (Al-Ni-Co) | Neodymium (NdFeB) |
|---|---|---|---|---|
| Magnetic Behavior | Soft Magnetic | Hard Magnetic (Intermediate) | Hard Magnetic (High Performance) | Hard Magnetic (Super High Performance) |
| Retentivity (Memory) | Low | Medium | High | Very High |
| Coercivity (Resistance) | Very Low | Medium | High | Very High |
| DIY Magnetization | Easy (but temporary) | Moderate (and permanent) | Not Feasible | Not Feasible |
| Longevity/Permanence | Very Poor | Fair to Good | Excellent | Outstanding |
| Relative Cost | Very Low | Low | High | Very High |
- Alnico Magnets: Developed in the 1930s, these alloys of aluminum, nickel, and cobalt were the first major leap in permanent magnet technology. They are extremely resistant to high temperatures, making them valuable in certain industrial sensors and aerospace applications.
- Ferrite (Ceramic) Magnets: You know these as the dark gray magnets on your refrigerator. Made from iron oxide and barium or strontium carbonate, they are brittle but offer excellent corrosion resistance and are very cost-effective.
- Rare Earth Magnets (Neodymium, Samarium-Cobalt): These are the modern powerhouses. Neodymium magnets (NdFeB) are the strongest commercially available permanent magnets, enabling incredible miniaturization and power density in devices like hard drives, headphones, and high-performance electric vehicle motors.
The development of these advanced materials, particularly the specialized alloys used in things like silicon steel laminations, was a direct result of engineers needing materials with specific retentivity and coercivity to reduce energy loss and boost efficiency.
Real-World Applications of Permanent Magnets
From your simple, homemade magnet to a super-strong neodymium alloy, the principle of permanent magnetism is everywhere.
- Everyday Devices: They hold your fridge doors shut, spin the motors in your power tools and blenders, and help produce sound in speakers and headphones.
- Data Storage: The read/write heads in traditional hard disk drives use tiny, powerful magnets to alter the magnetic domains on the spinning platters, storing your data as a series of ones and zeros.
- Industrial Uses: In large-scale applications, permanent magnets are essential in electric generators, massive industrial motors, magnetic separators for recycling, and in medical equipment like MRI machines, which use incredibly powerful superconducting magnets to generate images of the human body.
Conclusion: Turning Theory into Practice
Converting a simple piece of iron or steel into a magnet is more than just a fun experiment. It’s a hands-on demonstration of the fundamental physics that powers our modern world. You’ve now seen how the orderly alignment of microscopic magnetic domains can create a tangible, powerful force.
You’ve learned that the choice of material is paramount—from the humble steel nail to the advanced alloys used in high-efficiency motors. You understand that permanence isn’t a given; it’s a property defined by a material’s ability to remember (retentivity) and its stubbornness to forget (coercivity).
By grasping these core concepts, you’re better equipped to understand the engineering choices behind the magnetic components in the technology all around you.
FAQ Section
Can any iron be made into a permanent magnet?
No. Only ferromagnetic materials like iron, nickel, and cobalt can be strongly magnetized. Furthermore, to make a permanent magnet, you need a “hard” magnetic material like high-carbon steel that has high coercivity to lock the magnetism in place. Pure, soft iron makes a poor permanent magnet.
How long does a homemade magnet last?
It depends on the material and how it’s treated. A magnet made from a hard steel object like a screwdriver can hold its charge for years if stored properly and not subjected to heat or physical shock. A magnet made from a soft iron nail might lose most of its magnetism in just a few hours or days.
What is the strongest way to magnetize iron?
The strongest and most effective method is electrical induction using a solenoid with a DC power source. This creates a powerful, uniform magnetic field that aligns the magnetic domains far more effectively than the stroking method. Industrial magnetizers use this same principle but with extremely powerful pulses of electricity.
Is it possible to make a super strong magnet at home?
You can make a surprisingly strong permanent magnet from hard steel, capable of lifting many paperclips. However, you cannot replicate the strength of commercial rare-earth magnets like neodymium at home. These materials are created through complex industrial processes like sintering and require incredibly powerful magnetic fields to be magnetized.
What’s the difference between an electromagnet and a permanent magnet?
A permanent magnet (like the one you made from steel) retains its magnetism after the external magnetizing force is removed. Its magnetic field is always “on.” An electromagnet is typically made with a soft iron core and only acts as a magnet when electricity is flowing through its coils. When you turn the power off, it loses almost all of its magnetism. This ability to switch on and off is its most useful feature.