How to Fix a Fan Motor: A Comprehensive DIY Troubleshooting & Repair Guide
Table of Contents
- Introduction: Why Your Fan Motor Isn’t Working (and How This Guide Helps)
- Safety First: Essential Precautions Before You Begin
- Diagnosing the Problem: Common Fan Motor Symptoms and Their Likely Causes
- A. Fan Hums But Doesn’t Spin
- B. Fan Not Spinning at All
- C. Fan Spins Slowly or Weakly
- D. Grinding, Squealing, or Loud Noises
- E. Overheating or Burning Smell
- F. Intermittent Operation
- Tools You’ll Need for Fan Motor Repair
- Step-by-Step Fan Motor Troubleshooting Guide
- A. Power Check
- B. External Inspection
- C. Disassembly
- D. Electrical Component Testing with a Multimeter
- Common Fan Motor Repair Solutions
- A. Replacing a Faulty Capacitor
- B. Lubricating or Replacing Motor Bearings
- C. Cleaning and De-dusting the Motor
- D. Checking and Repairing Wiring Connections
- E. Replacing a Blown Thermal Fuse
- F. Addressing Blade Imbalance
- G. Freeing a Seized Shaft
- H. DC Motor Specifics: Brushes, Commutator, and Armature Care
- When to Repair vs. Replace Your Fan Motor or the Entire Fan
- Preventative Maintenance to Extend Fan Motor Lifespan
- Conclusion: Get Your Fan Spinning Again
Introduction: Why Your Fan Motor Isn’t Working (and How This Guide Helps)
I’ve fixed more fans than I can count. Ceiling fans that wobble like a drunk flamingo. Box fans that hum like they’re trying to sing but can’t find the note. Pedestal fans that spin slowly and blow air about as strong as a sigh. If you’re here because your fan motor isn’t working you’re in the right place.
In my experience most fan motor problems fall into predictable buckets. Capacitors fail. Bearings dry up. Switches get flaky. Thermal fuses trip after the motor overheats. Sometimes dust and hair choke the motor until it can’t breathe. The good news is you can fix many of these issues at home with simple tools and a bit of patience. I’ll show you how to diagnose the problem first then walk you through the specific fixes that work.
I’ll cover AC fan motor repair for common household fans like ceiling, pedestal, oscillating, and exhaust fans. I’ll also touch on DC and universal motors you might find in portable fans or automotive blower motors. We’ll talk symptoms, causes, tools, testing with a digital multimeter, and repairs like capacitor replacement, bearing lubrication, wiring fixes, and thermal fuse replacement. I’ll share what I’ve learned the hard way so you don’t have to.
Safety First: Essential Precautions Before You Begin
Before I touch a single screw I slow down and set myself up to work safely. Electricity doesn’t forgive mistakes.
- Always unplug the fan. Don’t just switch it off. Unplug it.
- Wear safety glasses and work gloves. Bits of metal and dust go everywhere.
- Work in a well-lit area with a clear bench or table. Keep hardware in a tray or small cups.
- Discharge capacitors before testing or replacing them. Capacitors can hold a charge even after you unplug the fan.
- Use insulated tools when probing live circuits. Most tests happen with power off and the fan unplugged.
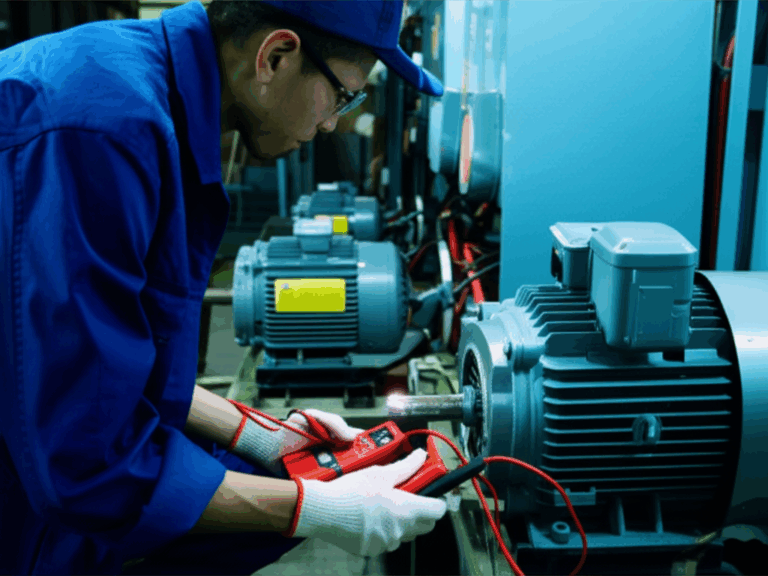
- If you’re not sure, stop and ask a pro. HVAC fan motor repair and industrial fan motor repair can involve higher voltages and more complex wiring.
I treat every repair as if someone else will use the fan later. That mindset keeps me careful and thorough.
Diagnosing the Problem: Common Fan Motor Symptoms and Their Likely Causes
Every fix starts with a solid diagnosis. I listen to the sound. I watch behavior. I sniff for hot electrical smells. Then I match the symptom to a shortlist of likely causes.
A. Fan Hums But Doesn’t Spin
I see this one all the time in AC induction motors and permanent split capacitor (PSC) motors on ceiling and pedestal fans.
Likely causes:
- Failed or weak capacitor
- Seized or sticky bearings
- Obstructed or imbalanced blades
- Motor seized up from rust or old grease
Keywords that matter: fan motor hums but won’t spin, capacitor replacement fan motor, lubricating fan motor bearings.
B. Fan Not Spinning at All
A dead fan doesn’t always mean a dead motor.
Likely causes:
- No power from the outlet or a tripped circuit breaker
- Blown fuse in the plug or a broken power cord
- Bad switch or control board
- Open motor winding or a blown thermal fuse
- Thermal overload protector tripped
Keywords: fan motor not working, how to test a fan motor, fan motor fuse blown, troubleshooting electric fan motor.
C. Fan Spins Slowly or Weakly
If the fan spins but acts lazy I think capacitor first then drag and dirt.
Likely causes:
- Weak capacitor or wrong capacitor values
- Worn or dry bearings
- Dirty windings and poor ventilation
- Voltage supply issues or high resistance in wiring
Keywords: fan motor spins slowly, fan motor speed control issues, fan motor efficiency improvement.
D. Grinding, Squealing, or Loud Noises
Noise tells you where to look.
Likely causes:
- Worn bearings or bushings
- Debris rubbing the rotor or fan blade
- Loose motor mounts or fan blade set screw
- Blade imbalance or bent fan blade
Keywords: fan motor makes grinding noise, fan motor noise reduction, fan motor vibration solution.
E. Overheating or Burning Smell
I take this very seriously. Heat kills motors.
Likely causes:
- Bearing friction or seized shaft
- Overloaded or stalled rotor
- Dust clogging vents and blocking airflow
- Shorted windings or insulation breakdown
- Wrong voltage supply or a failing control board
Keywords: fan motor overheating, burnt fan motor smell, fan motor thermal overload, fan motor insulation breakdown.
F. Intermittent Operation
Random starts and stops come from loose connections more often than magic.
Likely causes:
- Loose wiring inside the housing or at the terminal block
- Bad switch or speed control
- Failing capacitor opening under load
- Thermal fuse tripping from overheating then resetting after cool down
Keywords: intermittent operation, fan motor electrical problems, checking fan motor voltage.
Tools You’ll Need for Fan Motor Repair
I keep a simple kit ready for any fan motor repair job. You don’t need a fancy shop.
- Screwdrivers: Phillips and flat
- Pliers and needle-nose pliers
- Adjustable wrench
- Digital multimeter (DMM) with continuity and capacitance modes
- Continuity tester if your DMM doesn’t beep
- Capacitor tester or a DMM with capacitance
- Wire strippers and a basic soldering iron
- Electrical tape and heat-shrink tubing
- Light machine oil and grease for bearings
- Cleaning brush, compressed air, and a safe degreaser
- Bearing puller for stubborn shafts
- Safety glasses and work gloves
- Insulated tools if you must probe live circuits
These cover most DIY fan motor fixes from AC fan motor repair to DC motor troubleshooting.
Step-by-Step Fan Motor Troubleshooting Guide
Here’s the process I use on a pedestal fan, an oscillating table fan, an exhaust fan, or a ceiling fan. The logic stays the same. The housing changes but the motor principles don’t.
A. Power Check
- Test the outlet with another device. I’ve chased “motor problems” that turned out to be a dead outlet.
- Check the circuit breaker. Reset if tripped.
- Inspect the power cord for cuts, kinks, and burned plugs.
- Use your multimeter to perform a continuity test from the plug to the fan switch. If open, repair or replace the power cord.
If you find no voltage at the fan after the switch you likely have a bad switch or a broken wire.
B. External Inspection
- Clean the fan blades and grills first. Dust buildup causes airflow problems and overheating.
- Spin the blades by hand. They should move freely and coast a bit. If they stop quickly I suspect bearing issues.
- Look for loose hardware, a cracked blade, or a bent guard rubbing the blades.
- Check motor mounting brackets and alignment issues. Misalignment makes noise and vibration.
- For ceiling fans look for a wobbly fan. An imbalance can shake loose connections over time.
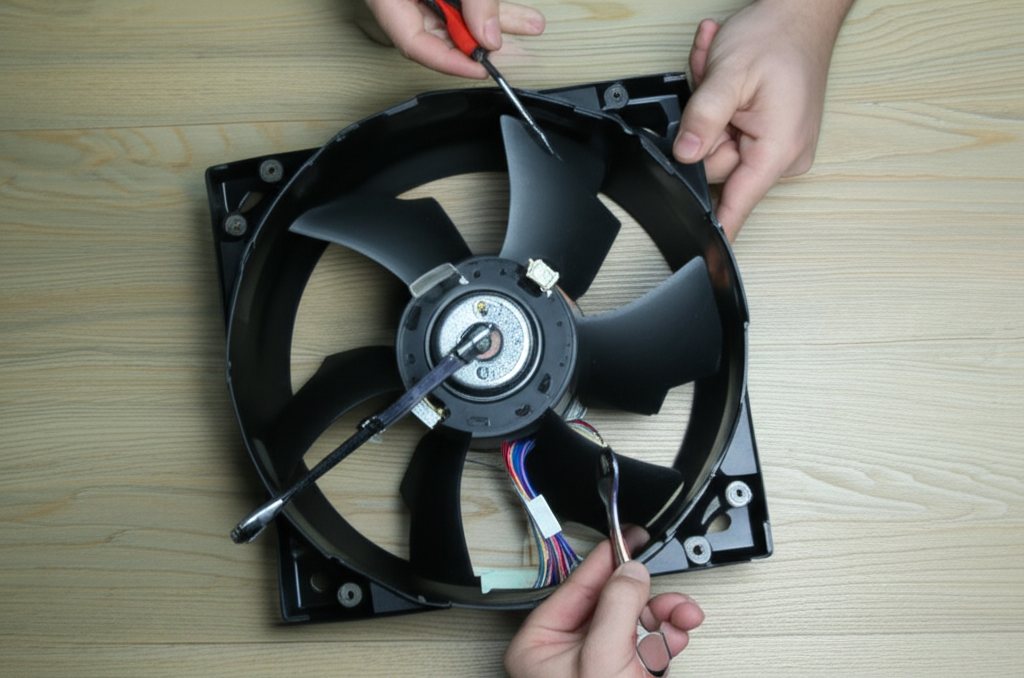
C. Disassembly
I take photos of every wire and connector before I pull anything apart. That habit saved me many times.
- Remove the guard, fan blade, and blade hub. Loosen set screws carefully.
- Disconnect and label wires at the terminal block or wiring harness.
- Pull the motor housing. Watch for hidden screws under stickers or rubber plugs.
- Separate the housing halves to access the stator, rotor, and bearings.
- For blower motors and squirrel cage fans remove the squirrel cage carefully. It bends easily.
Tip: Keep screws grouped by section. I use small cups with labels.
D. Electrical Component Testing with a Multimeter
This is where you shift from guesswork to data. Your DMM tells the truth.
1) Test the Power Cord
- Unplug the fan. Set your DMM to continuity.
- Probe from each blade of the plug to its end inside the fan. Wiggle the cord. If continuity cuts in and out the cord is bad.
2) Test the Switch and Speed Control
- Check continuity through the switch at each position. No continuity when it should be closed means the switch is bad.
- For variable speed controls or control boards look for burned spots or swollen components. Replace if suspect.
3) Test the Thermal Fuse or Thermal Overload Protector
- Many motors hide a thermal fuse under heat shrink near the windings. It should read near zero ohms.
- If open, find the cause of overheating before you replace it. Clogged vents and seized bearings are frequent culprits.
4) Test the Capacitor
- Discharge it first by bridging the leads with a resistor or by using an insulated screwdriver across the terminals while holding only the insulated handle.
- Compare the measured capacitance to the rating on the case. A weak or open capacitor is common in PSC motors and split-phase motors.
- Replace with the same microfarad value and an equal or higher voltage rating.
5) Test Motor Windings
- Measure resistance between winding leads. Look for expected ohms based on the service manual or typical ranges. Open circuit means a broken winding. Near zero ohms between different windings indicates a short.
- Check for a ground fault by measuring from a winding lead to the motor housing. You should see open circuit. Any continuity suggests insulation breakdown.
6) Fan Motor Current Draw Test
- After repairs and with the housing reassembled, use a clamp meter to measure current. Compare to the motor nameplate amperage. Excess current means friction or electrical faults remain.
If you understand the motor principle and how the stator and rotor interact diagnosis gets easier over time. If you want a refresher you can skim this clear summary of the motor principle and this primer on stator and rotor.
Common Fan Motor Repair Solutions
Here’s how I fix the issues I find most often on ceiling fans, oscillating fans, pedestal fans, exhaust fans, and blower motors.
A. Replacing a Faulty Capacitor
In my shop capacitor failure accounts for a big share of “hums but won’t spin” and “spins slowly” complaints. Typical ranges put it around 40 to 60 percent for AC induction fan motors.
Steps I follow:
- Identify the capacitor type and rating. PSC motors often use a run capacitor measured in microfarads. Some ceiling fans have dual capacitors for speed control.
- Discharge the capacitor safely.
- Take a photo of the wiring diagram or draw one. Label wires with tape.
- Remove the old unit and install the new one. Match microfarad value and meet or exceed voltage rating.
- Secure the capacitor so it can’t rattle around or rub a wire.
If the fan now jumps to life and reaches full speed you found the fix. If it still needs a push to start I look at bearings next.
Keywords woven in: fan motor capacitor test, capacitor replacement fan motor, fan motor capacitor values.
B. Lubricating or Replacing Motor Bearings
A dry bearing makes the rotor drag. You’ll feel it when you spin the blade by hand. I also listen for squealing or grinding noises.
- Identify bearing type. Many small fans use oil-impregnated sleeve bearings. Others use sealed ball bearings.
- For sleeve bearings add a few drops of light machine oil at the lubrication points. Spin the shaft to work the oil in. Don’t overdo it.
- For ball bearings that feel rough I replace them. Use a bearing puller if the hub is stubborn.
- While you’re in there inspect the shaft for scoring. Clean it with fine emery cloth if needed.
Lubrication reduces heat, extends lifespan, and boosts efficiency. It also cuts noise. Keywords: fan motor bearing replacement, fan motor grease points, fan motor bearing types.
C. Cleaning and De-dusting the Motor
Dust is the silent killer. It blocks airflow. It insulates the windings. It traps heat until the thermal fuse cries mercy.
- Blow out the motor housing with compressed air. Wear a mask and eye protection.
- Brush off windings and the stator slots gently. Don’t damage the enamel insulation.
- Clean the fan blade and squirrel cage fins completely. Pay attention to the blade root where gunk hides.
- Open ventilation slots and cooling vents. A clear path keeps the motor cool.
This simple step often fixes overheating and intermittent thermal trips. Keywords: cleaning fan motor parts, fan motor ventilation issues, fan motor airflow problems.
D. Checking and Repairing Wiring Connections
Loose wires make heat and cause intermittent operation. I check every connection I can see.
- Tug gently on spade connectors and terminal block screws. Tighten any loose ones.
- Look for heat discoloration on wires. Replace any brittle or charred insulation. Use proper wire gauge.
- Solder broken connections on control boards if you see a cracked joint. Reflow with a small soldering iron.
- Replace a damaged power cord entirely. Don’t patch it with tape.
Keywords: fan motor electrical problems, replacing fan motor switch, fan motor power cord repair, wiring diagram fan motor.
E. Replacing a Blown Thermal Fuse
Thermal fuses protect the windings. When they open they often point to another problem like blocked vents or seized bearings.
- Find the thermal fuse under heat shrink near the coil. You might see “TF” markings on some assemblies.
- Confirm it’s open with your DMM continuity test.
- Match the temperature and current rating for replacement. Don’t overspec the temperature rating because you’ll defeat the safety.
- Rebuild the heat shrink and route the fuse away from sharp edges.
Fix the root cause of the heating or you’ll be back here again. Keywords: thermal fuse location, thermal overload protector, fan motor thermal overload.
F. Addressing Blade Imbalance
A wobbly fan shakes itself and everything around it. I fix blade issues before they tear up bearings.
- Clean all blades first. Dirt causes imbalance.
- Inspect for cracks, bends, or loose blade irons on ceiling fans. Tighten mounting brackets.
- Use a balancing kit or add a small piece of tape to the lightest blade until wobble stops.
- Set the fan on a level surface during reassembly. True the blade hub on the shaft.
Keywords: fan blade imbalance fix, fixing a wobbly fan, fan motor mounting repair, fan motor vibration solution.
G. Freeing a Seized Shaft
A seized shaft stops the show. I’ve brought a few back from the brink.
- Apply a drop or two of penetrating oil at each end of the shaft where it meets the bearings.
- Gently twist the shaft with pliers padded by tape. Don’t crush it.
- Once it moves, flush with fresh light oil and spin until it turns freely.
- If it binds again the bearing is done. Replace the bearing or the motor.
Keywords: motor seized up fan, fan motor shaft lubrication points, fan motor mounting brackets.
H. DC Motor Specifics: Brushes, Commutator, and Armature Care
Portable fans and automotive blower motors often use DC or universal motors with brushes.
- Inspect carbon brushes for length. If they’re too short replace them. Follow a brush replacement guide specific to your motor if you can find one.
- Clean the commutator with isopropyl alcohol and a soft cloth. If it’s heavily grooved you can dress it lightly with very fine sandpaper then clean thoroughly.
- Check the armature windings for continuity and shorts. Rotate the shaft while testing adjacent bars on the commutator.
- Look for worn brush springs. Weak springs cause arcing and low torque.
Keywords: fan motor brushes, brush replacement guide, commutator cleaning, armature repair.
A note on construction and why it matters: fans rely on the magnetic circuit inside the stator and rotor. Those parts use thin electrical steel sheets called laminations. They reduce eddy current losses and heat. If you ever dive into deep motor rebuilds you’ll bump into topics like stator core lamination, rotor core lamination, and broader motor core laminations. You usually won’t change these in a home repair but understanding them helps explain why motors run cool and efficient when they’re clean and properly aligned.
When to Repair vs. Replace Your Fan Motor or the Entire Fan
I love a good repair. I also know when to call it. Here’s how I decide.
Repair makes sense when:
- The fix is simple like a capacitor, switch, thermal fuse, or power cord.
- Bearings need lubrication or a straightforward swap.
- The fan is high quality or special sized. Industrial or HVAC units often deserve the effort.
- You have a service manual or a clear wiring diagram and spare parts are available.
Replacement makes more sense when:
- The windings are open, shorted, or heavily burned.
- The control board costs more than a new fan.
- The motor requires rewinding and local shops quote more than the price of replacement.
- The fan is a cheap model with brittle plastic housing and cracked mounts. You can throw good time after bad on those.
Costs I typically see:
- Capacitor: $5 to $20
- Thermal fuse: $3 to $10
- Switch: $5 to $15
- Bearings: $8 to $30
- New entry-level fan: $20 to $80
- Pro repair: $75 to $200 or more depending on the fan and your area
You can save 50 to 90 percent with DIY if the issue is common. I consider age, overall condition, spare parts availability, and my time. I also weigh the environmental angle. Repairing one fan can keep one to three kilograms of e-waste out of the landfill.
Preventative Maintenance to Extend Fan Motor Lifespan
A few habits add years to any fan motor.
- Clean the blades, grills, and housing every few months. Dust blocks airflow and overheats windings.
- Lubricate sleeve bearings once or twice a year if your model allows it. Don’t over oil.
- Keep ventilation slots clear. Don’t push the fan against curtains or a wall.
- Avoid overload. Don’t hang heavy decorations from a ceiling fan or run a clogged exhaust fan. It drags the motor and cooks the thermal fuse.
- Check screws and mounting brackets annually. Tight fans run quiet.
- For HVAC blower motors inspect the squirrel cage for packed dust and balance issues. Keep filters clean so the motor sees proper airflow.
With simple maintenance many consumer-grade fan motors last five to ten years. Good industrial fans go ten to twenty years or more. Regular cleaning and lubrication can extend life by 25 to 50 percent in my experience.
Practical Walkthroughs: Real-World Fixes I’ve Done
I learn best by doing. Maybe you do too. Here are a few quick stories that echo the steps above.
- Pedestal fan hums and won’t start unless I spin the blade by hand
- Diagnosis: Capacitor tested at half the rated microfarads. Bearings felt ok.
- Fix: Replaced the capacitor with same µF value and higher voltage rating. Cleaned dust from the stator and rotor window. Fan sprang to life at full speed.
- Ceiling fan wobbles badly at medium speed and makes a ticking noise
- Diagnosis: Blade irons slightly bent, two blades dirty and heavier than the others. One loose mounting screw.
- Fix: Cleaned all blades. Tightened hardware. Used a small balancing weight on the lightest blade. Ticking disappeared and wobble stopped.
- Box fan gets hot and shuts off after ten minutes
- Diagnosis: Thermal overload protector tripping due to clogged vents and gummy sleeve bearings.
- Fix: Deep clean. A few drops of oil at each bearing. Current draw dropped and the fan ran cool.
- Automotive blower motor squeals and runs weakly
- Diagnosis: Worn brushes. Dirty commutator.
- Fix: Replaced brushes. Cleaned commutator. Verified armature continuity. Strong airflow returned.
Fan Motor Types and How That Affects Your Fix
Not every fan motor behaves the same. Knowing the motor type helps you choose the right repair.
- Shaded-pole motor
- Simple design. No external capacitor. Common in small desk or exhaust fans.
- If it hums and stalls look for seized bearings or a shorted winding.
- Permanent split capacitor (PSC) motor
- Very common in ceiling fans, pedestal fans, and HVAC blowers.
- Capacitor failure causes slow spin or failure to start. Replace the capacitor first.
- Split-phase motor
- Uses a start winding and often a centrifugal switch. Some older fans use this.
- If it won’t start check the switch and the capacitor if present.
- Universal or DC motor
- Found in portable and automotive fans. Uses brushes and a commutator.
- Brush wear and commutator grime cause weak torque and sparking.
- Direct drive vs. belt drive
- Most home fans are direct drive. Belt drive shows up in some industrial setups.
- Belt tension and pulley alignment matter on belt drives.
If you ever dig deeper into motor design you’ll see how the steel laminations shape efficiency and heat. The quality of the core lamination stacks and the way the magnetic flux flows through the stator and rotor matter a lot. Home repairs won’t change laminations yet understanding them explains why clean, cool motors last longer.
Advanced Diagnostics: When You Want to Be Thorough
Sometimes I go a step beyond the basics.
- Resistance check across multiple speeds
- On multi-speed fans measure the winding resistance at each tap. Higher resistance usually means lower speed. If one tap reads open that speed won’t work.
- Insulation testing
- If I suspect insulation breakdown I use a megohmmeter to test winding insulation to ground. This is optional for DIY but helpful on older motors that smell burnt.
- Visual inspection for insulation breakdown
- Look for brown and brittle enamel on the windings. Strong burnt smell often means shorted turns. I replace the motor instead of attempting a rewind on low-cost fans.
- Control board clues
- Scorched resistors or bulging electrolytic capacitors on a control board give the game away. Replace the board or rebuild if you’re skilled with electronics.
- Squirrel cage fan checks
- Balance matters. Clean each vane evenly. Spin the cage and listen for rhythmic scraping which suggests an alignment issue.
Sourcing Parts and Reading Specifications
When I shop for parts I never guess values.
- Capacitors
- Match microfarads exactly. Voltage rating can be higher but not lower.
- Choose reputable brands. Cheap caps fail early.
- Thermal fuses
- Match temperature and current rating. Place it back where the factory put it so it senses heat correctly.
- Bearings
- Use the bearing number etched on the shield. If you can’t find it measure inner diameter, outer diameter, and width.
- Switches and cords
- Match the amperage and voltage ratings. Don’t underspec.
- Service manuals
- If you can find a fan motor service manual or an exploded diagram you’ll save time. Wiring diagrams help you avoid crossed wires.
- Repair kits
- Some popular models have fan motor repair kits with common wear items. Handy for ceiling fans and HVAC blowers.
Troubleshooting Quick Reference by Symptom
- Fan hums but won’t spin
- Replace capacitor. Check bearings. Clear obstructions.
- Fan not spinning at all
- Check outlet, cord, switch, thermal fuse. Test windings for open circuit.
- Fan spins slowly
- Check capacitor values. Oil bearings. Clean motor and vents.
- Grinding or squealing noise
- Inspect bearings. Tighten mounts. Remove debris.
- Overheating or burning smell
- Clean and improve ventilation. Oil or replace bearings. Check for short circuits and high current draw.
- Intermittent operation
- Tighten wiring. Replace switch or failing capacitor. Check thermal overload behavior.
How Long Repairs Take and What to Expect
Most DIY fan motor repairs take 30 minutes to two hours. Capacitors and switches go fast. Bearing replacements and deep cleans take longer. Rewinding a motor usually isn’t worth it for household fans because the labor cost often exceeds a new fan. For industrial fans and HVAC blower motors I consider the value and the duty cycle before I decide.
A Note on Testing and Understanding What You See
- Continuity test
- Beep equals closed. Silence equals open. Simple but powerful.
- Resistance check
- Windings show a few ohms to tens of ohms depending on size. Compare across similar windings and look for an outlier.
- Short circuit vs. open circuit
- Near zero ohms between separate windings is a short. Infinite ohms within a winding is open.
- Ground fault
- Any continuity from a winding lead to the housing is a red flag. Stop and reassess.
You’ll get faster and more confident as you test more motors.
Ceiling Fans, Exhaust Fans, and HVAC Blowers: Special Notes
- Ceiling fan motor repair
- Use a proper balancing kit. Verify the capacitor values for each speed if the fan uses multiple capacitors. Secure the canopy and mounting bracket.
- Exhaust fan motor troubleshooting
- Grease and dust love kitchen exhaust fans. Clean thoroughly. Look for shaded-pole motors with sleeve bearings and add oil.
- HVAC fan motor repair guide
- Turn off the breaker at the panel. Label every wire on the control board. Many are PSC motors with a single run capacitor. Check the blower wheel for packed dust which throws balance off.
- Automotive fan motor repair
- Power comes from the vehicle harness. Test with a fused jumper. Replace worn brushes and clean the commutator.
Why Your Fix Works: A Quick Peek Under the Hood
When a capacitor fails a PSC motor loses the phase shift that gives it starting torque. The motor hums because the stator energizes yet the rotor won’t break free. A fresh capacitor restores the phase split and torque. When bearings wear friction spikes and the motor draws more current. Heat builds. Insulation degrades. Thermal fuses open to save the windings. Cleaning, lubrication, and proper airflow keep losses low so the laminations and windings run cool.
If the engineering side fascinates you you can learn more about how steel laminations shape performance in motors. These resources explain what’s inside the magnetic circuit and why it matters:
- A quick overview of stator core lamination
- A look at rotor core lamination
- How the full stack of motor core laminations improves efficiency
Conclusion: Get Your Fan Spinning Again
If your fan motor hums but won’t spin start with the capacitor. If it squeals or grinds focus on lubricating or replacing the bearings. If it overheats clean it thoroughly and clear the vents. If it’s dead test the power cord, the switch, and the thermal fuse then check the windings. Work step by step with a multimeter and your eyes open. Take photos before you disconnect wires. Match parts by value and rating. Don’t rush.
I fix fans because it saves money, reduces e-waste, and just feels good. Most repairs are simple once you know where to look. You’ve got this. Unplug the fan, grab your tools, and bring that motor back to life.