How to Fix a Seized Motor: Your Step-by-Step Engine Unseizing Guide
Table of Contents
- What I Mean by a “Seized Engine” and Why It Happens
- Is Your Engine Truly Seized, or Is It Something Else? (Diagnosis)
- Step 1: Rule Out Peripheral Issues
- Step 2: Try to Turn the Engine Manually
- Step 3: Visual Checks That Save Time and Money
- Tools and Materials I Keep on Hand for Unseizing a Motor
- Step-by-Step: How I Unseize an Engine Safely
- Step 1: Prepare the Engine
- Step 2: Soak the Cylinders With Penetrating Fluid
- Step 3: Work the Crank Gently and Patiently
- Step 4: What I Do When It’s Really Stubborn
- Step 5: After It Breaks Free
- Post-Unseizure Checks and First Start Procedure
- Compression Test and Basic Inspections
- First Start and Break-In Precautions
- When I Call a Professional or Recommend Replacement
- Preventing Engine Seizure: What Actually Works
- FAQs About Seized Motors
- Quick Note if You Meant an Electric Motor (Not a Gas or Diesel Engine)
What I Mean by a “Seized Engine” and Why It Happens
When a motor seizes, the crankshaft will not turn. Sometimes it will not even budge. Other times it feels painfully stiff. In practice I see a few big buckets of causes. Knowing which bucket you are in saves time and parts.
- Lack of lubrication: This is the classic “ran low on oil” or “oil pump failed” scenario. Main bearings, rod bearings, and piston skirts can overheat and weld themselves to the crankshaft or cylinder walls. This is the most common cause I see.
- Overheating: Engines that overheat can scuff pistons and rings. They can warp a cylinder head, cook oil, and gall bearings.
- Water ingress and hydrostatic lock: Water or coolant fills a cylinder. Liquids do not compress. You hit the starter, the piston stops dead against a solid column of fluid. Sometimes the engine locks only because of the fluid. Other times the connecting rod bends or the crank twists and you have real damage.
- Rust and corrosion after long storage: The piston rings rust to the cylinder walls. The cylinder walls pit. The crank bearings might corrode. I see this a lot with small engines that sit, marine engines, or cars that sleep in damp barns.
- Mechanical failure: A broken connecting rod, a seized camshaft, a timing chain failure that jammed things, a snapped timing belt on an interference engine with bent valves. Parts break and jam the works.
- Peripheral or accessory seizures: The engine seems seized because a bolted-on accessory locked up. I have found stuck AC compressors, alternators, water pumps, or a power steering pump that locked the belt. The belt grabs the crank pulley and you think the engine is stuck.
If you only remember one thing, remember this. “Seized” describes a symptom. It does not tell you the cause. That is why smart diagnosis comes first.
Is Your Engine Truly Seized, or Is It Something Else? (Diagnosis)
Before you pour in fluids and grab a breaker bar, follow a simple path. It saves time. It saves threads and knuckles too.
Step 1: Rule Out Peripheral Issues
I start with the easy checks.
- Battery and cables: Verify battery charge. Clean the terminals. Check grounds. A weak battery will not spin a stiff engine. You need all the amps you can get.
- Transmission position: Park for an automatic. Neutral for a manual. I set the parking brake and chock the wheels before I do a single turn.
- Starter motor behavior: Do you hear a solenoid click and nothing else. No click at all. A harsh clunk. You might have a bad starter or poor connections. If the starter gear is jammed in the flywheel teeth, I gently rock the crank by hand and free the gear.
- Accessory belts: This step has saved me many times. Remove the serpentine belt or V-belts. Try to turn the crankshaft by hand. If the engine turns without the belt, you likely have a seized alternator, AC compressor, water pump, or power steering pump. Spin each pulley by hand. A locked accessory can mimic a seized engine.
At this point if the crank still does not want to move, I move on.
Step 2: Try to Turn the Engine Manually
- Find the crankshaft pulley bolt or an access point at the flywheel or flexplate. On most engines I fit a deep socket and a long breaker bar on the crank bolt and turn clockwise as viewed from the front.
- I apply steady pressure. No bouncing. No jumping on the bar. The goal is to feel what the engine tells you. A gentle back-and-forth rocking motion can help. If you move it a degree, you are winning.
- If the flywheel is exposed and safe to access, I may use a pry bar on the ring gear teeth with great care. A small controlled motion beats a big uncontrolled shove.
What I learn from feel:
- Completely locked with a hard stop: Think fluid in the cylinder, a dropped valve, debris in a cylinder, or a broken part jammed in the works.
- Gradually stiff with some spring: Think rust on cylinder walls or dry rings stuck in their grooves.
- Tight at one point of rotation: Think localized piston scuffing or a rod bearing that started to seize.
Step 3: Visual Checks That Save Time and Money
- Oil level and condition: Pull the dipstick. Low oil points at lubrication failure. Milky oil points at coolant. Glitter points at metal. I drain the oil if I suspect damage and I look for bearing material in the pan.
- Coolant and leaks: Is the coolant low. Are there obvious external leaks. White crust around hose ends. A failed head gasket can leak coolant into a cylinder and create hydrostatic lock.
- Spark plug pull and peek: I remove all spark plugs on a gasoline engine. On a diesel I remove glow plugs or injectors. This relieves compression and lets me check for fluid in the cylinders. If I see water, fuel, or coolant mist or puddles, I know I have hydrostatic lock. If the top of a piston looks rusty, I know rust seized rings to the cylinder walls.
- Borescope: If I have one I look at the cylinder walls. Scoring lines. Rust. Pitted bores. Shine matters.
These steps confirm if the engine is truly seized. They also guide the unseizing method.
Tools and Materials I Keep on Hand for Unseizing a Motor
The right tools turn a fight into a plan.
- Breaker bar and quality sockets sized for the crank bolt and flywheel bolts
- Penetrating oil: PB Blaster, Liquid Wrench, Kroil, or a 50/50 ATF and acetone mix
- Marvel Mystery Oil as an optional soak fluid
- Spark plug socket, glow plug tools for diesels
- Impact wrench for stubborn bolts only, not to force a stuck crank
- Pry bar for careful flywheel leverage
- Turkey baster or syringe to measure and inject fluids into cylinders
- Rags, shop towels, and a drain pan
- Eye protection and gloves
- Heat gun for controlled warming around a stuck cylinder
- Wooden block or hardwood dowel and a light hammer for gentle taps, used only when the head is off
- Borescope if available
- Torque wrench for reassembly
- Fresh engine oil and a new filter for the first oil change
I also keep a fire extinguisher handy. Heat and penetrants do not mix well with fuel. Safety first.
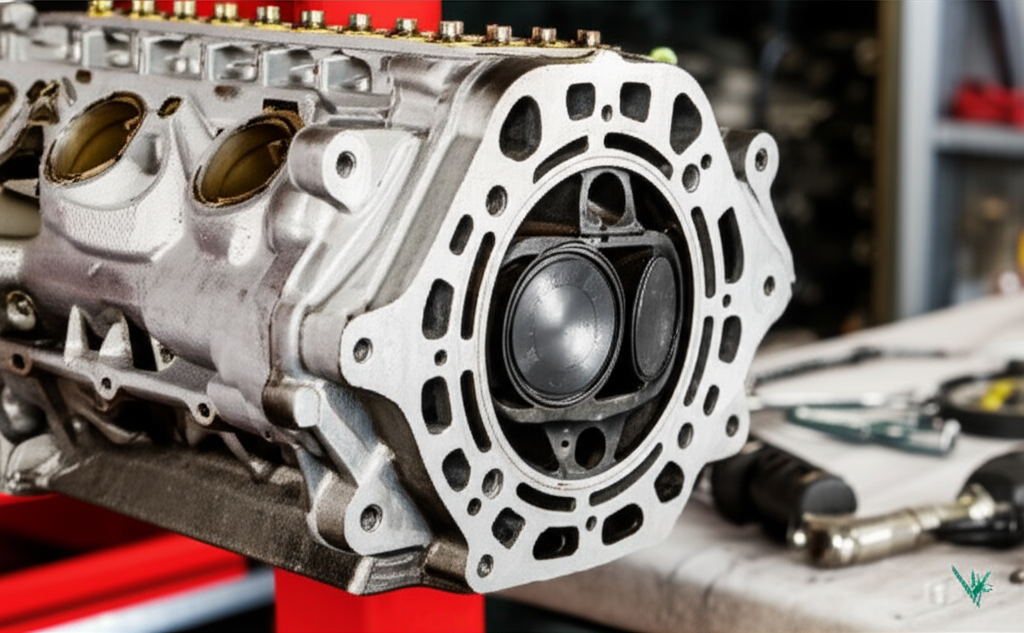
Step-by-Step: How I Unseize an Engine Safely
This is the workflow I reach for whether I am freeing a car engine, a motorcycle engine, a lawnmower, a generator, or a marine engine. The parts change scale. The process stays the same.
Step 1: Prepare the Engine
- Disconnect the battery. I want zero sparks.
- Remove all spark plugs on gasoline engines. Remove glow plugs or injectors on diesels. The goal is to relieve compression and to give me a path to add penetrants into the cylinders.
- Label plug wires or coil connectors. I like to take a quick photo so nothing gets mixed up later.
- If the plugs fight me, I add a drop of penetrant at the base and let it sit. Forcing a stuck plug in an aluminum head can wreck threads.
Step 2: Soak the Cylinders With Penetrating Fluid
- I pour 1 to 2 ounces of penetrating oil into each cylinder. The ATF and acetone mix works very well on rust. Marvel Mystery Oil can help rings loosen up. PB Blaster and Kroil creep into tight spots. There is no single magic potion. Use a quality penetrant. Avoid overfilling. You only need a small puddle on the piston top.
- If the crank will move a degree or two, I stop with the pistons at staggered heights. The soak reaches more cylinder wall area that way.
- I let the engine soak 24 to 48 hours. I reapply daily if needed. I have left engines soaking for a week when rust was obvious. Patience beats broken parts.
Step 3: Work the Crank Gently and Patiently
- After the soak, I put a breaker bar on the crank bolt. I apply slow pressure clockwise. If it resists, I rock it back and forth. Sometimes it will give a millimeter then stop. That is progress. I go slow and let the penetrant do its work.
- I never try to free a stuck engine by hammering on the starter. The starter is a blunt instrument and you can snap something you cannot afford to replace.
- If I feel nothing after a careful attempt, I let it soak longer.
A few tips that matter:
- Do not use excessive force on the crank bolt. You can strip threads or snap the bolt inside the crankshaft. That turns a hard day into a nightmare.
- I avoid impact forces on the crank. Steady torque and patience work best.
Step 4: What I Do When It’s Really Stubborn
Not every engine gives up without a fight. Here are the tougher cases and what I do.
- Hydrostatic lock fix: If a cylinder pukes coolant or fuel, I finish clearing all fluid with the plugs out. I crank the engine by hand then with the starter to push any remaining liquid out of the spark plug holes. I keep rags over the holes to catch spray. I then find and fix the cause. Could be a failed head gasket, a cracked head, a leaking injector, or a flooded carburetor on a small engine. I never put the plugs back until I see dry vapor and no liquid.
- Heat to help expansion: I use a heat gun around the stuck cylinder. Moderate heat can expand the block and loosen rust grip on the rings. I never use an open flame near fuel lines or plastic parts.
- Wooden block and tap: Only with the cylinder head removed and the engine on a bench. I’ve placed a hardwood block on a piston crown and tapped lightly to nudge a rusted ring free. I do not smack the piston. Control and finesse matter. This is a last resort in-car because access is limited.
- Flywheel leverage: With the transmission removed or an inspection port open, I have gently walked the ring gear teeth with a pry bar. Small moves. No prying against thin castings.
- Lower-end inspection: If lack of oil caused the lock, I may drop the oil pan. I look at rod bearings and main bearings. Blue discoloration or melted bearing material tells the story. Sometimes loosening a rod cap on the tight journal lets me turn the crank for diagnosis. Repair requires new bearings at a minimum. Often it points toward a full rebuild.
- Valvetrain checks: If the timing belt snapped on an interference engine, valves can bend and jam a piston. I will remove the cylinder head for inspection. A timing chain failure can do similar harm. Repair means valves, guides, possibly a head, and sometimes pistons.
- Accessory seizure: If the engine frees up with the belt off, I replace the seized AC compressor, alternator, water pump, or power steering pump. You fix the accessory then you check the engine for damage in case the belt smoked and heated the crank pulley excessively.
Step 5: After It Breaks Free
Once the crank turns, I keep going until it spins smoothly by hand.
- I rotate the engine through multiple full revolutions. I listen and feel for tight spots. I reapply a light amount of penetrant if needed.
- With the spark plugs still out, I lay rags over the holes and crank the engine by hand to eject the soak fluid. Then I use the starter for a few seconds to clear the cylinders. No plugs. No fuel. No spark.
- I change the engine oil and filter right away. Penetrating fluids can thin the oil. I want fresh oil to protect the bearings and the camshaft.
- I add a few drops of clean engine oil to each cylinder to lubricate the rings before the first start.
Post-Unseizure Checks and First Start Procedure
Here is the part that separates a freed engine from a safe engine. A motor can spin and still be hurt inside. I check the basics before I fire it up.
Compression Test and Basic Inspections
- Compression test: I check every cylinder. Wide variation points at ring or valve trouble. Low across the board can be worn rings or a timing issue. A leak-down test gives more detail if you have the tool.
- Oil pressure: I verify the oil pressure light goes out while cranking. If you have a gauge, watch it. No oil pressure means stop and investigate.
- Coolant integrity: I check for leaks. I verify the cooling system holds pressure. I do not want coolant flooding a cylinder again.
- Spark plug inspection: I install new plugs if the old ones are fouled or rusted. On diesels I reinstall glow plugs or injectors with new seals.
- Fuel and ignition system checks: If the engine sat for a long time, I inspect fuel for varnish. I replace a clogged fuel filter. I confirm spark on a gas engine. I tidy ignition wires and connections.
First Start and Break-In Precautions
- First spin-up: I leave the plugs out and spin with the starter for 10 to 15 seconds to build oil pressure. Then I install plugs and start the engine.
- First idle: I let it idle gently. I listen for knocks, clanks, and scraping. A rod knock or main bearing rumble tells me the engine needs more than a soak and a prayer.
- Monitoring: I watch oil pressure. I watch coolant temperature. I look for leaks. I smell for fuel and coolant. I do not rev a freshly freed engine.
- Short drive and recheck: If it sounds healthy, I take a short drive, bring it back, and recheck oil level, coolant level, and for any drips. I cut the oil filter open if I suspect metal. Glitter means trouble and a possible rebuild.
When I Call a Professional or Recommend Replacement
I love a good save, yet I do not kid myself. Some engines need a teardown. Some need a rebuild. Some need a replacement.
- The crank will not budge after extended soaking and careful attempts. Time to strip and inspect.
- I hear grinding or clanking when I try to turn it. That points at broken parts inside.
- The compression test shows one or more dead holes and leak-down confirms bent valves or cracked rings.
- The oil pan is full of bearing material. Main bearing inspection shows heat damage. You likely need an engine rebuild after seizure.
- Timing belt snapped on an interference engine or timing chain failure caused valve contact. Bent valves will not heal with oil. The head needs repair.
- Hydrolock bent a connecting rod. The engine may run rough and vibrate. The fix is mechanical and not just a cleaning.
- The cost to rebuild or repair outweighs the vehicle’s value. A used engine or engine swap can be the practical choice.
I lean on professional machine shops for cylinder bore rust removal, cylinder honing, cleaning cylinder walls on a seized engine, crankshaft grinding, and precision measurements. A professional engine unseizing service or a full rebuild may look expensive, yet it can be cheaper than chasing gremlins after a half-fix.
Preventing Engine Seizure: What Actually Works
You can prevent most seized engine stories with simple habits.
- Regular oil changes with the right viscosity and quality. I do not stretch intervals. Oil is cheaper than engine block repair after a seize.
- Keep the cooling system healthy. Coolant flushes on schedule. Good hoses. A clean radiator. Overheating seized engine repair often starts as ignored maintenance.
- Fix leaks right away. Low oil or low coolant turn small drips into big bills.
- Storage matters:
- For long-term storage fog the cylinders with oil and turn the engine by hand to distribute it.
- Stabilize fuel. Old gasoline turns to varnish and gums rings and valves.
- Keep intake and exhaust sealed so moisture cannot condense inside cylinders.
- Use a block heater in freezing climates for easier starts and better lubrication.
- Listen to your engine. Knocks, ticks, and rising temperatures are the engine’s way of waving a red flag.
- Avoid deep water crossings. Engine seized from water happens faster than you think. Water does not compress. Hydrolock happens in a heartbeat.
- Turn engines that sit. A lawnmower, generator, or motorcycle that sleeps all winter will thank you if you spin it once a month. Freeing a seized small engine is much easier when you prevent rust in the first place.
- Maintain belts and accessories. A seized alternator, AC compressor, water pump, or power steering pump can mimic an engine seizure and can snap belts at the worst time.
FAQs About Seized Motors
Q: Can a fully seized engine be saved?
- A: Sometimes. If rust and light lubrication loss caused the lock, I have freed many with patience and penetrant. If bearings welded to the crank or a rod let go, you need a rebuild or replacement.
Q: How long should penetrating oil sit in a cylinder?
- A: I give it 24 to 48 hours. I reapply daily if needed. I have waited up to a week on heavy rust. Sooner can work on minor cases. Time and patience pay off.
Q: What happens if you try to start a seized engine?
- A: You can break the starter. You can snap a ring or a rod. You can make a fixable problem worse. I never “bump” a seized motor with the starter. I work it free by hand first.
Q: What is the best fluid to unseize an engine?
- A: I rotate between PB Blaster, Kroil, Liquid Wrench, Marvel Mystery Oil, and an ATF and acetone mix. The ATF mix penetrates rust well. No single fluid works every time. The method matters more than the label.
Q: Is it expensive to fix a seized engine?
- A: It depends on the cause. A DIY seized engine repair with penetrants can cost very little. An engine rebuild after seizure can get expensive fast. I weigh repair vs used engine options and the value of the vehicle.
Q: What causes an engine to seize while driving?
- A: Usually loss of oil pressure or severe overheating. A broken timing belt or chain on an interference engine can also create a rapid lock due to valve and piston contact.
Q: How do I know if my engine is truly seized?
- A: Pull the plugs and try to turn the crankshaft with a breaker bar. If it will not move at all and the accessories are free, you likely have a seized engine. A borescope and fluid checks confirm the picture.
Q: Can I start a seized engine after it frees up?
- A: Yes after you clear all fluid from the cylinders, change the oil and filter, and verify compression. I build oil pressure with plugs out first. Then I start and monitor closely.
Q: What about diesel engines vs gasoline engines?
- A: Diesel engine seized repair follows the same pattern, yet access differs. You remove glow plugs or injectors. Diesel hydrolock from fuel or coolant is common after injector or head issues. High compression makes precision even more important.
Q: How much force should I apply to unseize an engine?
- A: Less than you think. Use a long breaker bar for leverage and apply smooth pressure. If you feel like you must jump on it, stop. You risk breaking the crank bolt or worse.
Q: What are the signs of engine seizure?
- A: The starter clicks with no crank or nothing happens. The flywheel will not turn. The engine may have died suddenly on the road with a harsh clunk. Oil light on plus high temperature before stall are bad signs.
Q: What checks should I do after unseizing?
- A: Compression test after seized engine. Oil pressure verification. Fresh oil and filter. Inspect for leaks. Listen to bearings, valvetrain, and timing components. Check the fuel system and ignition system for any issues that could have led to the problem.
Q: Is it worth fixing a seized engine?
- A: If the cause was rust or light oil starvation and the engine frees up cleanly, often yes. If bearings or pistons suffered heavy damage, a used engine or replacement can be the better path. I compare repair vs engine replacement and do the math with parts and labor included.
Quick Note if You Meant an Electric Motor (Not a Gas or Diesel Engine)
People say “motor” for many machines. If you are dealing with an electric motor that locked up, your playbook looks different.
- Electric motors “seize” due to bearing failure, rotor rubbing on the stator, contamination, or shorted windings that overheat and warp parts.
- You check bearings first. You inspect the air gap. You measure insulation. You replace bearings and seals. You do not pour penetrants into windings.
- Understanding the construction helps. If you need a quick refresher on how the main components work together, this overview of stator and rotor basics spells it out clearly.
- Troubleshooting steps for locked or humming electric motors differ from engines. This guide to common electric motor problems can point you at likely causes.
- If you are rebuilding or sourcing cores, the quality of motor core laminations and the grade of electrical steel laminations matter for efficiency and heat. Poor cores run hot and fail early.
If you came here for internal combustion engine seized solutions, stick with the steps above. If your “motor” is electric, the links here will get you on the right track.
Extra Tips and Nuggets I’ve Learned the Hard Way
- Starter stuck in ring gear: If the flywheel will not turn and the starter is wedged, loosen the starter bolts a touch and wiggle the starter. Then try the crank again.
- Manual transmission tricks: With plugs out and the gearbox in a high gear, gentle rocking can help move the crank a hair. I still prefer the crank bolt because it gives me more feel.
- Do not forget the exhaust and intake: If you need to do deeper work, exhaust manifold removal or intake manifold removal may be necessary. Penetrating oil on studs. Heat on nuts. Patience on rusty hardware.
- Carbureted small engines: On lawn equipment and older motorcycles, I often clean the carburetor if the engine turned hard after sitting. Gummed fuel can stick valves and rings. I do a carburetor cleaning before I judge compression.
- Diesel peculiarities: Diesel glow plug removal or injector removal can be tight. Work them gently. A snapped glow plug is a headache you do not want.
- Keep notes: I log how much force, how long the soak lasted, and what each cylinder looked like. It helps if you end up doing an engine tear down on a seized engine later.
Putting it All Together
Fixing a seized motor is a game of patience, feel, and cause-finding. I begin with diagnosis. I remove spark plugs or glow plugs. I add a sensible penetrating oil to each cylinder. I let it soak and I work the crank by hand. I use heat carefully when rust is the villain. Once the engine turns, I clear the cylinders, change the oil and filter, and verify compression and oil pressure. Then I start it gently and listen. If the engine protests with heavy knocks or low compression, I stop and re-evaluate. Sometimes you rebuild. Sometimes you replace. Sometimes you celebrate because the old engine comes back to life with only a little rust dust in the drain pan.
This approach works on gasoline engines and diesel engines. It works on small engines like lawnmowers and generators. It works on motorcycles and some marine engines with the right access. The tools are simple. The method is careful. The payoff can be huge compared to the cost of an engine replacement.
As you dive in, keep these keywords in mind if you want to research deeper or shop for parts and tools:
- engine seized solutions, how to unseize an engine, motor won’t turn over fix, stuck engine repair guide, locked up engine causes
- penetrating oil for seized engine, ATF and acetone unseize engine, breaking a seized motor free, engine rust seizure repair
- hydrostatic lock fix, piston seized in cylinder, crankshaft stuck repair, freeing a seized small engine, car engine seized diagnosis
- marine engine seized troubleshooting, lawnmower engine seized fix, generator engine seized help, motorcycle engine seized tips
- tools to unseize an engine, risks of unseizing a motor, engine seized from water, engine seized from lack of oil, overheating seized engine repair
- cylinder bore rust removal, impact wrench for seized engine, breaker bar engine unseize, flywheel won’t turn, starter motor seized troubleshooting
- spark plug removal seized engine, glow plug removal seized engine, what causes an engine to seize, how to prevent engine seizure, cost of fixing seized engine
- is it worth fixing a seized engine, professional engine unseizing service, DIY seized engine repair, engine rebuild after seizure
- removing pistons from seized engine, cleaning cylinder walls seized engine, Marvel Mystery Oil seized engine, rust penetrant for engine
- heating engine block to unseize, cooling engine parts to unseize, tapped piston to unseize, rocking crankshaft to free engine
- applying torque to flywheel, inspecting engine after unseizing, compression test after seized engine, engine oil change seized motor
- fuel system check seized engine, ignition system check seized engine, signs of engine seizure, partial engine seizure symptoms, full engine seizure symptoms
- manual transmission seized engine, automatic transmission seized engine, power steering pump seized motor, AC compressor seized motor
- water pump seized motor, alternator seized motor, common seized engine mistakes, engine tear down seized
- engine block repair seized, cylinder head removal seized, valvetrain inspection seized, connecting rod inspection seized, main bearing inspection seized
- cam gear seized repair, timing belt snapped seized engine, timing chain failure seized engine, engine crank no start seized
- what to do if engine seizes while driving, how long does it take to unseize an engine, alternative to engine replacement, engine reconditioning after seize
- lubricants for seized components, engine maintenance to prevent seizure, checking engine for internal damage, is my engine truly seized
- unseizing techniques, chemical solutions for engine seizure, mechanical methods for seized engine, engine restoration projects
- used engine options vs repair, engine swap seized motor, can a seized engine be started, how much force to unseize engine
- seized engine sound diagnosis, exhaust manifold removal seized, intake manifold removal seized, fuel injector removal seized
- carburetor cleaning seized small engine, diesel engine seized repair, gasoline engine seized solutions
- engine block heater seized, why did my engine seize up, engine turning hard after sitting, storage tips to prevent engine seize, understanding engine seizure
If you follow the steps here, you will know whether you are dealing with a simple hydrostatic lock fix, a rust-bound ring, or a deeper mechanical failure that needs more than a soak. That clarity is half the battle. The other half is patience and steady hands. You have got this.