How to Install a Trolling Motor: A Complete Step-by-Step Guide for DIY Boaters
- Table of Contents
- How to Install a Trolling Motor: A Complete Step-by-Step Guide for DIY Boaters
- Why does a proper install matter?
- What tools and materials do you need?
- Where should you mount a trolling motor?
- How do you measure proper shaft length?
- How to mount the base step by step
- How do you wire a trolling motor to the battery?
- How do you route and protect wires through the boat?
- Can you add GPS, i-Pilot, foot pedal, and a transducer?
- How do you test the motor after install?
- What about Jon boats, bass boats, pontoons, and canoes?
- How long does it take and what will it cost?
- How do you maintain and secure your setup?
- How does a trolling motor work inside?
- Troubleshooting and mistakes to avoid
- Wiring charts, safety, and standards table
- References
- FAQ
- Key takeaways
Want smooth control on the water? This simple, friendly guide shows you how to mount and wire your trolling motor the right way. I walk you through tools, steps, and smart tips. You avoid costly mistakes. You get safe power. You hit your spots with ease.
Why does a proper install matter?
Problem: Many boaters rush the job. They skip planning. They use the wrong wire gauge. They skip a Circuit Breaker. The motor works for a day, then it fails. Worse, a short can melt wires.
Agitate: That is not just a bad day. That is a safety risk. You can burn a plug. You can damage a Deep Cycle Battery. You can fry a control board. You can miss fish when the prop quits.
Solution: Install it right the first time. Use this step by step trolling motor install plan. You get safe Voltage. You keep Amperage under control. You protect your gear. You enjoy the full Thrust (lbs) your Trolling Motor can give. You also boost Performance, Safety, and Longevity.
I built this Trolling motor installation guide to be clear and calm. You will learn How to mount a trolling motor, How to connect trolling motor to battery, Trolling motor battery wiring diagram basics, and Best practices for trolling motor wiring. I also show Testing trolling motor after installation and Maintaining trolling motor wiring.
What tools and materials do you need?
Problem: You start the job then you pause. You run to the store three times. That kills your day.
Agitate: Each pause creates mistakes. You may grab the wrong Marine Grade Wire or forget Heat Shrink Tubing. You may use hardware that rusts.
Solution: Set up a Trolling motor pre-installation checklist and a Trolling motor installation tools list.
- Trolling Motor with Mounting Plate or bracket
- Deep Cycle Marine Batteries (12V, 24V, or 36V setup)
- Marine Grade Wire of the right gauge for distance and Amperage
- Circuit Breaker rated for your motor
- Quick Disconnect Plug and Quick Release Bracket
- Drill with bits, pilot bits, and stainless bits for metal
- Wrenches, sockets, and a torque tool for Mounting Bolts
- Wire Strippers and a Crimping Tool
- Heat Shrink Connectors, Heat Shrink Tubing, Electrical Tape
- Sealant (Marine Silicone) for holes and hardware
- Multimeter for Voltage checks and continuity
- Measuring Tape, marker, safety glasses, and gloves
- Stainless Steel Hardware, Washers, Nuts
- Conduit or loom, Cable Ties, and Mounting hardware
- Battery Box and strap
- Optional: Foot Pedal, Hand Control, remote control, GPS mods, Transducer
These tools cover Bow Mount trolling motor installation and Transom mount trolling motor setup. They also fit Deck mount installation, Trolling motor bracket installation, and Universal trolling motor mounting system parts.
Where should you mount a trolling motor?
Problem: Bad placement hurts control. The prop cavitates. The head hits the deck. The shaft blocks an Anchor (Shallow Water).
Agitate: Poor placement leads to stalling in weeds. You bump docks. You fight your boat in wind.
Solution: Plan Choosing trolling motor mounting location first.
- Bow Mount vs Transom Mount
- Bow Mount gives better pull and precise control. It shines for a Bass Boat or larger Aluminum Boat or Fiberglass Boat.
- Transom Mount is simple. It suits a Jon Boat, canoe, or small Pontoon Boat setups.
- Front mount trolling motor guide
- Check clearance for deck lids, rails, and anchor rollers.
- The head should clear the bow when you stow it.
- The shaft should hang over the edge without hitting the hull.
- Trolling motor mounting considerations
- Leave room for a Quick Release Bracket.
- Keep room to route Power Leads and a Wiring Harness.
- Plan for a Transducer cable and a Fish Finder connection.
- Mounting a GPS trolling motor
- Check that the GPS compass and sensors see the sky.
- Keep metal rails away from the head.
You can even mount without drilling on some clamp style Transom mount motors. For Bow mounts, drilling is best.
How do you measure proper shaft length?
Problem: A shaft that is too short pops out of the water in chop. A shaft that is too long snags.
Agitate: Cavitation wastes power. It scares fish. It can chip your Propeller.
Solution: Proper trolling motor shaft length is key. Stand at the bow. Measure from the deck to the waterline. Add 20 inches for most boats. Large boats in rough water need more. Use this rough guide:
- Small boats (14–16 ft): 45–52 inches
- Medium (17–19 ft): 52–60 inches
- Large (20+ ft): 60–72 inches
This fits Minn Kota, MotorGuide, Garmin Force, Lowrance Ghost, and Rhodan sizing charts. Do a Trolling motor depth adjustment on the water to fine tune. If you fish big waves, consider a Trolling motor shaft support or Trolling motor shaft stabilization to stop bounce.
How to mount the base step by step
Problem: Crooked holes and dry mounts cause leaks. Loose brackets rattle.
Agitate: Leaks rot wood. Loose brackets crack a Fiberglass Boat deck.
Solution: Follow this Step by step trolling motor install for the base.
- Step 1: Position and mark the mounting area
- Place the motor on the bow or transom. Check overhang and stow path.
- Use the motor base or paper template. Mark drilling points clearly.
- Measuring for trolling motor placement helps you avoid a hatch or a rib.
- Step 2: How to drill holes for trolling motor
- Start with pilot holes. Step up to the final size.
- Deburr holes so wires do not chafe.
- Use Sealant (Marine Silicone) in each hole. Use 3M 4200 or 5200 on decks and transoms.
- Step 3: Secure the bracket or Mounting Plate
- Set the base with Stainless Steel Hardware, Mounting Bolts, Washers, and Nuts.
- Tighten in a star pattern. Check torque settings for trolling motor bolts in your manual.
- Add a Quick Release Bracket for easy removal and security.
- Step 4: Transducer installation
- If the motor has an integrated Transducer or Universal sonar, read your manual.
- Route the transducer cable with the Power cable. Use loom and Cable Ties.
Use a Trolling motor bow mount plate if your deck is thin. Use a Trolling motor transom mount bracket for transom installs. For Aluminum Boat or Jon Boat, add backing plates if you can. For Fiberglass Boat, drill slow and seal well.
How do you wire a trolling motor to the battery?
Problem: Wrong gauge wire leads to heat and drop. No Circuit Breaker risks fire. Bad crimps cause dead motors.
Agitate: Your motor may not reach max Thrust (lbs). It may trip a breaker. It may cut out at speed.
Solution: Follow this Electrical install plan for 12V, 24V, and 36V. Use Marine Grade Wire sized for distance and load. Use a Circuit Breaker near the battery. Use Heat Shrink Tubing for every crimp.
- Step 1: Battery bank setup (12V, 24V, 36V)
- Installing a 12V trolling motor uses one Deep Cycle Battery.
- Installing a 24V trolling motor uses two in series. Positive of battery 1 to negative of battery 2.
- Installing a 36V trolling motor uses three in series.
- Parallel wiring is for more 12V capacity. It is less common for the motor itself.
- How to set up a trolling motor battery bank: mount each in a Battery Box, strap them down, and label them.
- Step 2: Install the Circuit Breaker
- Place it within 7 inches of the battery on the positive cable.
- The rating should match your motor. Many 12–24V motors use 50–60A. Many 36V motors use 60–70A. Check your manual.
- Step 3: Run power cables
- Find the shortest safe route. Avoid sharp bends and heat.
- Protect with Conduit or loom when you pass through a hull or deck.
- Trolling motor wire routing through hull must use grommets and sealant.
- Step 4: Connect wires
- Strip insulation clean. Crimp with a quality Crimping Tool.
- Use marine lugs and Heat Shrink Connectors. Seal with Heat Shrink Tubing and finish with Electrical Tape if needed.
- Connect positive and negative to the right posts. Watch polarity.
- Step 5: Trolling motor plug installation and Quick Disconnect Plug
- Wire the plug per the label. Use the correct poles for 12V, 24V, or 36V.
- A Trolling motor quick disconnect installation makes removal fast and safe.
Use a Trolling motor power cable routing plan that keeps Power Leads clear of speaker wires and sonar lines. That helps reduce noise on your Fish Finder. Make sure the Trolling motor power lead installation uses clean lugs and tight nuts.
How do you route and protect wires through the boat?
Problem: Loose cables snag. Water creeps into splices. Vibration breaks weak joints.
Agitate: You chase gremlins all season. The motor cuts out when you need it most.
Solution: Use Best practices for trolling motor wiring and Trolling motor cable management.
- How to run wires for trolling motor
- Follow factory looms if you have them. Use Conduit or split loom if you do not.
- Avoid sharp edges. Add grommets to bulkhead holes.
- Waterproofing trolling motor connections
- Use adhesive lined Heat Shrink Tubing on all splices.
- Insulating trolling motor connections stops corrosion.
- Trolling motor wiring harness installation
- Bundle the Harness with Cable Ties. Leave service loops for the motor head and Quick Release Bracket.
- Trolling motor battery box wiring
- Keep the Battery Box dry and vented.
- Add a Trolling motor power switch installation if you want a master cut off.
- Trolling motor power distribution
- Use a bus bar if you feed a Fish Finder or pumps from the same bank. Follow Amperage and Voltage rules.
Can you add GPS, i-Pilot, foot pedal, and a transducer?
Problem: Add-ons can confuse. You worry about wiring and setup.
Agitate: If you wire it wrong, your Spot-Lock drifts. Your Foot Pedal lags. Your Fish Finder shows noise.
Solution: Plan extras early. Mount and route cables with the main harness.
- Trolling motor remote control setup and Installing a foot pedal trolling motor
- Pair the remote or Foot Pedal per the brand’s steps.
- Place the pedal where your foot rests natural.
- How to install Minn Kota i-Pilot and use Spot-Lock
- Follow the Minn Kota guide. Update software. Calibrate GPS.
- Keep the GPS puck clear of metal.
- Garmin Force trolling motor installation and Lowrance Ghost trolling motor setup
- Use their templates and torque specs. Calibrate heading and pedals.
- Rhodan trolling motor installation
- Mount the GPS anchor motor per guide. Test Spot-Lock hold.
- Trolling motor transducer installation and Trolling motor universal sonar installation
- If you add an external Transducer, use a clamp and route the cable with the Power cable.
- Connecting trolling motor to fish finder helps you see structure at the bow.
- Installing a shallow water anchor with trolling motor
- Check clearance for both. Leave room to deploy and stow.
How do you test the motor after install?
Problem: You finish the job and rush to the lake. A small issue ruins your day.
Agitate: A loose Mounting Bolt can fall out. A short can trip your Circuit Breaker.
Solution: Do checks at home before you launch.
- Visual inspection
- Check all bolts for tightness. Look at Washers and Nuts. Look for seal squeeze out on holes.
- Verify that cables are neat. No pinched wires. No bare copper.
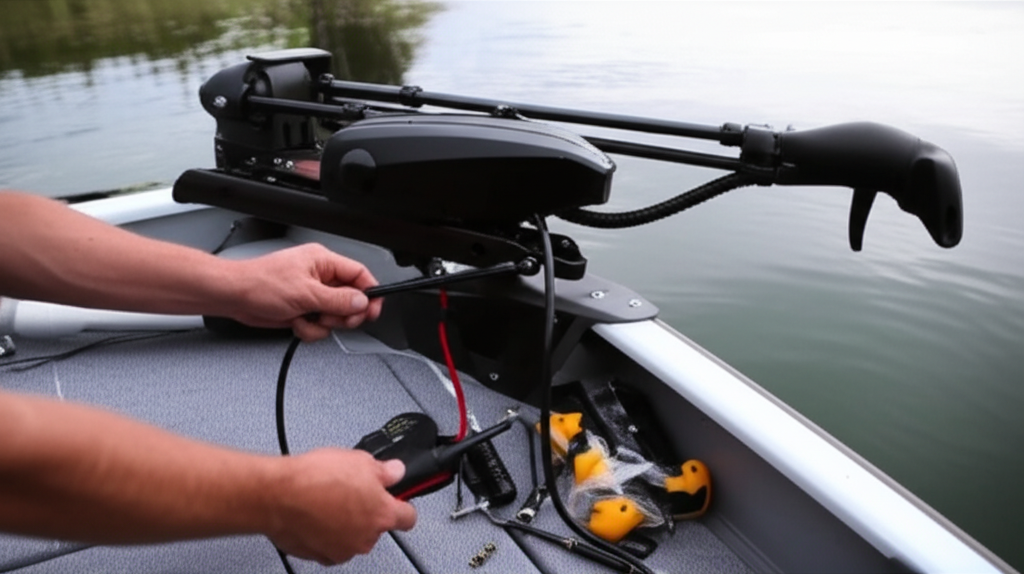
- Electrical test with a Multimeter
- Check Voltage at the plug. Confirm correct Voltage for 12V, 24V, or 36V.
- Test continuity and ground. Confirm no short.
- Functional test
- Connect the motor. Test low and high speeds. Test steering and a Foot Pedal or Hand Control.
- Test GPS, i-Pilot, and Spot-Lock if you have them.
- Make sure the Propeller clears the hull and the motor deploys and stows smooth.
Checking trolling motor performance at dock saves time. Testing trolling motor after installation builds trust in your setup.
What about Jon boats, bass boats, pontoons, and canoes?
Problem: One plan does not fit all boats.
Agitate: Wrong mount on a Pontoon Boat can make the motor useless.
Solution: Tune the plan to your hull.
- Jon boat trolling motor installation
- A Transom Mount is simple. A Bow Mount gives more control. Use backing plates if the deck is thin.
- Bass boat trolling motor setup
- Bow Mount is king. Use a Trolling motor bow mount plate. Add a Quick Release Bracket. Plan for a Fish Finder and Transducer at the bow.
- Pontoon Boat
- Installing a trolling motor on a pontoon boat needs a special bracket. Check rail clearance. Use long Shaft Length.
- Aluminum Boat trolling motor install
- Seal holes with care to stop leaks. Use stainless hardware.
- Fiberglass Boat trolling motor mounting
- Drill slow. Use tape to stop gelcoat chips. Seal and torque per spec.
- Installing a trolling motor on a canoe
- Use a Transom Mount clamp. Keep weight low. Use a small 12V motor. Keep a Battery Box in the center for balance.
How long does it take and what will it cost?
Problem: You need a plan for time and budget.
Agitate: Half done jobs drag on.
Solution: Plan your Trolling motor installation time and cost.
- DIY time: 2 to 6 hours for most boats. It depends on hull, wiring runs, and your skill.
- Pro time: 1 to 3 hours for a clean install.
- Professional trolling motor installation cost varies by area. Expect to pay labor per hour and parts.
DIY saves labor. It builds your know-how. Use this guide to avoid rework.
How do you maintain and secure your setup?
Problem: Salt, vibration, and thieves attack your gear.
Agitate: Corrosion creeps in. The motor shakes loose. A thief walks away with your motor.
Solution: Set a simple plan.
- Maintenance tips
- Regular inspection of wiring and connections.
- Keep terminals clean and corrosion free.
- Check mounting hardware often.
- Repairing trolling motor wiring early prevents bigger issues.
- Battery care
- Trolling motor battery charger connection after each trip gives long life.
- Trolling motor battery selection guide: pick Deep Cycle Battery or LiFePO4 sized for your motor and time on the water.
- Wiring marine batteries for trolling motor requires clean lugs and tight nuts.
- Security
- Best practices for securing trolling motor include a lock on the Quick Release Bracket.
- Preventing trolling motor theft with a cable lock and smart storage.
How does a trolling motor work inside?
Problem: You want to know what you bought. You want to trust the motor under the hood.
Agitate: If you do not know the guts, you may fear strange sounds or buzz.
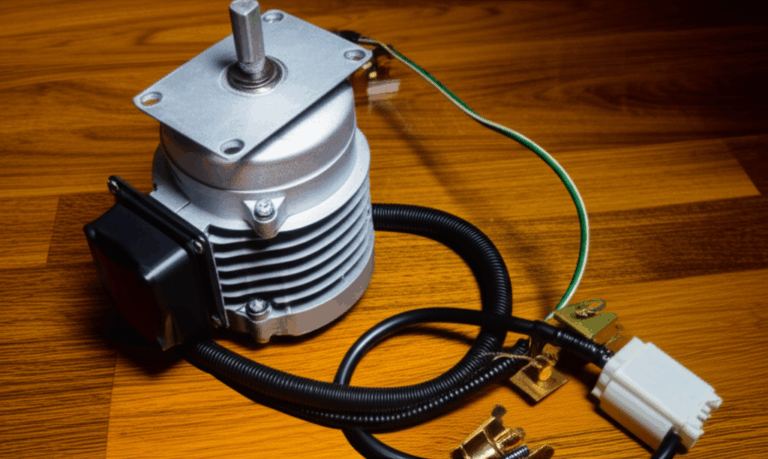
Solution: Learn the basics. A motor has a stator and rotor. The stator makes a magnetic field. The rotor spins the shaft and the Propeller.
Inside many motors, the stator uses thin steel sheets called laminations. Quality stator core lamination and electrical steel laminations help reduce heat and loss. The rotor may use a cast core with bars or magnets and precise rotor core lamination. Good cores help smooth power and longer run time.
You do not need to open your motor. You should know that smart design inside plus clean power outside gives top performance.
Troubleshooting and mistakes to avoid
Problem: Little errors add up. They waste trips.
Agitate: You lose thrust. You chase ghosts. You blow fuses.
Solution: Use this checklist of Trolling motor installation mistakes to avoid.
- Incorrect wire gauge leads to Voltage drop and heat. Follow charts.
- Missing or improper Circuit Breaker risks damage.
- Poorly crimped connections fail under load. Crimp well and seal with Heat Shrink Tubing.
- Incorrect battery wiring in series or parallel kills performance. Follow the diagram for 24V and 36V series.
- Loose mounting bolts cause noise. Check torque settings for trolling motor bolts often.
- Improper shaft length selection leads to cavitation or bottom strikes.
Trolling motor fuse size matters. Use the maker spec. Trolling motor voltage drop calculation helps plan wire gauge. You can keep it simple. Short runs need less gauge. Long runs need thicker wire.
If your prop gets bent, follow a Trolling motor propeller replacement guide from your brand.
Wiring charts, safety, and standards table
Here is a simple table you can use as a starting point. Always check your motor manual for the exact Amperage and length needs.
| Category | Data/Recommendation | Source/Context | Why it matters |
|---|---|---|---|
| Wire Gauge (AWG) | 12V, 55 lbs, <5 ft: 8 AWG; 12V, 55 lbs, 10–20 ft: 6 AWG; 24V, 80 lbs, 10–20 ft: 6 AWG; 36V, 112 lbs, 15–25 ft: 4 AWG; For runs >25 ft go up one gauge | ABYC E-11, Minn Kota and MotorGuide manuals | Undersized wire causes drop, heat, and fire risk |
| Circuit Breaker | 50–60A for many 12V–24V motors; 60–70A for many 36V motors; place within 7 inches of battery | Maker manuals, ABYC E-11 | Protects from surges and shorts |
| Battery Type | Deep Cycle Marine Batteries: Flooded, AGM, Gel, or LiFePO4 | Battery makers, pro tips | Starting batteries are not for trolling loads |
| Shaft Length | Waterline to bow + 20 inches (min) | Brand sizing guides | Stops cavitation and bottom strikes |
| Sealant | Marine-grade 4200/5200 on holes and bolts | Marine repair guides | Stops leaks and rot |
| Install Time | DIY 2–6 hours; Pro 1–3 hours | Installer estimates | Plan your day and budget |
References
- ABYC Standard E-11, AC and DC Electrical Systems on Boats
- Minn Kota Owner’s and Installation Manuals
- MotorGuide Trolling Motor Installation Guides
- Garmin Force Installation Manual
- Lowrance Ghost Installation Guide
- Rhodan HD GPS Anchor Trolling Motor Install Guide
- 3M Marine Adhesive Sealant 4200/5200 datasheets
FAQ
Q: Can I do a DIY trolling motor install on a Fiberglass Boat if I have never drilled before?
A: Yes. Go slow. Tape the gelcoat. Start with pilot holes. Use Sealant. Follow the steps above.
Q: Where to mount a trolling motor on a Pontoon Boat?
A: Use a strong bracket at the bow. Leave space to deploy. Use a longer Shaft Length.
Q: Can I mount a trolling motor without drilling?
A: You can on a clamp type Transom mount. Bow mounts need bolts for strength.
Q: How do I connect a trolling motor to a battery safely?
A: Use the right gauge Marine Grade Wire. Add a Circuit Breaker within 7 inches of the battery. Crimp and seal every joint.
Q: What is the best way to install a trolling motor if I fish saltwater?
A: Use Saltwater trolling motor installation tips. Rinse with fresh water after trips. Use corrosion resistant Stainless Steel Hardware. Seal all holes. Grease terminals.
Key takeaways
- Plan the job with a Trolling motor pre-installation checklist and a clear tools list.
- Choose Bow Mount or Transom Mount based on control and boat type.
- Measure Shaft Length right to avoid cavitation.
- Mount the base with sealed holes and Stainless Steel Hardware.
- Set up a 12V, 24V, or 36V battery bank in series as required.
- Install a Circuit Breaker near the battery and use the right wire gauge.
- Route wires with Conduit, grommets, and loom and seal all connections.
- Add GPS, i-Pilot, Spot-Lock, a Foot Pedal, or a Transducer with careful cable routing.
- Do a full Visual, Electrical, and Functional test before launch.
- Maintain wiring, clean terminals, check bolts, and lock the motor to prevent theft.
- Follow brand guides for Minn Kota trolling motor installation, MotorGuide trolling motor wiring, Garmin Force trolling motor installation, Lowrance Ghost trolling motor setup, and Rhodan trolling motor installation.
- Enjoy the Benefits of proper trolling motor installation with smooth control and long life.