How to Know if Your Motor Is Locked Up: A Comprehensive Diagnostic Guide
Every engineer and product lead has lived this scene. Something critical will not turn. Maybe it is a car engine that won’t crank after a heavy rain. Maybe it is an HVAC fan motor that hums then trips protection. Or a BLDC rotor that refuses to spin on a test bench. When a motor is “locked up,” time is not on your side. You need a straight answer, a safe diagnostic path, and a clear plan for what to do next. You also need to understand the engineering fundamentals that cause lock-up in the first place because that is how you prevent it in future designs with better materials, better laminations, and better assembly choices.
This guide speaks to both worlds: field diagnostics for locked-up internal combustion engines and electric motors, and design-level guidance on lamination materials and processes that reduce the risk of overheating, eddy-current losses, and seizure. We will start with practical steps to confirm a lock-up, then shift to the engineering science behind it, followed by material and manufacturing choices that raise performance and reliability.
In This Article
- Why “Locked Up” Matters: Definitions and Failure Modes
- Fast Field Checks: Rule Out Simple Issues First
- Key Symptoms That Point to a Locked-Up Motor
- Step-by-Step Diagnostics to Confirm a Lock-Up
- The Engineering Fundamentals: Why Motors Lock Up
- Materials and Manufacturing Choices That Influence Lock-Up Risk
- Which Application Is This For? Best-Fit Guidance by Scenario
- What to Do If Your Motor Is Confirmed Locked Up
- Prevention: How to Avoid Engine and Motor Seizure
- Collected Data, Case Studies, and Cost Benchmarks
- Your Engineering Takeaway
Why “Locked Up” Matters: Definitions and Failure Modes
Let’s define terms so your team speaks the same language.
- “Locked up” means the rotating assembly cannot turn under normal torque. In a car engine that often shows up as an engine that won’t turn over or a single heavy click from the starter motor with no crank. In an electric machine the rotor may not budge even when the drive commands torque or it may move a few degrees then stall hard.
- Mechanically, lock-up equals immobility of the crankshaft, rotor, or associated drivetrain component. In combustion engines you often see seized bearings, pistons scuffed to cylinder walls, or a bent connecting rod due to hydro-lock. In electric motors you may find bearing failure, foreign object binding, a seized accessory load, or thermal damage that distorts the stator or rotor.
- It is critical because hard lock-up usually signals severe damage that can escalate quickly if you force motion. Try to crank a hydro-locked engine and you can bend rods. Power a jammed rotor and you can cook windings. You want to diagnose before you apply more power.
You will see many symptom phrases that all point to the same problem:
- engine won’t turn over
- engine won’t start no crank
- engine cranks slow then stops
- starter motor clicking but no crank
- engine won’t spin freely
- motor seized symptoms
- electric motor seized
- fan motor seized
- HVAC motor seized
- washing machine motor locked
- compressor motor seized
- pump motor locked
- power tool motor seized
Different machines. The same physics: something is stopping rotation.
Fast Field Checks: Rule Out Simple Issues First
Before you declare a catastrophic failure, clear the easy stuff. You can save hours and sometimes thousands of dollars.
1) Verify power supply health
- For vehicles: A weak or dead battery can mimic a seized engine. Check open-circuit voltage with a multimeter. Then load test or try a jump starter. Watch for a single click or rapid clicking from the starter motor. That sound can mean low voltage not a seized crank.
- For electric motors: Confirm input voltage, phase balance, and that the drive is not current limiting or tripping. Check fuses, contactors, and E-stops. A supply problem can look like a jammed rotor.
2) Verify starter motor and control path
- Starter motors fail. You may hear grinding, a whir without engagement, or no sound at all. Compare symptoms: “starter motor failure symptoms” differ from “signs of a seized engine.” A healthy starter draws heavy current and produces torque. If it strains and bogs down hard the engine may be stuck.
- On electric drives check drive faults, encoder feedback, and torque commands. A bad feedback signal can hold the rotor.
3) Confirm correct drivetrain state
- Vehicle in Park or Neutral. Parking brake set. Manual transmission clutch depressed. A transmission locked up vs engine can create similar “no crank” behavior. A seized torque converter or transmission front pump can load the engine so much that it stalls or fails to crank.
- In machines, uncouple the load when possible. A seized pump, gearbox, or accessory can simulate a motor lock.
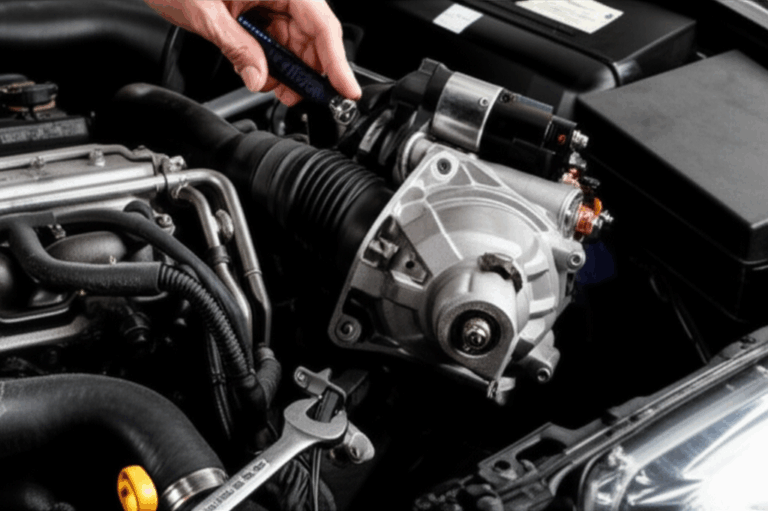
4) Check seized accessories
Serpentine belt systems can fool you. A seized alternator, AC compressor, water pump, or power steering pump can jam the belt and stop the crankshaft pulley. Remove the belt. Spin each pulley by hand. If one is locked you found your culprit. The engine may be fine.
Common quick checks that pay off:
- Confirm ground connections and starter cables. High resistance drops voltage at the starter.
- Inspect fuse links and relays.
- For vehicles after heavy rain or flood, consider hydro-lock. Water in a cylinder will prevent cranking.
If these pass and the motor still will not turn, you move to direct mechanical checks.
Key Symptoms That Point to a Locked-Up Motor
You can often recognize a lock-up without tearing anything down.
- No crank or a single heavy click
You turn the key or hit the start command. You hear one heavy click then nothing. The crankshaft does not rotate. That is a classic sign of a seized engine or a dead starter. You still need to test to separate the two.
- Breaker bar test failure
For engines, put a socket on the crankshaft pulley bolt and use a long breaker bar. Try to rotate the engine clockwise and counterclockwise. If it will not budge, you likely have a seized engine. If it moves a few degrees then binds you may have piston-to-valve contact or partial seizure. If it turns freely your issue lies elsewhere.
- Starter motor straining
A strong starter tries to turn the engine. You hear groaning, bogging, or the lights dim hard. That is mechanical drag or a near-lock condition.
- Warning signs before failure
Engines often warn you before they lock. Loud knocking or grinding. Engine knocking before seizing. Overheating or high temperature gauge readings. An oil pressure warning light illuminated. Smoke or steam from under the hood. You might see coolant in oil or oil sludge. Those symptoms point to oil starvation engine lock, overheated engine seized, or internal breakage.
- Electric motor equivalents
Humming with no rotation. High inrush then a quick trip on overload. Smell of insulation or visible smoke. Rotor will not turn by hand. Bearings growl or feel rough. Belted loads slip or hold.
These patterns do not prove a lock by themselves. They push you toward hands-on confirmation.
Step-by-Step Diagnostics to Confirm a Lock-Up
You can follow a safe, structured workflow. The goal is to distinguish a true lock from supply, control, or accessory issues without causing more damage.
1) Verify power and starter integrity
- Vehicles: Measure battery voltage while cranking. If voltage collapses below 9.6 V on a healthy battery, suspect heavy mechanical drag. If the starter is silent check the control circuit first.
- Electric motors: Verify commanded speed and torque, check drive status, and confirm no interlocks hold the system. If possible, run a no-load test.
2) Remove spark plugs (gasoline) or glow plugs (diesel)
- Purpose: Relieve compression and allow fluids to escape. Hydrolock happens when water, coolant, or fuel enters a cylinder. Liquid does not compress. Remove plugs then crank. If fluid sprays out you likely had hydro-lock. Dry the cylinders and find the source such as a blown head gasket, failed injector, or flood exposure.
- Watch for rust or coolant traces. Long-term storage or coolant leaks can seize rings to cylinder walls.
3) Attempt to turn the engine by hand
- Use a socket on the crankshaft pulley bolt and a long breaker bar. Apply steady pressure clockwise and counterclockwise.
- Interpret results:
- Completely immobile means strong indication of seized engine.
- Slight movement then resistance means partial seizure or piston-to-valve interference.
- Free movement means the engine is not locked up. Your problem is likely starter motor failure or a transmission/accessory issue.
4) Isolate accessory components
- Remove the serpentine belt. Try the breaker bar again. If it turns now you had a seized accessory such as an alternator, AC compressor, water pump, or power steering pump. Spin each pulley to find the frozen unit.
5) For electric motors, decouple and bench test
- Remove belts or couplings. Try to spin the rotor by hand. Use a dial indicator to check for shaft runout if you suspect impact damage.
- If the rotor spins freely, megger the windings to check insulation. Investigate the driven load. A pump or compressor can lock from contamination or bearing collapse.
- If the rotor will not turn by hand, inspect bearings and check for foreign objects. In some designs a loose lamination or slipped stack can rub the rotor.
6) Inspect internal condition with minimal tear-down
- For engines, drain the oil and inspect for metal. Pull the oil filter and cut it open. Metal flakes point to bearing failure. Use an endoscope or borescope through the spark plug hole to check cylinder walls for scoring.
- For electric motors, remove end bells to access bearings. Check for discoloration from heat and signs of rubbing between rotor and stator.
7) Advanced checks and tools
- OBD-II scanner for engine error codes. Codes can indicate misfires, low oil pressure events, or cam/crank timing errors.
- Flywheel inspection through the access cover if you suspect broken teeth or mechanical interference.
- Penetrating oil can free lightly rusted piston rings in small engines. Apply through the plug holes then try the breaker bar again. Do not force a fully seized engine with a long bar or impact. You can make the damage worse.
You now know if the motor is locked up. The next question is why.
The Engineering Fundamentals: Why Motors Lock Up
Under the hood of “locked up” sit a set of physical causes. Understand them and you can design motors and systems that run cooler, last longer, and protect themselves when things go wrong.
1) Lack of lubrication (oil starvation)
Combustion engines rely on pressurized oil to separate surfaces. Lose that film and metal meets metal. Bearings overheat. Rod and main bearings can weld to crankshaft journals. Pistons can scuff and seize to cylinder walls. Oil starvation engine lock often traces back to low oil level, sludge from extended oil change intervals, clogged passages, or an oil pump failure. In small engines you see similar behavior under heavy load with low oil or on steep slopes.
2) Severe overheating
Excess heat expands metal. Pistons can swell more than bores. Clearances vanish. The engine overheats then seizes. Cooling system faults drive this: coolant leaks, radiator blockages, thermostat failures, or failed fans. Overheated engine seized is a common post-mortem conclusion when the temp gauge spiked and the driver kept going.
3) Hydro-locking
Liquid in the combustion chamber stops the piston. Water or coolant from floods or blown head gaskets, or raw fuel from a stuck injector. Try to compress an incompressible fluid and you bend connecting rods or crack pistons. Hydrolock often announces itself after heavy rain, deep puddles, or overheating events that breach the head gasket. Diesel engine seized from hydro-lock can be especially severe due to higher compression ratios.
4) Internal component failure
A broken timing belt or failed timing chain can cause piston-to-valve contact. Valves can lodge in pistons. The crank can jam. A broken connecting rod can wedge. A camshaft can seize. Valvetrain damage seized events often follow ignored noises or overdue timing component service. Cylinder scoring, worn piston rings seized, and crankshaft journal damage also show up in teardown reports.
5) Long-term storage and rust
Moisture does ugly things in idle machinery. Pistons rust to cylinder walls. Rings stick. Bearings pit. When you try to start a small engine or a boat engine after months of sitting it feels frozen. Penetrating oil and patient manual rotation can sometimes free it. Sometimes you need a rebuild.
6) Electric motor specific: thermal damage and magnetic drag
Electric machines bring different failure modes. Bearings fail from contamination or poor lubrication. Overcurrent and hot spots cause thermal expansion. You can get rotor-to-stator rub. Or laminations can degrade so that eddy current heating spikes, which raises core temperature and stack warpage risk. This is where lamination material and thickness matter. Think of eddy currents like little electrical whirlpools swirling inside the core when magnetic fields change. Thinner insulated laminations break big whirlpools into tiny ripples which cuts heating. Less heat means less expansion which means lower seizure risk due to rub or bearing damage.
If you design motors, you control many of these risks through material choice, lamination thickness, core assembly methods, and cooling strategies.
Materials and Manufacturing Choices That Influence Lock-Up Risk
Here is where design decisions pay dividends. Your lamination material and your manufacturing process directly affect core losses, thermal profile, and mechanical integrity under load. That cascade determines whether a motor runs cool and reliable or runs hot and drifts toward failure.
Material considerations
- Silicon steels (non-oriented grades, often called CRNGO)
General-purpose workhorses for motors and generators. Moderate cost. Good performance from 50 to a few hundred hertz. You tune grade and thickness to balance hysteresis loss and eddy current loss. Thinner gauges reduce eddy currents as frequency rises which lowers heat. Lower heat reduces thermal growth and preserves clearances between rotor and stator.
- Grain-oriented silicon steels (CRGO)
Designed for transformers with flux along the rolling direction. Excellent for transformer lamination core designs. Not typically used in rotating machines because flux rotates and GO steels lose their directional advantage there.
- High-silicon and advanced NOES grades
Lower core loss at higher frequencies. Useful in high-efficiency BLDC stator core designs and small high-speed motors. Again thinner laminations cut eddy current loss which reduces core temperature and lowers the chance of thermal rub or insulation breakdown.
- Cobalt alloys
You get higher saturation flux density and good performance at elevated temperatures. Aerospace and high power density applications use cobalt alloys despite the cost. Strong choice when size must shrink yet torque density must rise.
- Amorphous and nanocrystalline alloys
Extremely low core losses at high frequencies due to random atomic structure and very thin ribbons. More common in high-frequency transformers. Motors can use them in limited cases where cost and manufacturing allow.
Manufacturing and assembly processes
- Stamping vs laser cutting
Stamping rules at volume. It delivers consistent geometry, burr control with good tooling, and high throughput. Laser cutting is flexible and ideal for prototypes or complex low-volume parts though it introduces more heat affected zone. That can degrade magnetic properties if you do not control it. You can mitigate with stress relief or optimized cutting parameters. For mass production of simpler geometries, stamping often provides the cost-effective path to scale. For tight timelines or intricate designs, laser cutting gets you there faster.
- Lamination thickness and insulation coating
Thinner laminations reduce eddy current loss. That reduces core heating under variable frequency drives. Good insulation coatings keep laminations electrically isolated which keeps those “whirlpools” small. You balance thickness against cost and stacking factor.
- Bonding, interlocking, or welding stacks
Adhesive bonding can produce very quiet cores with high structural integrity and minimal electromagnetic degradation when done correctly. Interlocking features work like LEGO bricks that snap laminations together which avoids weld heat. Welding can introduce localized heat and stress which can raise local losses. Use welding sparingly or with post-process stress relief when magnetic performance matters most.
- Rotor and stator concentricity and mechanical tolerances
Tight concentricity keeps airgap uniform. Uniform airgap lowers unbalanced magnetic pull which reduces bearing loads and the chance of rotor rub. Good fixturing during stack build and precise press fits maintain alignment.
- Surface finish and burr control
Burrs can bridge laminations which increases eddy currents. They can also damage insulation layers. Good tooling maintenance and deburring protect both magnetic performance and long-term reliability.
Practical tie-in to lock-ups
When core losses drop, temperature drops. Lower temperatures protect bearings and insulation. You get less thermal growth. Rotor-to-stator clearances stay where you designed them. You avoid those marginal cases where a hot rotor expands into the stator at peak load then binds. That is how smart lamination choices turn into fewer field failures.
For deeper reference on material scope and parts:
- If you want a quick overview of material choices and how they map to applications see electrical steel laminations as a category of core stack building blocks: electrical steel laminations.
- When evaluating stator stack options and slot geometry choices that affect flux distribution and noise see: stator core lamination.
- For rotor skew, bar geometry, and mechanical integrity considerations in induction or PM rotors see: rotor core lamination.
- For component-level sourcing or stack build capability across motor families see: motor core laminations.
Which Application Is This For? Best-Fit Guidance by Scenario
Not every situation needs the same approach. Match your diagnostic and design decisions to your machine and duty cycle.
- Passenger cars and light trucks
If the engine won’t crank or you hear a single click, rule out battery and starter first. Then pull the plugs to check for hydrolock. If the breaker bar test fails with plugs out, you likely have internal damage. Common failure paths include low oil pressure events that wipe bearings or overheating that swells pistons. Accessory lockups like alternator seized or AC compressor seized can mimic engine lock. Removing the belt exposes those quickly.
- Heavy equipment and industrial engines
Heavy equipment engine seized after low oil or severe overheating is common due to duty cycle and environment. Oil sampling and filter inspections often reveal the story. Expect higher rebuild potential on large blocks because the economics support machine work.
- Small engines: lawnmowers, generators, pumps
Storage and moisture seize rings to cylinder walls. Add penetrating oil, wait, then try to rotate by hand. If it frees up and compression returns you may avoid a full tear-down. If not, bore scoring or bearing damage may require a rebuild.
- Electric motors in HVAC, fans, and pumps
HVAC motor seized can be a bearing or a failed start capacitor. Try to spin the fan by hand with power off. If it is stiff or gritty replace bearings. If it spins freely and still hums check the capacitor and windings. For industrial pumps decouple the load to separate motor from drivetrain faults. Check for rotor rub from thermal growth.
- BLDC and high-frequency machines
In BLDC stator core designs, core losses can spike at higher electrical frequencies. Choose materials and thickness to manage eddy currents. Validate airgap under maximum temperature with FEA and test data. Rotor laminations must handle mechanical stress at speed with minimal runout to avoid rub under thermal load.
- Transformers and static cores
Transformers do not “lock up” mechanically but they do overheat if the lamination choice or assembly is poor which shortens life. CRGO grades align with the rolling direction for lower losses. Poor stacking or burrs raise core loss which raises temperature.
Honest limitation check
Laser cutting offers precision and is ideal for prototyping and complex, low-volume designs. However for high-volume runs of simpler geometries, traditional stamping often gives a more cost-effective and repeatable path. Bonded stacks reduce noise and can improve mechanical stability though they add process steps. Interlocks simplify assembly and avoid weld heat though they can slightly reduce stacking factor. There is no silver bullet. There is only the right fit for your production and performance targets.
What to Do If Your Motor Is Confirmed Locked Up
When you confirm a lock-up you face two parallel tasks: quantify damage and choose the right repair or replacement path.
Assess damage and costs
- For engines, drain and inspect oil for metal. Cut open the oil filter. If you see bearing material you likely need a rebuild or replacement. If hydrolock occurred early and you stopped fast you may get away with replacing bent rods or gaskets.
- For electric motors, inspect bearings, rotor, and stator for rubbing or discoloration. Test insulation resistance. If laminations show heat damage or delamination you may need a replacement stack.
Repair and replacement options for engines
- Partial repair: If damage is limited you may replace bearings, pistons, rings, and gaskets.
- Full rebuild: Machine crank journals, bore and hone cylinders, replace timing components. Costs vary by platform.
- Used or remanufactured engine: Often the fastest way to return a vehicle to service with predictable cost.
Repair and replacement options for electric motors
- Bearing replacement and cleaning often solves seize events caused by contamination.
- Rewinding may save a stator with thermal damage if laminations remain sound.
- Rotor repair is possible if damage is limited though a cracked rotor cage or demagnetized PMs may force replacement.
- Full motor replacement may be best when downtime carries a higher cost than the component.
Make the business decision
Weigh machine age, downtime cost, energy efficiency gains from a newer design, and your maintenance capability. Older cars may not justify a full rebuild. Industrial assets often do.
Prevention: How to Avoid Engine and Motor Seizure
A few low-drama habits and a few smart design choices cut risk dramatically.
For internal combustion engines
- Maintain oil level and change intervals. Use the correct viscosity and a quality filter.
- Watch the temperature gauge. If it climbs, stop. Overheating can seize an engine in minutes.
- Fix leaks early. Coolant in oil or oil in coolant is a red flag.
- Avoid deep water. Hydro-lock happens faster than you think.
- Listen for noises. Knocking or grinding before failure is common.
- For storage, fog cylinders and rotate the engine occasionally to prevent rust.
- Replace timing belts on schedule. A broken timing belt seized engine scenario is expensive and avoidable.
For electric motors
- Keep the motor clean and ventilated. Airflow keeps temperatures in check.
- Lubricate bearings per spec and protect them from contamination.
- Use overload protection and monitor temperature. Do not let a drive cook a motor under stall conditions.
- Align and tension belts correctly. Misalignment and overtension kill bearings.
- Validate lamination material and thickness to manage core loss. Lower losses mean cooler cores which mean lower mechanical stress at full load.
- Choose assembly methods that protect magnetic properties and minimize distortion.
Design-level prevention through laminations
- Select lamination material for your frequency and flux density.
- Choose thickness that keeps eddy current loss under control.
- Insist on good coatings and burr control.
- Use bonding or interlocking when acoustic and mechanical stability matter.
- Validate with testing. Map temperature rise versus load and duty cycle.
Collected Data, Case Studies, and Cost Benchmarks
Below are consolidated observations from industry practice. Use them as ballpark guideposts as you frame repair options and design decisions.
| Category | Statistic/Data Point | Notes/Context |
|---|---|---|
| Leading Causes of Engine Seizure/Failure | (Based on automotive industry analyses and mechanic reports) | |
| Oil Starvation/Poor Lubrication | 15-20% of severe engine failures | Due to low oil, clogged passages, oil pump failure. Directly leads to bearing and piston seizure. |
| Overheating | 10-15% of severe engine failures | Caused by coolant leaks, radiator issues. Results in warped heads, piston seizure, metal expansion. |
| Timing System Failure | 5-10% of major engine issues | Broken timing belt/chain can cause piston-to-valve contact which can lead to catastrophic internal damage and lock-up. |
| Hydro-locking | Less common, but high severity | Incompressible liquid in cylinders prevents piston movement. Often leads to bent rods. |
| Cost Implications of a Locked-Up Engine | (Average costs, highly variable by vehicle make/model, engine type, and location) | |
| New Engine Replacement | $4,000 – $10,000+ (parts & labor) | Varies significantly by vehicle make/model and engine type. |
| Remanufactured Engine | $2,500 – $6,000 (parts & labor) | More affordable than new. Engine rebuilt to factory specifications. |
| Used Engine (Salvage) | $1,500 – $4,000 (parts & labor) | Risk exists because history is unknown. Budget-friendly for older vehicles. |
| Engine Rebuild (Partial/Full) | $2,000 – $7,000+ (parts & labor) | Depends on extent of internal damage. Cost-effective if block and head are salvageable. |
| Preventable Engine Failure Rate | (General industry consensus; specific hard data is scarce but widely accepted) | |
| Maintenance-Related | Estimated 80% of engine failures are preventable | Through regular oil changes, coolant checks, and addressing minor issues before they become major. |
| Common Seized Components | (When an engine locks up) | |
| Main/Rod Bearings | Very common in lubrication failure | Bearings fuse to crankshaft/connecting rods due to friction and heat. |
| Pistons to Cylinder Walls | Common in overheating/hydro-lock/rust | Piston expands or rust binds them. |
| Crankshaft | Direct result of bearing failure | If bearings fail catastrophically the crankshaft cannot rotate freely. |
| Case Study Observation (General) | Ignoring Warning Signs | Many severe engine failures are preceded by ignored oil pressure lights, overheating warnings, or unusual noises. |
Your Engineering Takeaway
Let’s wrap with the core points you can act on right now.
- Locked up means the rotating assembly will not turn. Separate supply and control faults from mechanical immobility before you apply force.
- Do quick checks first. A dead battery or a seized accessory can look like a seized engine. Removing a belt or decoupling a load often tells you the truth.
- Use the breaker bar test and pull spark or glow plugs to identify hydro-lock. Those two steps confirm or refute a seized engine fast.
- Root causes cluster around lubrication loss, overheating, hydrolock, internal breakage, and long-term storage rust. Electric motors add thermal growth, bearing failure, and rotor-stator rub.
- Your lamination choices drive core loss which drives temperature which drives mechanical stability. Thin, well-insulated laminations and sound stack assembly methods cut heat and reduce lock-up risk in electric machines.
- Pick the right manufacturing route. Stamping scales with low losses. Laser cutting excels for prototypes and complex small runs. Bonded or interlocked stacks preserve magnetic properties and structural integrity.
- When failure is confirmed, weigh repair versus replacement with downtime cost in mind. Engines and motors both offer partial repair paths if damage is limited.
- Prevent with maintenance in the field and with better lamination materials and tolerances in design. Cooler cores run longer. Stable clearances avoid rub. Bearings live happier lives.
If you need to evaluate trade-offs on lamination thickness, grade, and stack assembly for a new project, bring your duty cycle, electrical frequency, target efficiency, and space constraints. You can have a productive conversation with a lamination supplier when you frame the problem in those terms. Ask for loss curves by thickness, insulation class details, stacking factor, and process capability for your geometry. The right partner will help you reduce core loss and heat which lowers the odds that any motor under your watch ever “locks up” in the first place.