How to Make a Permanent Magnet: Your Guide to Magnetic Creation
Of course, here is the article written according to your specifications.
Table of Contents
- How to Make a Permanent Magnet: Your Guide to Magnetic Creation
- Introduction: Unlocking the Mystery of Permanent Magnets
- The Science Behind Permanent Magnetism
- Ferromagnetism: The Key Property
- Hysteresis Loop: Understanding Magnetic Behavior
- Essential Materials for Making a Permanent Magnet
- Core Materials (Ferromagnetic Substances)
- Tools for Magnetization
- Practical Methods: How to Make a Permanent Magnet at Home
- Method 1: The Rubbing Technique (Simple & Accessible)
- Method 2: The Electromagnet Technique (Stronger Results)
- Method 3: Heat Treatment and Magnetization (Advanced DIY/Historical Context)
- Industrial Methods: Beyond the DIY Bench
- Sintering & Powder Metallurgy
- Casting
- Bonding & Injection Molding
- Specialized Magnetizing Equipment
- Factors Affecting Permanent Magnet Strength and Durability
- Material Choice
- Strength of Magnetizing Field
- Heat Treatment
- Shape and Size
- External Factors
- Safety Precautions When Working with Magnets and Electricity
- Common Applications of Permanent Magnets
- Conclusion: The Enduring Power of Permanent Magnets
Introduction: Unlocking the Mystery of Permanent Magnets
I remember being a kid and getting my first real magnet. It wasn’t just a flimsy refrigerator magnet; it was a solid, powerful little block that could snap up a chain of paperclips. I was fascinated. How did this simple piece of metal hold such an invisible, magical force? That question stuck with me, and it eventually led me down a rabbit hole of experiments and learning. It turns out, it’s not magic at all—it’s pure science, and it’s something you can even do yourself.
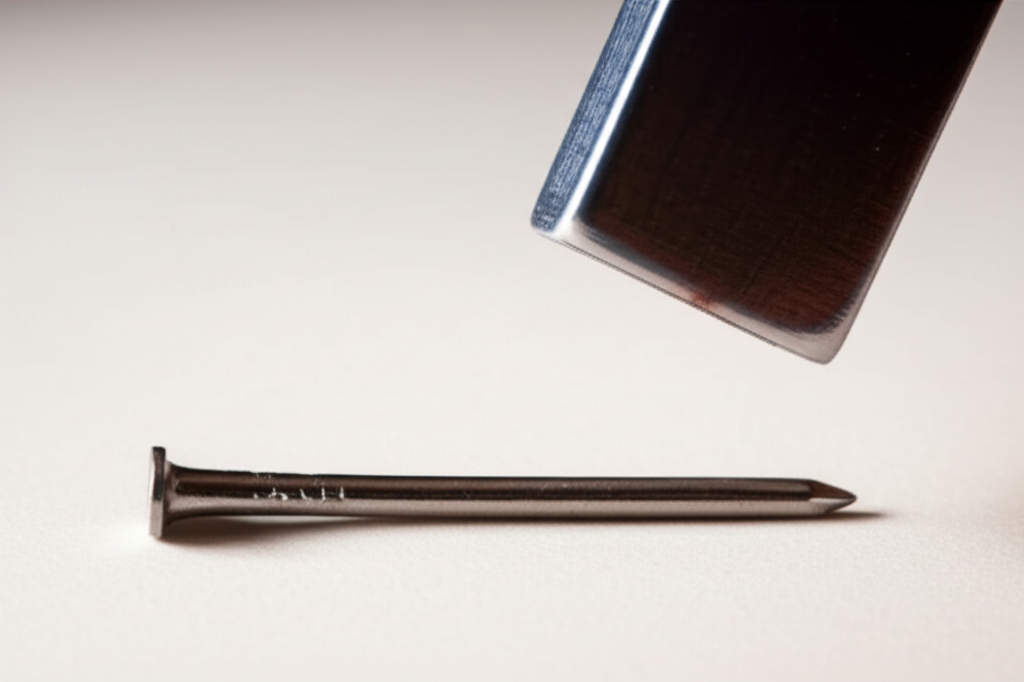
So, what is a permanent magnet? Simply put, it’s a material that creates its own persistent magnetic field. Unlike a temporary magnet, like a nail that’s only magnetic when it’s touching another magnet, a permanent magnet holds onto its magnetism. This ability to attract and repel other magnetic materials is what makes them so incredibly useful in our daily lives.
Learning how to make one isn’t just a fun science experiment (though it’s definitely that!). It’s a fantastic way to get a hands-on understanding of the fundamental principles of physics and materials science. In this guide, I’ll walk you through everything I’ve learned, from the basic science to the practical, step-by-step methods you can try at home.
The Science Behind Permanent Magnetism
Before we start trying to create a magnet, I think it’s crucial to understand why it works. When I first started, I just followed the steps without knowing the “why,” and my results were pretty inconsistent. Once I grasped the core concepts, everything clicked into place.
Ferromagnetism: The Key Property
The secret sauce behind permanent magnets is a property called ferromagnetism. Only a few elements on the periodic table are naturally ferromagnetic at room temperature: primarily iron, nickel, cobalt, and some rare earth elements like neodymium and gadolinium. These materials are special because of their atomic structure.
Inside these materials are tiny, microscopic regions called magnetic domains. You can think of each domain as a tiny, self-contained magnet with its own north and south pole. In an unmagnetized piece of iron or steel, like a regular nail, these domains are all jumbled up. They point in random directions, and their individual magnetic fields cancel each other out. The nail, as a whole, isn’t magnetic.
The goal of making a permanent magnet is to get all—or at least most—of these magnetic domains to align and point in the same direction. When they all line up, their individual magnetic fields add up, creating one large, strong magnetic field that radiates out from the object. This is the magnetization process.
Hysteresis Loop: Understanding Magnetic Behavior
Now, here’s where it gets a little more technical, but stick with me because it explains why some magnets are stronger or more “permanent” than others. Scientists use a graph called a hysteresis loop to describe a material’s magnetic properties. Two key terms from this concept are really important for us:
For our DIY projects, we’re essentially trying to use an external force to align the domains in a material with decent coercivity (like hard steel) so it holds onto its magnetism.
Essential Materials for Making a Permanent Magnet
One of the best parts of this project is that you probably have most of what you need lying around the house. You don’t need a fancy lab to get started.
Core Materials (Ferromagnetic Substances)
The heart of your magnet is the material you choose to magnetize. Here are some common options:
- Steel: This is your best bet for a DIY permanent magnet. High-carbon steel works particularly well. I’ve had great success with things like old screwdrivers (the kind you don’t mind scratching up), large nails, knitting needles, or even sturdy paper clips. Steel has a higher coercivity than pure iron, so it holds its magnetism better.
- Iron: While iron is the classic ferromagnetic material, pure iron actually makes a better temporary magnet. It’s very easy to magnetize but also loses its magnetism just as quickly. An iron nail will work, but don’t expect it to stay magnetic for very long.
- Special Alloys (For Context): The magnets you buy in a store aren’t just plain steel. They’re made from sophisticated alloys designed for maximum performance. You won’t be making these at home, but it’s good to know what they are:
- Alnico magnets (aluminum, nickel, cobalt, iron) are known for being very stable at high temperatures.
- Ferrite magnets (also called ceramic magnets) are the common black magnets you see on refrigerators. They’re brittle but have great corrosion resistance.
- Neodymium magnets (NdFeB) are the superstars. These are a type of rare earth magnet made from neodymium, iron, and boron. They are incredibly powerful for their size but can be brittle and need a protective coating to prevent corrosion.
Tools for Magnetization
Depending on which method you choose, you’ll need a few other items:
- An Existing Strong Magnet: For the simplest method, you’ll need a strong permanent magnet you already have. A good neodymium magnet works wonders here, but a strong refrigerator magnet can also do the job.
- Copper Wire: For the electromagnet method, you’ll need insulated copper wire, often called magnet wire. The enamel coating is crucial insulation.
- Power Source: A simple DC power source is needed for the electromagnet. A D-cell battery or a 6V lantern battery is a great place to start. A variable DC power supply is even better if you have one.
- Iron Filings: These aren’t essential for making the magnet, but they are incredibly cool for visualizing the invisible magnetic flux lines around your newly created magnet.
- Safety Gear: Don’t forget safety glasses, especially if you’re working with wires and batteries. If you ever handle strong neodymium magnets, gloves are a good idea to prevent pinching.
Practical Methods: How to Make a Permanent Magnet at Home
Alright, let’s get to the fun part! I’ll walk you through two simple methods I’ve used successfully and a third, more advanced one for context.
Method 1: The Rubbing Technique (Simple & Accessible)
This is the classic science fair experiment, and it’s the perfect place to start. It works surprisingly well and beautifully demonstrates the principle of domain alignment.
Step-by-Step Guide:
- Pros & Cons: The beauty of this method is its simplicity and safety. The downside is that the magnetic strength is relatively weak and it might not last forever, as the domains can get knocked out of alignment over time.
Method 2: The Electromagnet Technique (Stronger Results)
If you want to create a more powerful magnet, using electricity is the way to go. This method uses the principle of electromagnetic induction to create a very strong, uniform magnetic field that does a fantastic job of aligning the domains.
Step-by-Step Guide:
- Pros & Cons: This method produces a much stronger magnet. However, it involves electricity, which requires safety precautions. The coil can get hot, and short-circuiting a battery can be dangerous.
Method 3: Heat Treatment and Magnetization (Advanced DIY/Historical Context)
This method is how early, high-quality magnets were made, but I want to be very clear: this is not recommended for beginners without proper equipment and supervision. It involves very high temperatures.
The basic idea is to heat a piece of high-carbon steel until it glows red-hot. This temperature is known as the Curie temperature, the point at which a material loses its ferromagnetism and the domains are free to move easily. You then let it cool down while it’s inside a strong magnetic field (like a powerful coil). As the steel cools and regains its ferromagnetic properties, the domains align with the external field and get locked into place by the crystal structure of the metal. This process, which involves quenching steel, creates a very strong and very durable permanent magnet.
Industrial Methods: Beyond the DIY Bench
While our home methods are fun, it’s fascinating to see how the powerful magnets used in modern technology are made. The magnets in an electric car motor or an MRI machine are created through highly controlled industrial processes.
Sintering & Powder Metallurgy
This is the most common method for making high-strength rare earth magnets like Neodymium (NdFeB) and Samarium Cobalt (SmCo). The raw materials are melted, cast into an ingot, and then crushed into a fine powder. This powder is pressed into a mold while being exposed to an incredibly powerful magnetic field to align the particles. Finally, it’s sintered—heated to just below its melting point—which fuses the particles together, locking the alignment in place.
Casting
Alnico magnets are often made by casting. The molten alloy is poured into a mold (often a sand mold) and then undergoes a complex heat treatment process while in a magnetic field. This allows for complex shapes but is a very energy-intensive process.
Bonding & Injection Molding
For applications needing complex shapes or flexible magnets, magnetic powder is mixed with a polymer binder. This mixture can then be injection molded or compression bonded into the final shape. These magnets aren’t as strong as their sintered counterparts but offer great design flexibility.
Specialized Magnetizing Equipment
After the magnet is formed, it’s still just an unmagnetized block of metal. The final step is to place it inside a powerful pulse magnetizer. This device uses massive capacitors to send an enormous jolt of electricity through a coil, generating a magnetic field thousands of times stronger than what we can create with a battery. This is what fully saturates the material, aligning virtually all the magnetic domains.
Factors Affecting Permanent Magnet Strength and Durability
Through my experiments, I’ve learned that not all magnets are created equal. Several factors determine how strong a magnet is and how long it will last.
- Material Choice: This is the biggest factor. A magnet made from a neodymium alloy will always be drastically stronger than one made from steel, thanks to its superior crystal structure and magnetic properties.
- Strength of Magnetizing Field: A stronger external field will align more domains, resulting in a stronger magnet. This is why an industrial pulse magnetizer creates a much stronger magnet than my D-cell battery setup.
- Heat Treatment: For certain alloys like Alnico and steel, a precise annealing process or quenching is critical to creating the right internal structure to “hold” the magnetism.
- Shape and Size: A long, thin shape (like a bar or needle) generally makes a better magnet than a short, wide one because it reduces self-demagnetizing effects.
- External Factors: A permanent magnet isn’t necessarily permanent forever. Strong impacts (like dropping it repeatedly), high temperatures approaching the Curie point, or exposure to a strong, opposing magnetic field can all knock the domains out of alignment and weaken or erase the magnet.
Safety Precautions When Working with Magnets and Electricity
Safety should always be your top priority. Here are a few things I’ve learned to always keep in mind:
- Handling Strong Magnets: Be extremely careful with large neodymium magnets. They can snap together with incredible force, easily pinching skin or even breaking bones. Keep them far away from electronics, credit cards, and pacemakers, as their strong field can cause permanent damage.
- Electrical Safety: When using the electromagnet method, never use a household wall outlet as your power source—it’s incredibly dangerous. Stick to low-voltage DC sources like batteries. Be aware that coils can get hot, and never create a short circuit by touching the bare wires together.
- Heat Safety: If you ever attempt more advanced methods involving heat, use proper protective gear like heat-resistant gloves and work in a well-ventilated area away from flammable materials.
Common Applications of Permanent Magnets
Once you start looking, you’ll see permanent magnets everywhere. They are the unsung heroes of modern technology.
- Everyday Items: They hold your notes on the refrigerator, keep your cabinet doors closed, and are essential parts of speakers and headphones.
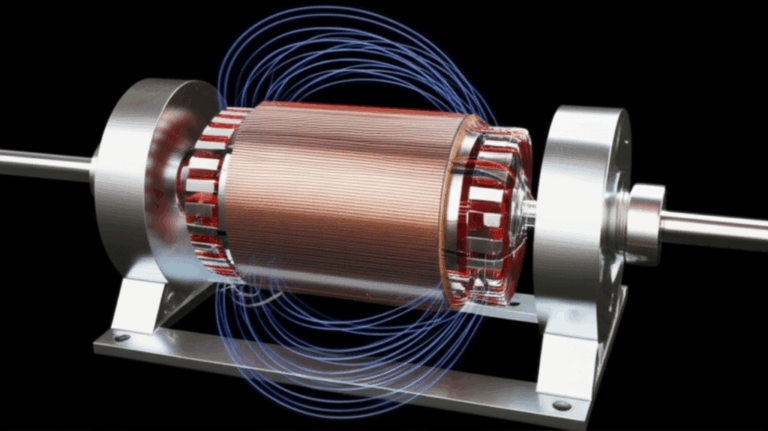
- Technology: They are absolutely critical in electric motors and generators. In fact, the relationship between the stator and rotor in a motor is often defined by powerful magnetic fields. This fundamental motor principle powers everything from your electric toothbrush to massive wind turbines. Specialized materials like electrical steel laminations are often used in these applications to manage the magnetic fields efficiently.
- Medical: The massive magnets in MRI machines create detailed images of the human body, revolutionizing medicine.
- Data Storage: The read/write heads in traditional hard disk drives use tiny, powerful magnets to store bits of data on a magnetic platter.
Conclusion: The Enduring Power of Permanent Magnets
From a simple child’s toy to a critical component in life-saving medical equipment, the journey of the permanent magnet is incredible. What I love most is that this profound scientific principle is something you can explore right on your kitchen table. By stroking a nail with a magnet or wrapping it in a coil of wire, you are directly manipulating the atomic structure of a material, organizing microscopic chaos into a unified, invisible force.
I encourage you to give it a try. Start simple, stay safe, and be curious. You’ll not only create a physical object with fascinating properties but also gain a much deeper appreciation for the unseen forces that shape our world. The power of magnetism is all around us, just waiting to be unlocked.