How to Meg a Motor: The Comprehensive Guide to Motor Insulation Testing that Also Improves Your Lamination Decisions
Every engineer wants reliable motors that run cool, use less energy, and don’t surprise the plant with a 2 a.m. trip. You care about motor health and efficiency plus total lifecycle cost. If you’re weighing how to megger a motor properly and how those results tie back to lamination material, stack quality, or core construction choices you’re in the right place. This guide shows you how to run an insulation resistance test the right way and how to use what you learn to make smarter decisions about stator and rotor core laminations and the processes that build them.
Think of this as an expert consultant on your shoulder. We’ll start with the real problem you face. We’ll explain the engineering fundamentals in plain language. We’ll guide you through the common options for materials and manufacturing. We’ll finish by empowering you with clear next steps.
In short, clarity over complexity.
In This Article
- Introduction: What Is Meggering a Motor and Why It’s Essential
- Understanding Motor Insulation, Laminations, and Common Failure Causes
- Essential Tools and Safety Gear for Meggering
- Safety First: Crucial Steps Before You Begin
- Step-by-Step Guide: How to Perform a Motor Megger Test
- Interpreting Your Motor Megger Test Results
- What to Do if Your Motor Fails the Megger Test
- Frequency of Megger Testing: When and How Often
- The Engineering Fundamentals of Laminations and Core Losses
- Your Options Explained: Materials and Manufacturing Processes
- Which Application Is This For
- Your Engineering Takeaway
Introduction: What Is Meggering a Motor and Why It’s Essential
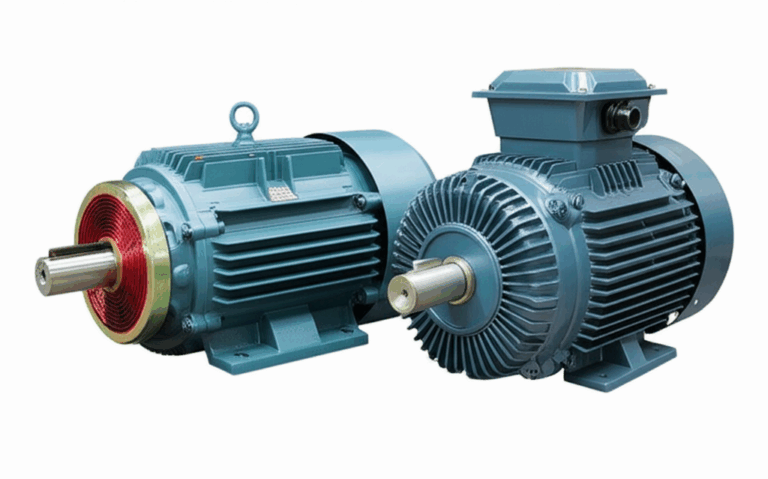
Meggering a motor means performing an insulation resistance test with a megohmmeter. You apply a DC test voltage to a de-energized motor winding and you measure leakage current to ground or between phases. The meter reports insulation resistance in megohms or gigaohms. Higher values indicate healthier insulation.
Why this matters goes beyond pass or fail. Good insulation protects people and equipment from ground faults and phase-to-phase shorts. It also hints at the motor’s internal condition. Moisture ingress, contaminated windings, or heat damage show up as falling insulation resistance long before a winding burns out. If you’re responsible for preventive maintenance, predictive maintenance, or broader asset management you can trend insulation resistance values and reduce downtime. You can also connect the dots between electrical performance and the core itself since poor lamination choices can run motors hotter which accelerates insulation degradation.
Key benefits you’ll see when you meg a motor correctly:
- Enhanced safety for technicians and operators
- Early warning on moisture, dirt, oil, and chemical contamination
- Data for trending and baseline comparisons
- Better conversations with suppliers about materials, stack build, and quality
- Lower total cost through fewer unplanned outages
Understanding Motor Insulation, Laminations, and Common Failure Causes
Insulation in an electric motor separates the winding conductors from ground and from each other. It must withstand thermal stress, electrical stress, mechanical vibration, and environmental contamination. The insulation system includes enamel on the wires, slot liners, phase separators, varnish, and the overall winding-to-frame system.
Common factors that degrade insulation:
- Moisture ingress and humidity: Even a little humidity can cut insulation resistance by orders of magnitude. A dry winding might read above 1 GΩ while the same motor after moisture exposure can drop below 1 MΩ.
- Contamination: Dust, oil, and chemicals form conductive films. Dirt and grime break down insulation resistance and they can accelerate partial discharge in higher voltage systems.
- Overheating and thermal stress: High operating temperatures drive chemical aging. The wrong lamination material or poor stacking increases core losses which raises temperature and stresses the insulation.
- Vibration and mechanical damage: Loose wedges, poor supports, or misalignment can nick conductors or abrade slot liners.
- Age and wear: Insulation materials harden and crack over time.
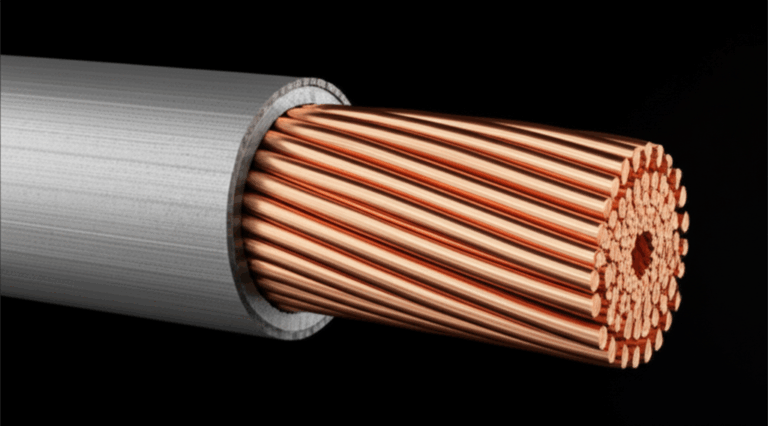
Where do laminations fit into this picture? The stator and rotor core laminations create the magnetic circuit that turns your electrical energy into torque. They also influence heat generation through hysteresis and eddy current losses. Excess core loss means more heat in the stack and higher winding temperature. That pushes the insulation system harder and shortens life. Better lamination material and clean manufacturing help the motor run cooler which protects insulation. We’ll come back to how to choose the right electrical steel and the right manufacturing process later.
Essential Tools and Safety Gear for Meggering
You don’t need a truckload of gear to meg a motor well. You do need the right tool and you must use it safely.
- The Megohmmeter (Megger)
- Types: Digital and analog units both work. Digital megohmmeters offer stable readings, clear megohm to gigaohm ranges, DAR and PI functions, and data logging. Analog units give a visual needle that some technicians like for trending during the test.
- Test voltage ranges: Common test voltages include 250 V DC, 500 V DC, and 1000 V DC for motors up to 1 kV. For higher rated motors you may use higher test voltages that follow IEEE 43 guidance.
- Selection: Match the megger’s test voltage and range to your motor’s rated voltage. For many low-voltage AC motors a 500 V DC test works well and aligns with industry practice.
- Personal Protective Equipment (PPE)
- Electrical gloves rated for the voltage
- Safety glasses or face shield
- Arc-flash clothing compliant with NFPA 70E and your site’s Electrical Safety Program
- Voltage-rated footwear
- Follow OSHA and company policies
- Other Tools
- A trusted multimeter to verify zero energy before testing
- Lockout/Tagout (LOTO) kit
- Screwdrivers, wire brushes, rags, and electrical contact cleaner for terminal cleanup
- Test leads and alligator clips in good condition
- A temperature sensor if you plan to correct resistance readings to 40 °C for better comparison
- Data logging or a simple record sheet for baseline insulation readings
A quick note on the meter itself. Check megger calibration at the intervals your quality program requires. Keep an eye on megger battery life if you run multiple 10-minute PI tests in the field.
Safety First: Crucial Steps Before You Begin
You’re applying DC voltage to a motor winding. Treat this as energized work even though you test a de-energized system.
- De-energize the motor: Open and lock the disconnect switch or circuit breaker that feeds the motor. De-energize both the motor and any connected controls.
- Implement Lockout/Tagout: Follow your LOTO procedure. Attach locks and tags and verify the correct isolation points in the Motor Control Center (MCC) or local disconnect.
- Verify zero energy: Use your multimeter to confirm zero voltage on the line side and at the motor terminals. Discharge capacitors if present such as in single-phase motors or in connected power factor correction banks.
- Isolate sensitive electronics: Disconnect or isolate the Variable Frequency Drive (VFD) from the motor leads. A DC test can damage semiconductor devices if you leave them in circuit.
- Environmental checks: Avoid wet floors and damp areas during testing. Humidity skews readings and creates safety hazards.
- Proper PPE usage: Wear PPE that matches the task. Treat this as a live test risk even though the system is locked out.
If you are unsure about any step stop and bring in a licensed electrician or a qualified technician.
Step-by-Step Guide: How to Perform a Motor Megger Test
Follow a simple sequence. Keep your notes detailed so you can trend insulation resistance values over time.
1) Preparation of the Motor
- Disconnect the motor from all power sources. Verify with your meter.
- If feasible, disconnect the motor from the driven load so you can spin the shaft later for other checks like bearing inspection.
- Clean the terminal box. Use a wire brush and contact cleaner to remove oil, dirt, and corrosion.
- Let the motor cool to ambient temperature if it just came offline. Insulation resistance drops as temperature rises so a hot motor will read low.
- Isolate sensitive electronics such as VFDs or soft starters. Remove cables as needed to ensure your test only stresses the motor windings.
2) Connecting the Megohmmeter
- Connect the megger’s ground or earth terminal to a bare metal point on the motor frame. Scrape paint if needed to get a solid connection.
- Connect the line test lead to the winding terminal under test. For a three-phase motor label or note the terminals as T1, T2, and T3.
- Keep your hands off the clips and terminals once connected. Treat the winding as live during the test.
3) Performing the Tests
- Phase-to-Ground (Winding-to-Frame) Test
- Test each phase to ground individually. Connect the megger line lead to T1 and the earth lead to the motor frame. Apply the test voltage for 60 seconds. Record the insulation resistance reading at 60 seconds. Repeat for T2 to ground and T3 to ground.
- Phase-to-Phase (Winding-to-Winding) Test
- Only run phase-to-phase tests when the windings are isolated from each other. If the motor is built in star or delta you may need to open the leads inside the terminal box or inside the connection area.
- Test T1 to T2 then T2 to T3 then T3 to T1. Apply the same 60-second test for each pair. Record all values. This test spots inter-turn or phase-to-phase weaknesses.
- Dielectric Absorption Ratio (DAR) Test
- Apply the test voltage for at least 60 seconds. Record insulation resistance at 30 seconds and again at 60 seconds. Calculate DAR as IR at 60 seconds divided by IR at 30 seconds. DAR helps on smaller motors when a full 10-minute test is not practical.
- Polarization Index (PI) Test
- Apply the test voltage continuously for 10 minutes. Record insulation resistance at 1 minute and at 10 minutes. Calculate PI as IR at 10 minutes divided by IR at 1 minute. A rising resistance indicates polarization and drying behavior which often means cleaner, drier insulation.
4) After Each Test
- Discharge the winding. Many megohmmeters automatically discharge after a test but you should still short the winding to the frame briefly with a resistor or follow the meter’s discharge procedure.
- Note temperature and relative humidity. You can correct readings to 40 °C for better apples-to-apples trending.
- Restore any connections you lifted such as VFD leads after you complete all tests and after you discharge the windings.
5) Test Voltage Selection Tips
- For AC and DC rotating machinery rated 1000 V or less a 500 V DC test voltage is commonly recommended. Many manufacturers and IEEE 43 guidance align with that practice.
- For higher rated machines you can follow IEEE 43 for test voltage guidance which scales up with nameplate voltage.
Brands like Fluke, Megger, AEMC, Klein Tools, and Amprobe offer capable digital megohmmeters. Choose one that stores readings and calculates PI and DAR if you plan to trend insulation resistance values as part of predictive maintenance.
Interpreting Your Motor Megger Test Results
You now have a set of insulation resistance values for phase-to-ground and possibly phase-to-phase. What do the numbers mean?
- Higher is better. You want values that sit well above your minimum. Gigaohm readings look great on a dry, clean, small motor. Large motors often land lower due to geometry and surface area.
- Minimum acceptable insulation resistance: IEEE Std 43 recommended practice provides a rule of thumb for AC and DC rotating machinery rated 1 kV or less. Use (kV + 1) MΩ at one minute corrected to 40 °C. A 460 V motor has a rated voltage of 0.46 kV so the minimum is roughly 1.46 MΩ at one minute corrected to 40 °C.
- Compare to manufacturer specifications. Some OEMs publish minimum IR values and test voltage recommendations. Always defer to the motor’s manual.
PI and DAR Guidelines
- PI = IR at 10 minutes divided by IR at 1 minute
- Excellent: greater than 4.0
- Good: 2.0 to 4.0
- Questionable: 1.5 to 2.0
- Bad or likely contaminated or wet: less than 1.5
- DAR = IR at 60 seconds divided by IR at 30 seconds
- Good: greater than 1.4
- Questionable: 1.25 to 1.4
- Bad: less than 1.25
What low PI or DAR can indicate:
- Moisture ingress
- Dirt and oil contamination
- Aging or degraded insulation
- Carbon tracking from contaminants
- Thermal stress from overheating
The Importance of Trending
- Establish a baseline on new motors before placing them into service. This becomes your benchmark.
- Correct readings to 40 °C when possible. Temperature correction tightens your trending accuracy.
- Trend by asset. A single one-time test tells you where you stand today. A trend tells you where you’re headed.
Common scenarios:
- High IR with good PI and DAR: Healthy insulation and likely clean windings.
- Low IR with PI around 1.0: Wet or contaminated windings.
- Fluctuating readings between tests: Bad connections or unstable environmental conditions such as high humidity.
- One phase significantly lower than the others: Localized damage or contamination on that winding.
Consider NEMA insulation classes when you interpret. Higher temperature class materials tolerate heat better but they still degrade faster in hot motors. If your IR trend falls over months in a hot, dirty environment you may want to look at both your cooling airflow and your lamination core losses since core loss drives temperature at a given load.
Standards and references worth knowing: IEEE Std 43 for insulation resistance testing and NFPA 70E for electrical safety practices. NETA Acceptance Testing Specifications offer field-proven ranges for PI and DAR as well.
What to Do if Your Motor Fails the Megger Test
Don’t panic. Use a structured approach.
1) Re-clean then retest
- Clean the terminal box and external surfaces. Bake the motor if you see moisture as a likely cause. Low-temperature oven drying or space heaters and desiccant can work for field drying. Avoid overheating during drying.
- Re-test after the motor returns to ambient temperature.
2) Identify the fault type
- If one phase to ground reads low check for nicked insulation, damaged slot liners, or water paths.
- If phase-to-phase tests fail you may have inter-turn insulation problems or contamination between phases.
3) Options after you confirm a fault
- Drying and cleaning solve many moisture-related failures.
- Winding repair or rewind may be required if you find burned or brittle insulation.
- Motor re-insulation or a full rewind becomes the next step for severe damage.
- Replace the motor when repair cost exceeds asset value or when efficiency upgrades make a strong business case.
4) When to call a specialist
- Bring in a motor repair specialist or a licensed electrician when you find persistent low IR that does not respond to cleaning and drying or when you suspect winding damage.
You can also add complementary tests such as winding resistance measurement, surge testing, and power factor testing for motors if you need a deeper diagnostic. Insulation resistance testing remains your first line because it’s quick and safe and it tells you a lot.
Frequency of Megger Testing: When and How Often
- New motor baseline test: Always test new or newly overhauled motors. Record IR at one minute and ten minutes if possible and note temperature and humidity.
- After repairs or extended storage: Run an IR test before you reinstall or energize.
- Preventive maintenance schedules: Critical motors in harsh environments deserve more frequent checks. Quarterly or bi-annually works for many plants. Annual tests suit less critical assets in clean, dry settings.
- Troubleshooting: Test whenever a motor trips unexpectedly or shows unusual behavior such as high running temperature or recurring ground fault trips.
Data logging and record keeping matter. Store readings in your CMMS or reliability program. You can spot trends like seasonal humidity effects or gradual degradation that points to overheating.
The Engineering Fundamentals of Laminations and Core Losses
Let’s step back. Why do laminations matter so much to insulation health and motor reliability? Because core losses turn into heat and heat shortens insulation life.
Two main components drive core loss:
- Eddy current loss: A changing magnetic field induces circulating currents inside the core. Those currents heat the metal. Thinner, insulated laminations reduce eddy currents by breaking up the current paths. Picture a large whirlpool in a river. Laminations act like a series of baffles that split the whirlpool into tiny ripples.
- Hysteresis loss: Every time the magnetic field reverses the material’s magnetic domains flip. That flip costs energy due to the material’s coercivity. Materials with lower coercivity reduce hysteresis loss.
What influences core loss?
- Lamination thickness: Thinner sheets lower eddy current loss at a given frequency.
- Silicon content and alloy: Silicon steel raises electrical resistivity and reduces hysteresis loss compared with plain steel.
- Surface insulation coating between laminations: Proper coating prevents inter-laminar shorts and keeps eddy currents in check.
- Manufacturing quality: Burrs, smearing, and localized heating from cutting can bridge laminations which increases losses. Poor stacking and welds in the flux path do the same.
Lower core loss means lower temperature rise which directly protects the insulation system. In other words a good lamination stack helps your megger readings stay high over time.
Your Options Explained: Materials and Manufacturing Processes
We’ll break this into two parts. Materials first then manufacturing and assembly. Our goal is honest pros and cons for each route so you can choose what fits your design and your budget.
Material Considerations
- Non-oriented Silicon Steel (CRNGO)
- Use case: General-purpose motors that run on AC with flux rotating in the core.
- Pros: Versatile, widely available, good cost-performance balance. Multiple grades such as M36 or M19 with different thicknesses and losses.
- Cons: Higher loss than premium grades. Not ideal for very high frequency.
- Grain-Oriented Silicon Steel (CRGO)
- Use case: Transformers and some specialized machines with unidirectional flux. In motors the flux rotates so GO offers less benefit.
- Pros: Very low loss along the rolling direction. Excellent for transformer lamination core stacks.
- Cons: Not designed for rotating fields and less helpful for motors.
- High-Silicon and Premium Electrical Steels
- Use case: High-efficiency industrial motors, compressors, and HVAC motors where every watt counts.
- Pros: Lower hysteresis and eddy current losses. Cooler running and higher efficiency.
- Cons: Higher material cost and sometimes more challenging stamping behavior.
- Cobalt Alloys
- Use case: High power density or high temperature applications such as aerospace and specialty motors.
- Pros: High magnetic saturation which supports compact designs and high torque density.
- Cons: Very expensive and challenging to process.
- Amorphous or Nanocrystalline Alloys
- Use case: High-frequency applications and specialized equipment. Common in transformers and some high-speed motors.
- Pros: Ultra-low core loss at high frequency due to disordered atomic structure.
- Cons: Costly with manufacturing constraints and limited availability for complex motor shapes.
If you want a concise path through the landscape of electrical steels and stacks review sources that catalog the breadth of electrical steel laminations used in rotating machines and transformers.
Manufacturing and Assembly Processes
- Stamping with Progressive Dies
- Best for: High-volume production of repeatable shapes. Typical for induction and synchronous motors with defined slot counts and diameters.
- Pros: Low per-part cost once tooling is in place. Consistent burr control with well-maintained dies.
- Cons: Upfront tooling investment. Die wear can raise burr height and loss if you don’t maintain it.
- Laser Cutting
- Best for: Prototyping, short runs, complex geometries, and frequent design changes.
- Pros: No tooling. Quick design iteration. Excellent for pilot builds and R&D.
- Cons: Heat-affected zones can alter magnetic properties if you don’t manage cut parameters and post-process. Slower for large quantities.
- Wire EDM or Waterjet
- Best for: Very tight tolerances or when you must avoid thermal effects.
- Pros: Minimal HAZ. High precision. Suitable for specialty rotors and stators.
- Cons: Slow and more expensive than stamping for volume runs.
- Stack Construction and Joining
- Interlocking: Tabs and notches lock laminations like LEGO bricks. You keep magnetic properties intact and avoid welds in critical flux paths.
- Welding: Useful for structural integrity but you must keep welds out of high flux regions to avoid local loss spikes.
- Bonding: Adhesive bonding or backlack coatings produce quiet, rigid stacks with low vibration and excellent interlaminar insulation.
- Cleating or Riveting: Legacy methods that still serve in some designs. Mind the mechanical stress and placement to protect the magnetic circuit.
- Annealing
- Some materials benefit from annealing to relieve stress and restore magnetic properties after cutting. You must control temperature and atmosphere to protect coatings and avoid oxidation.
- Skewing
- Skewed rotor or stator slots reduce cogging torque and acoustic noise in BLDC and induction machines. You’ll trade some complexity in stacking for better smoothness and lower noise.
- Coatings
- Keep interlaminar insulation intact. Choose coatings with the right thermal class and chemical resistance for your environment. Coatings also affect punchability and burr formation.
Material and process decisions ripple through efficiency, temperature rise, and acoustic noise. They also show up later when you megger the motor since lower losses and better stacking mean cooler windings and healthier insulation.
If you’re comparing the role of each subcomponent take a look at how the stator core lamination controls magnetic flux paths while the rotor core lamination handles torque conversion and mechanical stresses. When you consider the full assembly you’ll see why many teams evaluate complete motor core laminations as a system rather than as isolated parts.
Which Application Is This For?
Different applications push different constraints. Match the solution to your use case.
- General Industrial Motors, Pumps, Fans, and Compressors
- Priorities: High efficiency at 50/60 Hz, robust against contamination, low acoustic noise.
- Materials: Non-oriented silicon steel in grades like M19 or M27. Thickness chosen to balance cost and loss.
- Processes: Progressive die stamping with interlocking or bonding. Manage burrs and weld location.
- HVAC Motors
- Priorities: Efficiency with quiet operation. Tight control on hum and vibration.
- Materials and Processes: Similar to general industrial but with more emphasis on skewing and bonding for low noise.
- BLDC and Permanent Magnet Motors
- Priorities: High power density, low cogging torque, tight tolerance stacks, and reduced eddy current in stator teeth due to high PWM switching frequencies from VFDs or controllers.
- Materials: Premium electrical steels or thinner laminations to reduce eddy currents. Consider segmented stator cores.
- Processes: Laser cutting for prototypes then stamping for production. Skewing or tooth shaping to reduce torque ripple. For design inspiration and constraints, review what a modern bldc stator core demands in terms of material and process.
- High-Speed Spindles and Specialty Motors
- Priorities: Very low loss at elevated frequency and high mechanical integrity.
- Materials: Premium non-oriented steels or cobalt alloys in extreme cases.
- Processes: Precision cutting with post-process anneal. Bonded stacks to control vibration.
- Motors in Harsh Environments
- Priorities: Corrosion resistance and insulation systems that handle moisture and chemicals.
- Materials: Standard non-oriented steels with robust coatings. Focus on varnish impregnation and slot liner quality.
- Processes: Bonding and careful weld control. Extra attention to terminal box sealing to avoid contamination that will wreck IR readings.
Be honest about constraints. Laser cutting offers superb flexibility for prototypes and complex stator shapes. Stamping wins on volume and cost for simplified geometries. Bonding builds quiet stacks yet adds process steps. Interlocking reduces welds and preserves magnetic performance yet requires precise tooling.
Bringing It Together: Maintenance, Testing, and Design Feedback Loop
Let’s connect your megger program to design and procurement decisions.
- You run a baseline IR test on a new motor. It reads 200 MΩ at one minute and PI equals 2.8. Great start.
- Six months later you record 40 MΩ at one minute and PI equals 1.6 in a hot, dirty compressor room. You also note higher winding temperatures from your thermal scans.
- Root cause review flags contamination and heat. The heat stems from higher core losses than expected due to a material change or burr issues in the stack. You confirm higher no-load loss on a test bench or via OEM data.
This loop closes when you update material specifications, insist on burr height limits, request bonding instead of welds in high flux regions, and tighten coating specs on laminations. You also refresh PM procedures for cleaning motor terminal boxes and for drying procedures after washdowns. Next quarter your motor insulation resistance stabilizes and PI climbs back above 2.0. Your megger trend just paid for itself.
Practical Nuggets and Field Tips
- Test voltage selection matters. Do not over-stress low-voltage motors with unnecessarily high DC test voltages.
- Keep the surface clean under your alligator clips. Poor contact gives you jumpy readings.
- Separate windings before phase-to-phase tests on star or delta motors. Testing across built-in connections hides problems.
- Use temperature correction to 40 °C for trending and for comparing to IEEE 43 minimums.
- Record relative humidity. You’ll see IR drift with seasons.
- For motors on VFDs, isolate the VFD before testing and consider that high dv/dt switching can stress insulation. PI and DAR trends may drop faster if the insulation system was not designed for inverter duty.
A Quick Word on Standards and Credible Sources
- IEEE Std 43 provides recommended practices for testing insulation resistance of rotating machinery. It covers test voltages, temperature correction, and interpretation.
- NFPA 70E defines arc-flash and electrical safety practices for PPE and procedures.
- NETA Acceptance Testing Specifications summarize field-proven PI and DAR ranges.
- OEM manuals always take precedence for motor-specific pass and fail criteria.
You should not fabricate or guess at values. If a motor’s manual sets a different threshold than a rule of thumb follow the manual.
Frequently Asked Technical Questions
- Does IR testing find every winding fault?
- No. It finds ground faults and gives a global picture of insulation condition. Surge tests and partial discharge tests catch other issues.
- Can I meg a DC motor?
- Yes. The same principles apply to DC motor insulation testing. Disconnect carbon brushes from the commutator if required and avoid stressing sensitive electronic controls.
- How does insulation class affect IR?
- Temperature rating affects long-term aging. It does not set a specific IR value at room temperature. Higher class materials still like cooler operation which ties back to core losses and ventilation.
- Should I test at 1000 V on a 480 V motor?
- Many plants use 500 V DC for motors up to 1 kV and that aligns with IEEE 43 recommended practice. If you need to deviate confirm with your engineering standards.
How Lamination Choices Influence Megger Results Over Time
- Thinner laminations plus good interlaminar insulation reduce eddy currents which reduces core loss and heat.
- Lower heat means slower insulation aging which supports higher IR and stronger PI over the service life.
- Clean cut edges and controlled burr height reduce local hot spots. Welding in low-flux zones avoids localized loss and temperature spikes.
- Bonded stacks cut vibration and noise which reduces mechanical wear on slot liners and end-turn supports.
Your lamination supplier becomes a partner in your insulation health strategy. You pick the right material and the right process. They deliver consistent core lamination stacks. You document IR at commissioning then you watch it hold steady for years.
Your Engineering Takeaway
- Start with the problem
- Insulation failure drives up to a third of motor failures across industries. Good insulation resistance protects people and equipment and avoids costly downtime.
- Understand the fundamentals
- Megger tests measure leakage current to infer insulation resistance. Use 500 V DC for most sub 1 kV motors unless the manufacturer says otherwise. PI and DAR reveal cleanliness and dryness.
- Run a safe and repeatable procedure
- Lockout and tagout every time. Verify zero energy with a multimeter. Isolate VFDs. Test each phase to ground for 60 seconds and consider phase-to-phase when windings are isolated. Discharge after each test.
- Interpret with context
- Compare to IEEE 43 minimums and to OEM specs. Correct readings to 40 °C. Trend IR over time. Low PI or DAR suggests moisture or contamination.
- Act when results dip
- Clean and dry first. Repair or rewind when needed. Consult a specialist when faults persist.
- Close the loop with design and purchasing
- Choose the right lamination material and processes to cut core loss and heat. Set burr limits, weld rules, and coating requirements. Favor bonding or interlocking where it helps magnetic performance and vibration.
- Match the approach to the application
- Stamp for volume. Laser cut for prototypes and complex shapes. Select steels that fit your frequency and loss targets. Skew for noise and cogging control. Selectively use premium alloys where performance demands it.
- Build trust with standards and data
- Use IEEE 43 for testing practices and NFPA 70E for safety. Keep clean records. Baseline every new motor. Trend by asset. Let the data steer both maintenance and design.
Ready to translate test insights into better designs? Bring your latest IR trend, your operating temperatures, and your target efficiency. Then outline material options and stack processes with your lamination partner. You will land on a motor that runs cooler, lasts longer, and avoids those 2 a.m. trips.
Action items you can take this week:
- Create a simple insulation resistance record sheet with temperature and humidity fields.
- Baseline your most critical motors and store results in your CMMS.
- Review lamination material specs for those motors and confirm burr height and coating standards with your supplier.
- Identify VFD-fed motors and plan additional checks since inverter duty stresses insulation differently.
- Schedule a short call with your lamination supplier to align on materials, thickness, joining method, and annealing needs for the next design iteration.
If you want a concise overview of complete motor stacks and how stator and rotor choices interact explore these resources on stator core lamination, rotor core lamination, the breadth of electrical steel laminations, and system-level motor core laminations. They will help you map a clear path from test results to design improvements and purchasing decisions.
Stay safe. Test smart. Design cooler-running machines that keep your plant humming.