How to Mount a Trolling Motor: A Complete DIY Installation Guide for Bow & Transom
Table of Contents
- Introduction: Why This Guide Matters
- What Is a Trolling Motor and Why Does Mounting Matter?
- Which Mount Should You Choose: Bow or Transom?
- What Tools and Materials Do You Need?
- How Do You Pick Thrust and Shaft Length?
- Where Should You Place the Motor on the Bow?
- Step-by-Step: Bow Mount Trolling Motor Installation
- Step-by-Step: Transom Mount Trolling Motor Installation
- How Do You Wire the Trolling Motor for 12V, 24V, or 36V?
- How Do You Test the Motor the First Time?
- What Are Common Mistakes and How Do You Avoid Them?
- Care, Storage, and Maintenance Tips
- Simple Troubleshooting Guide
- References
- Summary: Key Points to Remember
Want smooth boat control in wind and current? A trolling motor gives you quiet power and precise moves. In this guide I show you how to mount a trolling motor the right way. You get clear steps for bow mount and transom mount. You also get wiring tips, safety notes, and simple tests. Read on to save time and avoid leaks or power loss.
What Is a Trolling Motor and Why Does Mounting Matter?
A trolling motor is a small electric motor with a propeller. It helps you move slow and steady. It keeps your boat on a spot. It lets you fish with control. Proper mounting keeps the motor strong and safe. It stops water getting into your boat hull or deck. It keeps the propeller at the right depth. It keeps wires neat and dry.
Here is the Problem. Many people rush. They drill fast. They skip sealant. They pick the wrong shaft length. The motor shakes or the gelcoat chips. The boat leaks or the battery dies.
Now let me Agitate a bit. You hit a stump because the mount slipped. You smell hot wires because the wire gauge is too thin. The circuit breaker trips when a bass bites. Your day on the water turns into a fix-it day.
Here is the Solution. Use this easy step-by-step guide. I cover bow mount and transom mount. I show you wiring with series and parallel connections. I point out 3M 4200 vs 3M 5200 sealant. I help you pick the right trolling motor thrust and shaft length. I also note smart gear like a quick-release bracket and a battery box.
Which Mount Should You Choose: Bow or Transom?
I ask two things. What is your boat type and how do you fish? A bow mount sits on the front deck. It pulls the boat and gives tight control. Anglers love it for casting lines. A transom mount clamps on the transom at the stern. It is simple and fast to set up. It works great on jon boats, kayaks, inflatable boats, and small aluminum boats.
- Bow mount fits bass boats, fiberglass boats, and boats with flat deck room.
- Transom mount fits small boats with no front deck.
- Both types can be hand control, foot pedal, cable steer, electric steer, or remote control.
You can also compare brands. Minn Kota, MotorGuide, Lowrance Ghost, Garmin Force, Newport Vessels, Haswing, and Rhodan make popular motors. Many models add GPS and Spot-Lock. These help you hold a spot even in wind.
What Tools and Materials Do You Need?
You do not need a fancy shop. You need good basics.
- Tools: drill, drill bits for pilot and final size, measuring tape, marker, wrench or sockets, wire strippers, crimping tool, marine sealant gun, safety glasses, gloves.
- Materials: trolling motor, quick-release bracket for bow mount, mounting plate if needed, marine-grade stainless steel bolts, washers, Nyloc nuts, marine sealant like 3M 4200 or 3M 5200, marine wire in the right wire gauge, marine circuit breaker, battery box, deep cycle marine battery or batteries, heat shrink tubing, wire loom, fuse or battery switch, rub rail spacers if needed.
I also keep a few extras on hand.
- Masking tape to protect gelcoat while drilling
- Pilot holes guide screws in fiberglass or aluminum
- Deburring tool to clean drilled holes
- Transom pad for clamp-on motors
- Safety strap for transom motors
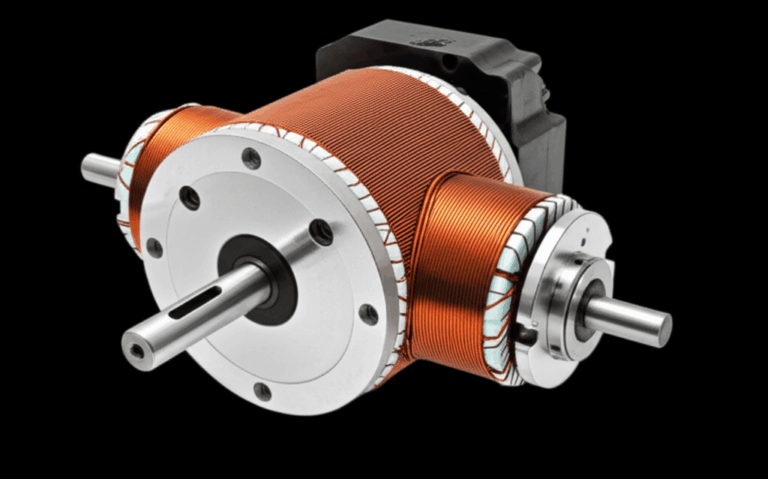
If you want to learn how these motors work inside you can read about the stator and rotor basics. That page shows the heart of the motor in simple terms.
How Do You Pick Thrust and Shaft Length?
You want enough thrust to move the load. You want the right shaft length so the propeller stays under water in chop.
- Small kayaks and tiny jon boats need less thrust. A 30 to 45 lb trolling motor thrust can work.
- Medium bass boats often run 55 to 80 lb thrust.
- Big boats may need 100+ lb thrust and 24V or 36V power.
Here is a simple table you can use.
| Boat Length | Boat Type | Typical Thrust | Voltage |
|---|---|---|---|
| 8–12 ft | Kayak / Small Jon | 30–45 lb | 12V |
| 12–16 ft | Aluminum / Inflatable | 45–55 lb | 12V |
| 16–19 ft | Bass / Fiberglass | 70–80 lb | 24V |
| 19–21+ ft | Heavy / Big Deck | 80–112 lb | 36V |
For shaft length, measure from the deck or transom down to the water line. Add 20–25 inches for bow mounts. Add 12 inches for transom mounts. You want the propeller about 12 inches below the surface. That gives you clean water and quiet pull.
Brands list trolling motor shaft length guide charts. Your owner’s manual will help too. If you fish in waves go a bit longer.
Where Should You Place the Motor on the Bow?
Pick a spot that lets the motor stow and deploy clean. The propeller and shaft must clear the rub rail, navigation light, and anchor. Check bow deck reinforcement and look for a strong core. Some decks need a backing plate.
- Plan the wire run to the battery box and circuit breaker.
- Leave room for a quick-release bracket. It lets you pull the motor for storage.
- Check transducer cable space if you use a fish finder.
- Keep deck clearance for the foot pedal if you use one.
Tape the spot. Lay the paper mounting template from the maker. Mark the drilling points with a marker. Test the overhang so the propeller will sit away from the bow by a few inches.
Step-by-Step: Bow Mount Trolling Motor Installation
I like to go slow here. Measure twice. Drill once.
1) Position and Mark
- Put the quick-release bracket or base on the deck.
- Set the motor so it clears the rub rail and anchor.
- Align with the mounting template. Mark the holes.
2) Drill Safely
- Put masking tape over each mark to protect gelcoat.
- Start with small pilot holes. Step up to final size.
- Keep the drill straight. Use low speed. Do not crack the surface.
- Deburr drilled holes for a clean fit.
3) Seal and Bolt
- Fill each hole with marine sealant. Use 3M 4200 if you want to remove later. Use 3M 5200 if you want a more permanent seal.
- Add stainless steel bolts, washers, and Nyloc nuts. Tighten by hand first.
- Use a wrench to snug the bolts. Do not over-tighten. You can crush the deck.
4) Mount the Motor
- Slide or bolt the motor to the quick-release bracket. Lock the retaining pin.
- Check stowing and deploying. Make sure it drops and locks smooth.
Brands like Minn Kota and MotorGuide include a mounting template. If you install a Minn Kota or a MotorGuide follow the owner’s manual. The same method works for Lowrance Ghost, Garmin Force, Newport Vessels, Haswing, and Rhodan bow mounts.
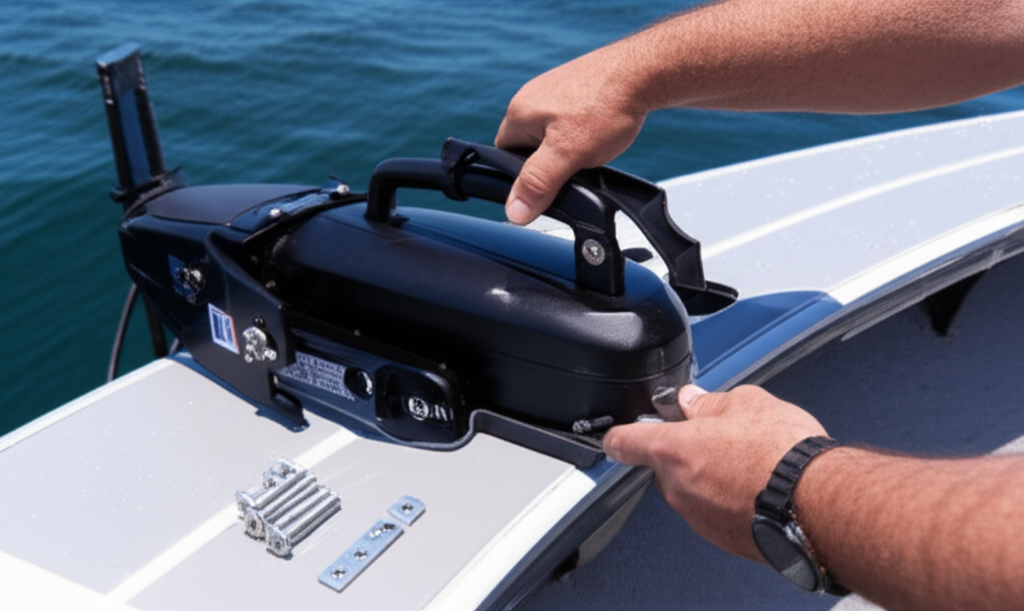
Step-by-Step: Transom Mount Trolling Motor Installation
A transom mount is faster. You still want it safe.
1) Prep the Transom
- Clean the transom. Remove dirt and old sealant.
- Set the motor in the center. You can offset a bit if you must clear a ladder.
- Adjust the shaft so the propeller sits about 12 inches under water.
2) Clamp It Down
- Tighten the built-in transom clamps. Get them snug.
- Add a safety strap around the transom for insurance.
- For rough water you can through-bolt a mount if the brand allows it.
- Use a transom pad if you do not want clamp marks.
3) Final Check
- Wiggle the head. It should not move.
- Step back. Spin the handle. Make sure you have full swing left and right.
- Keep cables clear of the prop.
How Do You Wire the Trolling Motor for 12V, 24V, or 36V?
Good wiring keeps you safe and keeps power strong. Plan the wire path. Use wire loom to protect from chafing. Keep wires away from sharp edges. Use heat shrink connectors and a crimping tool for solid joints. Add a marine circuit breaker as close to the battery as you can. Pick the right amperage from the owner’s manual.
Here is a simple way to think of it.
- 12V System: One marine deep cycle battery. Positive (+) goes from battery to circuit breaker to motor positive. Negative (–) goes from battery to motor negative.
- 24V System: Two 12V batteries in series. Connect the negative of battery 1 to the motor negative. Connect the positive of battery 2 to the circuit breaker then to motor positive. Use a jumper from positive of battery 1 to negative of battery 2 for 24V.
- 36V System: Three 12V batteries in series. Same idea with two jumpers. Positive of last battery goes to circuit breaker then motor positive. Negative of first battery goes to motor negative.
Do not wire parallel unless you want to stay at 12V and extend capacity. Series wiring raises voltage for more thrust. Use the right wire gauge for the run length and amps. Long runs need thicker wire. Use marine-grade tinned copper.
Here is a quick table to guide you. Always check your manual too.
| System | Max Amp Draw | Run Length (Total Feet) | Wire Gauge |
|---|---|---|---|
| 12V 50A | 10–20 ft | 6 AWG | |
| 24V 56A | 10–20 ft | 6 AWG | |
| 36V 60A | 10–20 ft | 4–6 AWG |
Add a battery switch if you want to cut power fast. Add a quick connect plug near the bow so you can pull the motor fast. Mount the circuit breaker within 7 inches of the battery if possible. Protect all exposed joints with heat shrink tubing.
If you want to see how an electric motor uses magnets and coils you can read this simple page on the motor principle. It makes sense once you see the flow.
How Do You Test the Motor the First Time?
Do not drop the prop into dry air at high speed. Use water in a tub or at the lake.
- Flip the battery switch on.
- Check the circuit breaker.
- Turn the motor to speed 1. The propeller should spin smooth.
- Tap forward and reverse. Test hand control or foot pedal.
- If you have GPS or Spot-Lock test those in open water.
Look at the wire run. Make sure there is no chafing. Feel the cables. Warm is normal. Hot is not. Check electrical connections for tight and dry.
What Are Common Mistakes and How Do You Avoid Them?
- Drilling without a mounting template: Use the paper template. Mark your holes. You save time.
- No marine sealant: You invite leaks. Seal the holes. Seal the bolt threads.
- Wrong shaft length: The prop comes out of the water in chop. Measure and pick the right length.
- Too-thin wire gauge: The motor starves for power. Use the right size wire.
- No circuit breaker: You risk a melt down. Always add a breaker with the right amperage.
- Loose clamps on a transom mount: Add a safety strap. Re-check after a few trips.
- Poor cable management: Use wire loom and ties. Keep wires away from the propeller.
I once drilled a bow deck on a fiberglass boat with no tape. The gelcoat chipped. I learned to use masking tape and start with small pilot holes. It looked clean the next time.
Care, Storage, and Maintenance Tips
A little care goes a long way. It keeps your gear strong and safe.
- Rinse the motor after each trip. Salt water loves metal. Fresh water rinse helps.
- Check stainless steel bolts and Nyloc nuts. Re-tighten if needed.
- Look at the sealant line. If you see gaps add more.
- Store the motor dry. Use a quick-release bracket to pull it and keep it safe at home.
- Keep batteries charged with a smart battery charger. Do not let them sit dead.
- Add corrosion prevention spray to metal parts.
- Stow the motor straight. Lock it down. Use a safety strap.
Keep your propeller clean. Cut off line that wraps the shaft. Check the motor head direction so it points true. Adjust shaft depth for the day.
If you are curious about the metal packs inside many motors you can study the electrical steel laminations. They help cut losses and boost efficiency. You can also look at the details of a stator core lamination which is the fixed part that holds coils.
Simple Troubleshooting Guide
You can fix many issues fast.
- No power: Check the circuit breaker. Check fuse. Check the battery switch. Test positive and negative connections.
- Weak power: Check wire gauge and run length. Inspect for corrosion. Charge the battery. Make sure you did series wiring right for 24V or 36V.
- Prop will not spin: Clear weeds. Remove the propeller and check for line. Re-seat the prop.
- Motor steers slow: Lube the pivot per owner’s manual. Check cable steer or electric steer parts.
- GPS or Spot-Lock drifts: Calibrate the compass. Update the unit per brand steps.
- Breaker trips: Use the right amperage breaker. Check for shorts. Make sure heat shrink connectors are sealed.
If you want a deeper dive into common faults you can read about a typical motor problem. It gives you a simple way to think about root cause.
Examples: Boats and Special Setups
- Bass boat bow with Minn Kota or MotorGuide: Use a quick-release bracket. Keep clear of the anchor and navigation light. Plan for a foot pedal on the deck.
- Kayak trolling motor mounting: Many use a side mount plate or a stern mount. Keep wires inside wire loom. Use a small battery box. A 30 lb thrust at 12V often works.
- Jon boat trolling motor setup: A clamp transom mount works well. Add a safety strap. Use a transom pad if you remove the motor often.
- Pontoon boat trolling motor installation: Use a strong mounting plate. Many add an adapter bracket. It keeps the propeller clear of the deck edge.
- Inflatable boat trolling motor mount: Use a solid transom board. Keep the circuit breaker near the battery and up high to stay dry.
Best Practices and Pro Tips
- Use marine-grade fasteners. Do not use hardware store zinc bolts on a boat.
- Check mounting bolt torque settings in your owner’s manual.
- Use through-bolting on the bow when you can. It beats wood screws.
- Add a quick connect plug for clean removal.
- Protect wires from chafing with wire loom.
- Keep a spare prop and pin in the boat.
- Use heat shrink on every crimp. It keeps water out.
- Seal every screw hole with marine sealant.
- Use a battery box with tie-down straps to secure the battery.
- Plan cable management so the foot pedal cords do not snag.
Brand Notes and Where to Buy
You can find gear at West Marine, Bass Pro Shops, Cabela’s, and Amazon. Follow the brand guide for your model.
- Install steps for “how to install a Minn Kota” match the bow mount steps above.
- Steps for “how to install a MotorGuide” follow the same path with different hole patterns.
- Lowrance Ghost and Garmin Force add GPS steering and Spot-Lock style hold. Plan power for 24V or 36V. Use the right circuit breaker.
If you add a transducer to the trolling motor, route the cable along the shaft with soft ties. Leave enough slack to turn. Do not pinch the cable in the bracket.
Quick Table: Bow vs Transom Mount Pros and Cons
| Mount Type | Pros | Cons |
|---|---|---|
| Bow Mount | Precise control. Best for casting and drifting. Works with GPS and Spot-Lock | More drilling. Needs strong deck and room |
| Transom Mount | Fast setup. Great for small boats and rentals | Less precise. Can cavitate in chop |
PAS in Action: Why This Guide Helps You Now
- Problem: You want a clean trolling motor installation. You fear drilling your fiberglass deck. You wonder about wiring diagrams and correct propeller depth.
- Agitate: You picture water inside the gelcoat. You see a loose mount that rattles. You imagine a long day with no thrust because the circuit breaker trips.
- Solution: Follow the steps in this guide. Use a mounting template, pilot holes, and marine sealant. Use proper wire gauge and a marine circuit breaker. Add a quick-release bracket and battery box. Test it smart. Fish with a smile.
References
- Manufacturer Owner’s Manuals: Minn Kota, MotorGuide, Lowrance Ghost, Garmin Force, Newport Vessels, Haswing, Rhodan
- ABYC E-11 Electrical Systems for Boats (for wiring best practices)
- Retailer guides at West Marine, Bass Pro Shops, Cabela’s
- Brand support pages for Spot-Lock, GPS setup, and remote control pairing
Summary: Key Points to Remember
- Pick the right mount type: bow mount for control or transom mount for speed.
- Choose the right thrust and shaft length for your boat and water.
- Use a mounting template, pilot holes, and masking tape to protect gelcoat.
- Seal every hole with 3M 4200 or 3M 5200. Tighten stainless steel bolts with Nyloc nuts.
- Plan electrical connections. Use proper wire gauge, heat shrink connectors, a marine circuit breaker, and a battery box.
- Test in water at low speed. Check prop spin, foot pedal, and GPS functions like Spot-Lock.
- Maintain the setup. Rinse after use. Inspect fasteners, sealant, and wires. Store with a quick-release bracket.
- Avoid mistakes like under-sizing wires, skipping sealant, or misplacing the mounting bracket.
- Use series wiring for 24V and 36V systems. Use parallel wiring only to add capacity at 12V.
- Keep a simple toolkit onboard: wrench, spare prop, fuses, and ties for cable management.