How to Replace a Windshield Wiper Motor: A Complete DIY Guide
Table of contents
- How to Replace a Windshield Wiper Motor: A Complete DIY Guide
- Is Your Wiper Motor Failing? Common Symptoms
- Essential Tools and Materials
- Safety First: Before You Begin
- Step-by-Step Windshield Wiper Motor Replacement Guide
- Step 1: Remove Wiper Arms
- Step 2: Access the Wiper Motor (Cowl Panel Removal)
- Step 3: Disconnect the Old Wiper Motor
- Step 4: Remove the Wiper Motor
- Step 5: Install the New Wiper Motor
- Step 6: Test the New Wiper Motor
- Step 7: Reinstall Cowl Panel and Wiper Arms
- Step 8: Final Check
- Troubleshooting Common Wiper Motor Issues After Replacement
- DIY vs. Professional: Cost and Time Considerations
- FAQs About Wiper Motor Replacement
- Conclusion: Get Your Wipers Working Reliably Again
I still remember changing my first windshield wiper motor in a pounding rainstorm week. The wipers on my old Honda Civic stopped in mid-sweep on the highway. I white-knuckled to the shoulder. Not fun. I diagnosed a failed motor that night. Next day I swapped it in my driveway with basic tools. Since then I’ve replaced wiper motors on friends’ Ford F-150s and a Subaru Outback. Same story each time. The job looks intimidating because everything hides under the cowl panel. In practice it’s a straight shot if you take your time and follow a sequence.
In this guide I’ll walk you through the entire process. I’ll cover common symptoms and quick tests. I’ll show you the tools you need. I’ll share the step-by-step from removing the wiper arms to aligning the park position. I’ll also flag gotchas that can slow you down like seized wiper arms and brittle cowl clips. If you’re wondering whether to try this yourself or pay a mechanic I’ll break down realistic time and cost too.
By the end you’ll know exactly how to change a windshield wiper motor and how to avoid common mistakes that cause wipers to park crooked or smack the cowl.
Is Your Wiper Motor Failing? Common Symptoms
When your wipers act up you need to confirm the motor is the culprit. I always start with symptoms:
- Wipers not moving at all. You flip the stalk. Nothing happens. No noises. No partial movement.
- Wipers move slowly or intermittently. They drag like they’re in molasses or stop randomly mid-sweep.
- Only one speed works. High might run while low and intermittent don’t. Or the opposite.
- Wipers get stuck in the middle of the windshield. Then start again after a bump.
- Grinding or humming noises from the wiper assembly. That low hum can signal a motor trying to turn with seized linkage or worn motor brushes.
I also look for these clues:
- Blown wiper motor fuse. A short or a locked linkage can pop it.
- Bad wiper relay. If the relay doesn’t click you won’t get power to the motor.
- Failed intermittent control module or BCM involvement on some cars. Many modern vehicles run the wipers through a control module.
- Seized wiper linkage or wiper transmission. The motor strains or hums but the arms don’t move. Corrosion in the pivot posts is common.
- Wiper arms stripped on the splines. The motor shaft turns but the arms slip.
If you’re not sure what you’re hearing try this. With the hood open and cowl panel still on listen while someone cycles the stalk. A faint click in the fuse box often points to the relay energizing which is good. A steady hum from under the cowl with no arm movement points toward a seized linkage or a dying motor.
Quick primer on how the motor behaves helps too. A wiper motor is a small electric motor with reduction gears and an internal park switch. That park switch tells the wipers where to stop. If it fails the wipers won’t park at the bottom. They might stop wherever you shut them off.
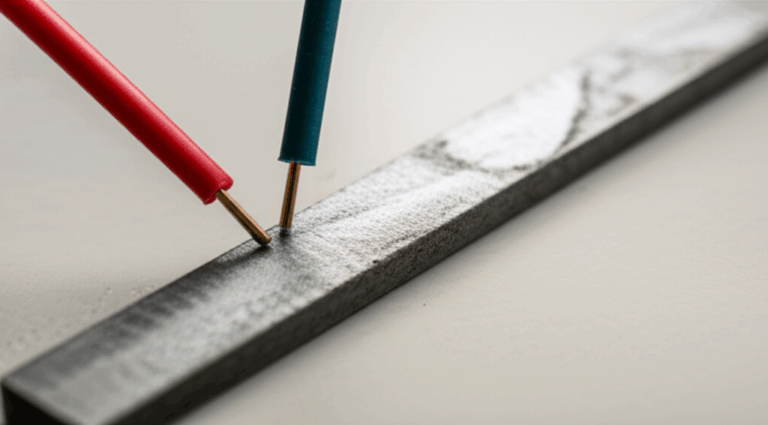
If you want a deeper background on what makes motors spin and how torque gets generated you can skim the basics here: motor principle. For the moving parts inside any motor the stator and rotor and the quality of motor core laminations affect efficiency and heat. You don’t need to be an engineer to swap the motor. I just find a tiny bit of theory helps when you test power and ground.
Essential Tools and Materials
Here’s what I keep on hand for a wiper motor replacement. You won’t need every single item for every vehicle yet this list covers most cases.
- New wiper motor. Get one specific to your year make and model. OEM or quality aftermarket like Bosch Denso ACDelco or Dorman. Check warranty.
- Socket wrench set. Deep and shallow sockets help. Common sizes for cowl and arm nuts live in the 10 mm to 15 mm range.
- Screwdrivers. Phillips and flathead.
- Trim removal tools. You’ll pop plastic clips without breaking them.
- Wiper arm puller. Highly recommended if the arms are stuck on the splines. Saves the arm and the shaft.
- Torque wrench. For reinstalling the wiper arm nuts to spec if your manual gives a value.
- Multimeter. For voltage tests and continuity. A must if you’re troubleshooting the circuit.
- Penetrating oil. For stubborn arm splines and rusted bolts.
- Lithium grease. For the wiper linkage pivots if you’re servicing them.
- Anti-seize compound. Light coat on the wiper arm splines during reassembly helps next time.
- Zip ties. For tidying the wiring harness or washer lines.
- Shop rags and a small magnet. The magnet catches dropped nuts in the cowl.
- Safety glasses and work gloves. Plastic clips love to snap without warning.
I also keep the vehicle’s manual or a Haynes/Chilton book nearby because it shows cowl panel fastener locations and torque specs. Some cars hide screws under weatherstrip or corner caps. A quick look saves time.
Safety First: Before You Begin
I’ve seen people skip this and get a spark show. Don’t.
- Disconnect the battery. Remove the negative terminal. You’ll open connectors near the windshield and you don’t want live circuits while your hands are in there.
- Park on level ground. Engage the parking brake. Give yourself room to work with the hood open.
- Mark wiper positions. Before you remove anything mark where the blades rest on the glass with masking tape. That helps you put the arms back in the right spot.
- Protect the glass and cowl. Set a towel along the bottom of the windshield. It catches dropped tools and keeps you from scratching the glass.
- Consult your manual. Some vehicles need special steps for the cowl panel removal or have rivets. Plan that out first.
Step-by-Step Windshield Wiper Motor Replacement Guide
The exact path varies a bit by vehicle. For example a Toyota Camry or Honda Civic keeps the wiper motor and linkage under the plastic cowl near the base of the windshield. A Ford F-150 does the same but the cowl may have more fasteners. The process below works for most front wiper motor replacements. A rear wiper motor on an SUV or hatchback sits under the rear trim on the liftgate. Same principles apply but you remove the inner panel instead of the cowl.
Step 1: Remove Wiper Arms
- Pop off the plastic caps that cover the wiper arm nuts.
- Loosen and remove the nuts. Keep them in a tray so you don’t lose them down the cowl.
- Wiggle the arms. Rock them gently off the tapered splines. If they won’t budge use a wiper arm puller. A couple turns and the arm lifts cleanly without bending anything.
- Set the arms aside in a safe spot. Keep the blades from catching on anything.
Tip: Mark the resting position on the glass with tape before you lift the arms. It speeds up final alignment.
Step 2: Access the Wiper Motor (Cowl Panel Removal)
- Remove the rubber hood seal if it sits on top of the cowl panel.
- Identify all the cowl panel clips screws or bolts. I use a trim tool to lift plastic clips so they don’t break. Work left to right so you don’t miss anything.
- Watch for hidden fasteners. Many cars tuck a screw under a corner cap near the A-pillars. Some use plastic rivets that you have to push through.
- Disconnect the washer fluid hose at a junction. Cap the hose so it doesn’t drip.
- Lift the cowl panel out carefully. Some vehicles use two-piece cowls. Remove the upper then the lower piece.
- Set the panel aside flat so it doesn’t warp.
Note on water leaks after cowl removal. When you reinstall make sure the foam seals sit correctly and the panel clips fully. A misaligned cowl can let water into the cabin air intake.
Step 3: Disconnect the Old Wiper Motor
- You’ll see the wiper linkage also called the wiper transmission bolted to the body with the motor attached.
- Disconnect the electrical connector to the motor. Press the tab and pull straight. If it’s stubborn use a small pick to lift the locking tab.
- Detach the linkage from the motor’s output shaft. The linkage usually connects with a small nut or a clip on the motor shaft. Mark this relationship if needed. That helps with park position later.
If the linkage bushings look worn or the pivots feel gritty plan to service or replace the linkage. A seized linkage can burn out a new motor.
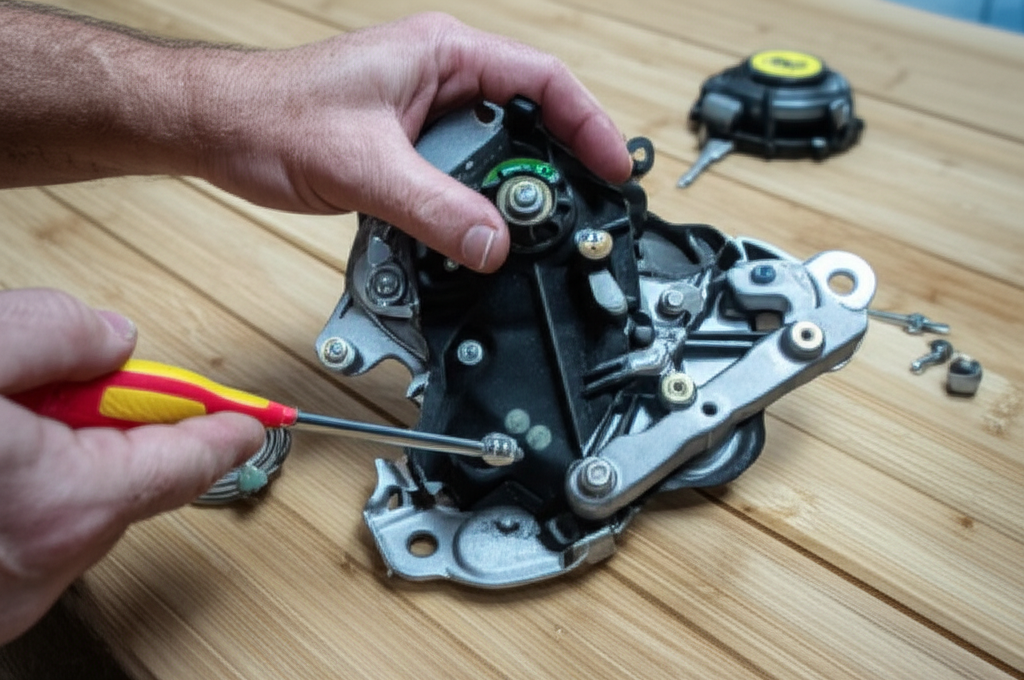
Step 4: Remove the Wiper Motor
- Unbolt the motor from its mounting bracket. Most use three bolts.
- Some vehicles mount the motor and linkage as one assembly. In that case remove the whole assembly. Then separate the motor on your bench.
- Lift the motor out. Watch the harness so you don’t snag it.
Before you toss the old motor glance at the gear housing. Many wiper motors use plastic gears that can strip. If you see chewed teeth and a weak smell of burnt electronics you found your failure.
Step 5: Install the New Wiper Motor
- Compare the new motor to the old one. Check connector shape bolt pattern and shaft orientation. If the listing shows it fits but the connector differs you might have the wrong part number.
- Attach the new wiper motor to the bracket or linkage using the original bolts. Snug them down evenly.
- Reconnect the linkage arm to the motor’s shaft. Make sure the linkage pivots move freely. I like to clean and lightly grease each pivot with lithium grease.
- Reconnect the electrical connector. Make sure it snaps in fully.
- Add a thin film of anti-seize on the wiper arm splines now. That helps next time you remove the arms.
Wiper motor alignment and park position matter. If you moved the linkage off the motor gear in step 3 you may need to clock the motor to its park position before connecting the linkage. I usually power the motor briefly on the bench to get it to park. Then I attach the linkage in the correct orientation. You can also do a quick in-vehicle test in the next step before you install the arms.
Step 6: Test the New Wiper Motor
- Reconnect the negative battery cable.
- Turn the ignition to ACC or ON. No need to start the engine.
- Cycle the wipers through low high and intermittent. Watch the linkage move. Verify the motor runs smoothly. Listen for binding or clunks.
- Turn the wipers off. The linkage should return to the park position. If it stops too high or too low adjust the linkage on the motor shaft to correct it.
- If the motor does not run check the fuse and the wiper relay. Check the ground wire and harness plug. A multimeter test here helps.
I never put the cowl panel back on until the motor parks correctly. Adjustments are easy with everything exposed.
Step 7: Reinstall Cowl Panel and Wiper Arms
- Disconnect the negative battery cable again for safety before you button it up.
- Reinstall the cowl panel in the reverse order. Seat every clip. Reinstall screws and bolts. Reconnect the washer hose at the junction.
- Lay the wiper arms on the splines aligned with your tape marks or the service manual specs. Most cars park just above the base of the windshield without touching the cowl.
- Install and tighten the wiper arm nuts. If you have torque specs use a torque wrench. If not bring them snug and then a bit more. Don’t overdo it or you risk stripping the splines.
- Pop the plastic caps back on.
Step 8: Final Check
- Reconnect the battery.
- Spray the windshield with water or washer fluid. Run the wipers at all speeds. Check for full sweep without hitting the cowl or each other.
- Confirm the wipers park neatly at the bottom. If they park a little high lift the arm off the splines and move it one tooth lower. Retighten the nut and retest.
- Inspect under the cowl area for any loose wires or hoses. Make sure the cowl panel sits flush and the weatherstrip seals.
At this point your wipers should run like new.
Troubleshooting Common Wiper Motor Issues After Replacement
Stuff happens. Here’s how I troubleshoot typical problems after installing a new motor.
- Wipers still not working. Check the wiper motor fuse location in the fuse box. Verify the fuse is good and the correct amperage. Swap the wiper relay with a similar known-good relay for a quick wiper motor relay test. Confirm power and ground at the motor connector with a multimeter. You should see battery voltage at the high or low speed pin when those modes are commanded. Check the wiper motor ground wire for continuity to chassis. If you have power and ground and the new motor does nothing the motor could be faulty out of the box.
- Wipers not parking correctly. This comes down to linkage alignment or motor park position. Remove the arm from the motor shaft and clock the linkage one or two splines. Some motors allow adjustment at the linkage ball joint instead. Always test with the cowl off before final assembly.
- Wipers hit each other or the cowl. Re-adjust wiper arm placement on the splines. Use the tape marks and the manual’s sweep diagram if available. Check that the arms are on the correct sides if they are different lengths.
- Intermittent works but low/high do not. Or the opposite. Suspect the switch, the control module, or the wiring. Some vehicles use a wiper control module integrated into the motor assembly. Others run through a body control module. A wiring diagram and a multimeter will point you in the right direction.
- Slow wipers. Check the linkage pivots for binding. Lubricate or replace the wiper transmission. Low voltage due to corroded connectors can also slow the motor. Clean and tighten the ground connection.
- Motor hums but arms don’t move. The motor spins yet the output gear may be stripped or the linkage popped off its ball joint. Inspect the motor gear housing and the linkage connections.
- After replacing wiper motor issues. If everything worked before reassembly then stopped after you installed the cowl you may have pinched a wire or knocked the connector loose. Pop the cowl back off and check.
If you’re unsure about the electrical path think of it like a simple series of checkpoints. Power leaves the fuse then passes through the relay and the stalk switch or control module. It reaches the motor through the wiring harness and returns to ground. A failure anywhere along that path stops the show.
DIY vs. Professional: Cost and Time Considerations
I’ve done this job in 45 minutes on an easy car and I’ve spent a full afternoon chasing a stubborn seized wiper arm on a salty truck. Here’s what I tell friends when they ask about cost and time.
- DIY part cost. Expect about $50 to $250 for a decent aftermarket wiper motor. OEM can run $80 to $400 or more depending on the vehicle.
- Labor time. Most cars fall in the 1 to 3 hour range. A straightforward sedan is closer to one hour. European luxury models and anything with a complex cowl can run longer.
- Shop labor cost. Shops typically charge $100 to $200 per hour. So you’ll pay $100 to $600 for labor plus the part.
- Total professional repair. You might see $180 to $1000 or more all in depending on the part and the vehicle. Location and shop rates matter a lot.
Is changing a wiper motor hard. I’d call it a moderate 6 out of 10. If you can remove interior panels and swap a blower motor you can do a wiper motor. The trickiest parts are cowl panel removal without breaking clips and dialing in the park position.
What about a used wiper motor. I’ve used salvage yard motors in a pinch. It can save money but it’s a gamble. You don’t know how long it sat or if water intrusion already started. If you go used pick the cleanest one you can find. Check the date codes. Ask about a return policy. I still prefer new or remanufactured with a warranty for this job.
Where to buy a wiper motor. I’ve had good luck with local parts stores like AutoZone Advance Auto Parts O’Reilly and NAPA. Online options like RockAuto often have better pricing and more brands in stock. Look for reputable names and check reviews. OEM vs aftermarket both work if you match the part number and the connector.
Practical Diagnostic Tips Before You Replace Anything
I always confirm the motor is the problem. A couple 5 minute checks can save you from replacing the wrong part.
- Check the fuse. Use the diagram on the fuse box cover. Replace a blown fuse once. If it pops again suspect a shorted motor or seized linkage drawing too much current.
- Listen to the relay. Have someone move the stalk while you touch the relay in the fuse box. You should feel a click. No click can mean a bad relay or a stalk switch issue.
- Voltage test at the connector. With the motor unplugged and the ignition ON back-probe the connector. Command low. You should see 12 V at the low speed pin. Command high and you should see 12 V at the high speed pin. If you have voltage on command the switch and relay are working.
- Ground test. Check continuity from the motor ground pin to chassis. A bad ground wire can look exactly like a bad motor.
- Direct power test. On the bench you can power the motor directly with fused jumper wires for a quick functional test. Only do this if you know the pinout. Polarity matters.
If you ever want to know why ground quality and core materials affect motor behavior at a deeper level you can browse more here on electrical steel laminations. That background is optional. It does explain why some motors run cooler and last longer.
Vehicle-Specific Notes That Have Helped Me
- Ford F-150 and GMC Sierra. The arms love to seize on the splines. A real wiper arm puller saves the day. Don’t pry under the arm with a screwdriver or you’ll chip the glass.
- Honda Civic and Toyota Camry. The cowl uses delicate clips. I pry where the manual shows and I use a trim tool with a wide blade. The washer hose often has a quick connector you can separate without tools.
- VW Golf BMW E90 Mercedes C-Class and Audi A4. Access can be tighter. Plan extra time to remove additional trim near the cowl. Some European cars park the wipers lower and have tight tolerances. Test carefully before reinstalling the cowl.
- Subaru Outback and Jeep Grand Cherokee. The linkage pivots corrode in the rust belt. If the wipers move slowly check those pivots before blaming the motor.
- Rear wiper motor on SUVs. The wiring passes through the liftgate boot which can crack and break wires. If the rear motor doesn’t work check for power at the motor and inspect the boot for broken conductors.
If you’re unsure about fastener locations a quick search with your year make and model plus “cowl panel removal” or “wiper linkage removal” often turns up a YouTube walkthrough or a forum thread that covers hidden clips.
Brands and Part Choices: OEM vs Aftermarket
I get this question a lot. Should you buy OEM or aftermarket. Here’s how I decide.
- OEM. You’ll usually pay more. The fit and the connector match perfectly. It feels plug and play. If the price difference is small I go OEM.
- Quality aftermarket. Bosch Denso ACDelco and Dorman produce solid replacements. I look for a warranty and good reviews. I avoid no-name parts with vague specs.
- Used. It can work if you need a quick cheap fix. I use it only if I can test the motor in the yard and I have a backup plan.
Check the part number and the connector shape. Some models got mid-year changes. If your car falls in that transition verify the exact fit by VIN when possible. You can also bring the old motor to the parts counter to match it.
Preventing Wiper Motor Issues
Motors fail from age but we can stretch their lifespan.
- Don’t run wipers on dry glass. It adds drag and heat.
- Lift the blades before a snowstorm. Frozen blades can overload the motor and strip the gears.
- Replace worn wiper blades. They chatter and bind which adds load.
- Once a year lift the cowl edge and spray a tiny bit of lubricant on the linkage pivots if accessible. Keep it off the glass.
- Keep the cowl drains clear. Standing water near the motor invites corrosion and water intrusion.
FAQs About Wiper Motor Replacement
Q: Can I drive without a working wiper motor
A: Not safely in rain or snow. In many places it is illegal to drive without functioning wipers when conditions require them. If your wipers fail mid-trip and rain starts pull over. Wait it out or use a safe route to a shop. Don’t gamble with visibility.
Q: How do I know if it’s the motor or the fuse or the relay
A: Start with the fuse. Replace it once. If it pops again suspect a seized linkage or short. Then listen for the relay click when you move the stalk. If the relay clicks and you have power at the motor connector but the motor does nothing the motor is bad. If there’s no power at the connector trace back to the relay and switch or control module.
Q: Is a used wiper motor a good idea
A: It can be if cost matters and you can test it. I prefer new or remanufactured with a warranty since the job can take time. If you install a used motor and it fails early you do the labor twice.
Q: Do I need a wiper arm puller
A: I highly recommend it. Those arms love to lock onto the splines. A puller removes them cleanly without bending the arm or cracking the windshield. It’s cheap insurance.
Q: How long does a wiper motor replacement take
A: Plan 1 to 3 hours for most vehicles. Your first time runs longer. Set aside a calm afternoon and you’ll finish without rushing.
Q: What if my wipers only work on high
A: That can point to the switch or the intermittent control. Check power at the motor connector in each mode. If you only get voltage on high the upstream control is suspect. Some cars integrate the intermittent function into a small board on the motor itself.
Q: My wipers park too high after I replaced the motor. How do I fix it
A: Pull the arms off the splines and move them down a tooth or two. If that doesn’t fix it reclock the linkage on the motor shaft so the internal park switch lines up with the blade resting position.
Q: Do I need to use a torque wrench on the wiper arm nuts
A: If your manual provides a spec follow it. If you don’t have a spec snug the nut down so the arm doesn’t slip on the splines then add a bit more. Don’t overtighten.
Q: Where can I find a wiring diagram or torque specs
A: Your owner’s manual sometimes lists specs. A Haynes or Chilton repair manual usually has diagrams. Model-specific forums often share photos and tips. YouTube can be a goldmine for visual guidance too.
When It’s Not the Motor: A Short Diagnostic Path
Here’s my simple flow when the wipers fail:
- No action and no noise. Check the fuse and relay first. Then check for power at the motor connector in low and high.
- Relay clicks but no movement. Check for power at the motor. If present test the motor on the bench. If the motor runs on the bench check the ground and the linkage for binding.
- Motor hums. Disconnect the linkage from the motor. If the motor runs free the linkage is seized. Service or replace the wiper transmission.
- Wipers sweep then stop randomly. Suspect the internal park switch in the motor or corroded connections. Replace the motor if the switch is integrated.
If you’re curious about the pieces inside and how magnetic losses and laminations shape motor performance you can take a quick detour to the basics of stator and rotor and the role of motor core laminations. You don’t need this to finish the job. It just adds color to what’s happening behind the cowl.
DIY Tips That Save Time and Headaches
- Photograph everything before you take it apart. I snap a photo of the linkage orientation and the wiring harness routing.
- Tape your socket. A tiny dab of tape inside the socket holds a small bolt so it doesn’t fall under the cowl.
- Label left and right wiper arms if they differ in length. You’ll avoid swapping them.
- Keep your fasteners grouped by step. I use small cups or labeled bags.
- If a clip snaps don’t sweat it. Most parts stores carry generic cowl clips. Replace any that feel loose.
- Clean the glass and the blades before your final test. You’ll get a truer sweep and less chatter noise.
DIY vs. Professional: Cost & Time Considerations
DIY saves money yet it costs your time. If you have basic hand tools and patience you’ll do fine. Expect 1 to 3 hours. You’ll spend $50 to $250 for the motor if you go aftermarket. A professional will add $100 to $600 in labor. Total out-of-pocket runs $180 to $1000 or more depending on the vehicle and part choice.
I lean DIY on most wiper motor jobs unless access is extreme or the cowl is integrated with a complex trim piece on a high-end car. If your vehicle buries the motor under multiple panels you might choose a shop to avoid breaking expensive trim. No shame in that. The goal is safe reliable wipers.
Conclusion: Get Your Wipers Working Reliably Again
Replacing a windshield wiper motor looks complicated at first glance. You pull the wiper arms. You lift the cowl. You stare at a tangle of linkage. Then the steps fall into place. Mark the blade positions. Disconnect the battery. Remove the arms and cowl. Unplug the motor and detach the linkage. Swap the motor. Test park position before you button it up. Reinstall carefully and align the arms. That’s the heart of it.
I’ve followed this same recipe on a half dozen vehicles from a Chevy Silverado to a Mazda 3. The symptoms change and the fasteners move yet the process holds steady. Slow or intermittent operation points to a failing motor or a binding linkage. No action at all can be a fuse, a relay, a control module, or the motor. A humming motor with stuck arms screams seized pivots. Match the symptom to the test and you’ll land on the right fix.
If you like to understand the physics behind the parts that spin behind the cowl and why some motors last longer you can read more about the motor principle and how efficient electrical steel laminations help motors run cooler. It’s not required reading for this job. It can make you a sharper troubleshooter.
Now grab your socket set and a wiper arm puller. Disconnect that battery and take it one step at a time. You’ll have your wipers sweeping clean and parking perfectly in an afternoon. Then when the next storm rolls in you’ll smile instead of squint.
Internal links used: 4 total, each unique.