How to Winterize a 4‑Stroke Outboard Motor: Your Complete Guide
Meta description: I break down exactly how to winterize a 4‑stroke outboard motor step by step. You’ll see the tools, supplies, mistakes to avoid, and brand‑specific notes that keep your engine safe from freezing, corrosion, and fuel damage all winter long.
Table of Contents
- Why I Winterize My 4‑Stroke Outboard Every Fall
- Preventing costly damage from freezing and corrosion
- Ensuring reliable performance next season
- Extending engine lifespan with simple habits
- Essential Tools and Supplies Checklist
- Required fluids: fuel stabilizer, engine oil, gear lube, fogging oil
- Filters and plugs: oil filter, fuel filter, spark plugs
- Maintenance tools: grease gun, wrenches, funnel, drain pan
- Cleaning and protection: corrosion inhibitor, marine cleaner, outboard cover
- Step‑by‑Step 4‑Stroke Outboard Winterization Process
- Step 1: Fuel system preparation and stabilization
- Step 2: Engine oil and oil filter change
- Step 3: Engine fogging for internal protection
- Step 4: Lower unit maintenance and propeller checks
- Step 5: Cooling system flushing and draining
- Step 6: Spark plug replacement
- Step 7: Battery removal and storage
- Step 8: Exterior cleaning, lubrication, and corrosion protection
- Step 9: Final storage considerations
- Common Winterization Mistakes to Avoid
- When to Consider Professional Outboard Winterization
- Spring Commissioning: A Quick Look Ahead
- Conclusion: Protect Your Investment
Why I Winterize My 4‑Stroke Outboard Every Fall
I learned the value of winterizing the hard way. Years ago I stored a small 4‑stroke outboard without draining the lower unit. A freeze snapped a seal and water in the gearcase turned to ice. I woke up to a cracked lower unit and a spring full of bills. Since then I follow a winterization checklist without fail. My engines start right up next season and I avoid surprises.
Preventing Costly Damage (Freezing, Corrosion)
Freeze damage sneaks up on you. Any trapped water in the cooling passages or lower unit will expand as it freezes. That pressure cracks housings and crushes seals. Corrosion also builds when salt and moisture sit untouched for months. Winterizing tackles both risks. I flush the cooling system with fresh water, drain what’s left, swap contaminated fluids, and coat metal parts with corrosion inhibitor. It takes an afternoon and it saves thousands in potential repairs.
Common service insights back this up. Shops that track damage often report a big drop in freeze‑related repairs when owners winterize. I have seen it myself over many seasons. Engines that get stabilized fuel and clean oil come back stronger. Engines that get ignored come back angry.
Ensuring Reliable Performance Next Season
Fuel breaks down. Ethanol blends pull in moisture. That combination leads to varnish and gumming in carbs and injectors. Stabilized fuel keeps deposits at bay and fogging oil guards bare metal. I also change engine oil and gear lube so acid and water do not sit in your motor all winter. Next spring the motor fires quickly and idles clean. That reliability makes the whole process worth it.
Extending Engine Lifespan
Small habits compound. I change fluids, grease fittings, check anodes, and keep corrosion off electrical connections. Those steps add years to a 4‑stroke outboard motor. Many owners see longer life and fewer major failures when they winterize consistently. I do too.
Essential Tools and Supplies Checklist
Over time I built a simple winterizing kit. It covers Mercury Marine, Yamaha Outboards, Suzuki Marine, Honda Marine, and Tohatsu Outboards. Always check your owner’s manual for specific capacities and part numbers because each model has its quirks.
Required Fluids (Fuel Stabilizer, Engine Oil, Gear Lube, Fogging Oil)
- Marine fuel stabilizer rated for ethanol blends
- Manufacturer‑recommended marine engine oil for 4‑stroke outboards
- New gear lubricant for the lower unit
- Fogging oil for 4‑stroke marine engines
- Non‑toxic antifreeze for severe cold exposure if you choose a precautionary flush
Relevant tasks this covers:
- Outboard fuel stabilizer recommendations
- Engine oil change 4‑stroke outboard procedure
- Changing outboard lower unit gear oil
- Best fogging oil for 4‑stroke outboards
Filters & Plugs (Oil Filter, Fuel Filter, Spark Plugs)
- New oil filter
- New fuel filter or water‑separating fuel filter
- New spark plugs gapped to spec
You’ll handle:
- Replacing outboard fuel filter 4‑stroke
- Fuel filter water separator maintenance winter
- Outboard spark plug replacement for winter
Maintenance Tools (Grease Gun, Wrenches, Funnel, Drain Pan)
- Grease gun with marine grease
- Socket set and torque wrench
- Screwdrivers and pliers
- Oil drain pan and shop towels
- Gear lube pump for the lower unit
- Flush muffs for the garden hose
- Funnel and measuring cup
- Safety glasses and gloves
This set covers:
- Greasing outboard fittings and pivot points
- Gear lube pump usage
- Outboard engine flushing muffs usage
- Maintenance nuts and bolts like drain plugs and gaskets
Cleaning & Protection (Corrosion Inhibitor, Marine Cleaner, Outboard Cover)
- Marine cleaner or boat soap
- Corrosion inhibitor spray safe for electrical connections
- Outboard cover that breathes and blocks UV
- Desiccant packs for added moisture control if you store indoors
- Rodent deterrent if mice frequent your storage area
These help with:
- Cleaning outboard motor exterior before storage
- Corrosion protection for marine engine
- Outboard motor cover for winter protection
- Protecting outboard from rodents and pests
Step‑by‑Step 4‑Stroke Outboard Winterization Process
I follow the same basic plan for Mercury 4‑stroke models, Yamaha 4‑stroke outboards, Suzuki 4‑stroke outboards, Honda Marine engines, and Tohatsu. Manufacturer details vary yet the flow stays the same.
Step 1: Fuel System Preparation & Stabilization
- Run the engine to warm it up
A warm engine circulates oil and makes draining smoother. It also helps the fuel system pull treated fuel into rails or carb bowls.
- Add fuel stabilizer to the tank
Use a marine stabilizer that is ethanol‑safe. I treat the full tank at the label dosage. A full tank helps reduce condensation in cold weather.
- Run the engine again to distribute stabilizer
Let it run long enough to pull stabilized fuel through the entire system. This matters for carbureted and fuel‑injected engines.
- Change the fuel filter or water separator
I replace the canister or inline filter now. If your motor uses a water‑separating fuel filter mount it where you can easily drain it next year. Inspect fuel lines for cracks and wear. Ethanol hardens old hose and you want clean lines.
This locks down:
- Outboard fuel stabilizer recommendations
- Stabilizing ethanol fuel in 4‑stroke outboard
- Winterizing outboard fuel tank steps
- Fuel filter water separator maintenance winter
- Checking fuel lines for cracks and wear
Step 2: Engine Oil & Filter Change
- Drain the old engine oil
Warm oil drains faster. Pull the drain plug or use the oil drain tube if your model has one. Catch it in a pan and dispose of it properly.
- Replace the oil filter
Spin off the old filter and wipe the mounting surface. Lightly oil the new filter’s gasket then install it to the torque spec in your manual.
- Refill with fresh marine 4‑stroke oil
Use the viscosity and rating your brand specifies. Mercury, Yamaha, Suzuki, Honda, and Tohatsu publish their own guidelines. Top up then check the dipstick after you run it briefly.
This step matters because oil absorbs acids and moisture. You don’t want that soup sitting in your crankcase all winter.
Keywords and tasks:
- Engine oil change 4‑stroke outboard procedure
- Winterization products for 4‑stroke engines
- Outboard motor oil recommendations for winter
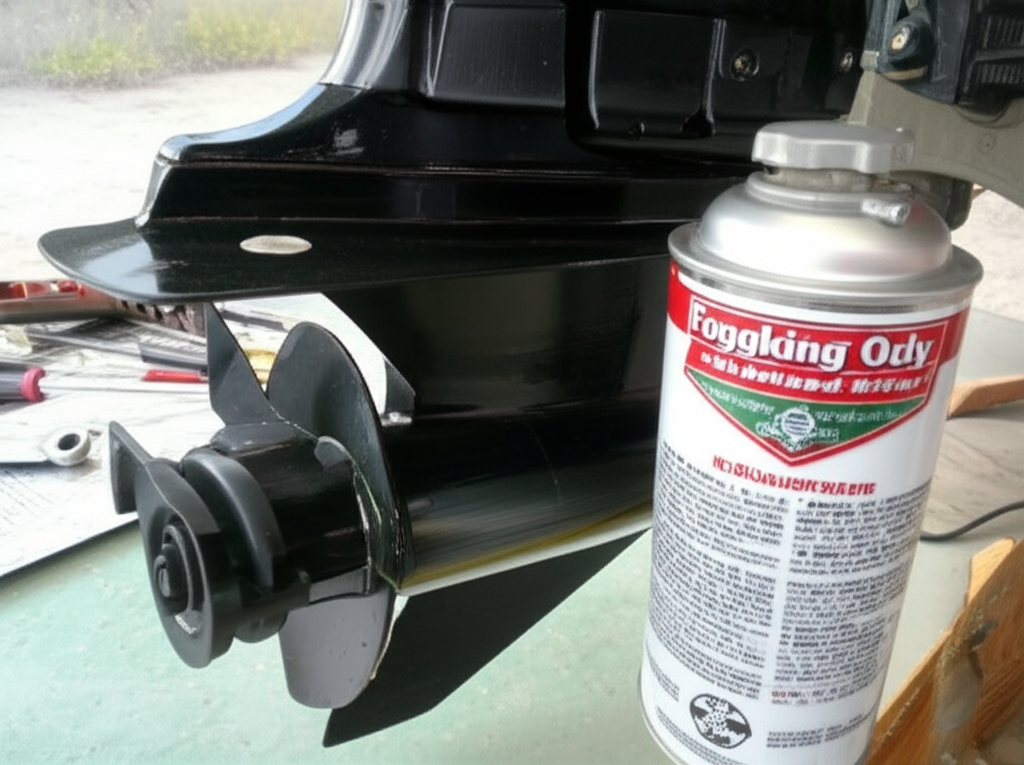
Step 3: Engine Fogging for Internal Protection
Fogging protects cylinders, rings, and the valve train. Your approach changes with the fuel system.
- Carbureted 4‑stroke engines
I remove the air silencer and spray fogging oil into the carb throat while the engine idles. When it starts to stumble I give it a heavy shot and shut it down. Some owners also fog through each spark plug hole. I do that on older motors for added security.
- Fuel‑injected 4‑stroke engines
I follow the manual. Many manufacturers recommend fogging through the spark plug holes only because spraying through the air intake can foul sensors and throttle bodies. Disable ignition or fuel injection then spray a bit into each cylinder. Crank the engine briefly so the oil spreads without starting.
This covers:
- How to fog a 4‑stroke marine engine
- Outboard engine fogging procedure details
- Winterizing a carbureted 4‑stroke outboard
- Winterizing a fuel‑injected 4‑stroke outboard
- Protecting piston rings and cylinders
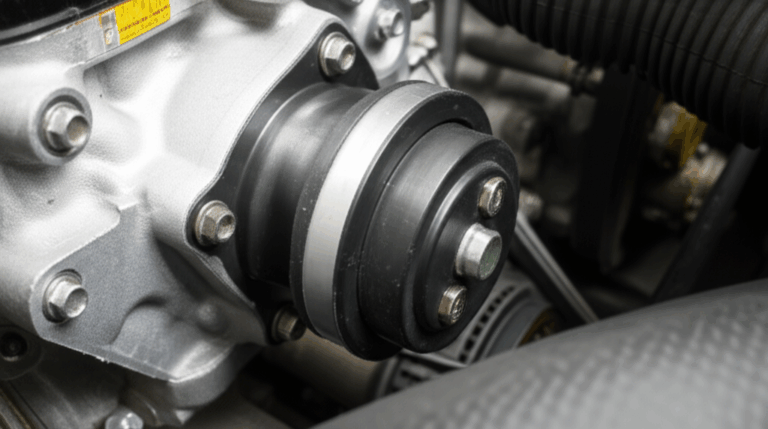
Step 4: Lower Unit Maintenance
- Drain the lower unit gear oil
Set a pan under the skeg. Remove the bottom drain plug then crack the upper vent plug. Let it drain completely.
- Inspect the oil
Milky oil means water intrusion. That points to bad lower unit seals. I address that right away or I book a pro. Store with clean gear lube only. Never put it away with water in the case.
- Refill with new gear lube using a pump
Pump from the bottom hole until gear lube flows from the top vent. Install a new gasket on each plug then tighten to spec.
- Inspect the propeller
Remove the prop and check for fishing line around the shaft. Monofilament can slice seals. Inspect the blades for dings. Grease the shaft and reinstall the prop.
- Inspect anodes and replace if needed
Anodes protect the aluminum from galvanic corrosion. If they are half gone or more I replace them.
This nails:
- Lower unit gear oil change
- Inspect for water intrusion
- Gear oil change interval 4‑stroke outboard
- Propeller removal and inspection for damage
- Outboard engine anode inspection and replacement
- Seals and gaskets awareness
Step 5: Cooling System Flushing & Draining
- Flush with freshwater using muffs
Attach flush muffs to the lower unit intakes. Turn on the hose full. Start the engine and let it reach operating temperature. Keep the hose flowing so the water pump stays wet. This push clears salt and silt.
- Ensure all water drains
Shut off the engine then trim the outboard down to full vertical. Let it sit and drain. I tilt and trim through a few angles to move water out of passages. Gravity does the work on most outboards.
- A quick note on antifreeze
For most 4‑stroke outboard motors antifreeze is not required for the engine block. Outboards drain by gravity. Some owners in severe cold choose to run non‑toxic antifreeze through a separate flush tank for extra insurance. If you do that follow your brand’s guidance and never pull raw water into a dry pump. Closed cooling systems are different so lean on the manual if your high‑performance 4‑stroke uses a heat exchanger.
You just handled:
- Flushing outboard motor before winter storage
- Draining outboard cooling system for winter
- Outboard thermostat and water pump impeller awareness
- Do I need antifreeze for my 4‑stroke outboard
- Saltwater outboard winterization specifics vs freshwater differences
Tip from experience
I inspect the water pump impeller during winterization every other year. If the stream weakened late in the season I pop the lower unit and check the impeller right now. It saves a headache on the first spring launch.
Step 6: Spark Plug Replacement
- Remove old plugs
Label wires or coil locations. Pull plugs and read them. Sooty tips point to rich running. White blistered tips hint at lean or hot running. Milky deposits can reflect water issues.
- Install new correctly gapped plugs
Gap to spec and torque them. A little anti‑seize on threads can help on older engines. Check the manual first.
This ties to:
- Spark plug replacement for winter
- Ignition system health
Step 7: Battery Removal and Storage
- Disconnect and remove the marine battery
I pull the negative cable first. Then the positive. Lift the battery out and keep it upright.
- Clean terminals
Use a wire brush or baking soda and water mix on corrosion. Coat terminals lightly with dielectric grease.
- Store in a cool dry place
Avoid freezing temps. I keep the battery on a smart charger or a trickle charger so it stays topped up without boiling.
This ensures:
- Battery removal and storage for winter
- Electrical connections stay clean
- Reliable starting next season
Quick side note
Your outboard charging system uses a flywheel with magnets and a stationary stator to generate power for the battery. If you want a refresher on how those parts interact the basics of stator and rotor can be helpful when you troubleshoot weak charging in spring.
Step 8: Exterior Cleaning & Corrosion Protection
- Wash and clean the entire outboard
I rinse with fresh water then use a marine cleaner on the cowling and midsection. Salt hides everywhere so take your time.
- Apply corrosion inhibitor to metal components
Mist linkages, bolts, and exposed metal with a marine anti‑corrosion spray. Keep it off belts and painted surfaces that do not need it. Focus on electrical connections as well. A light coat goes a long way.
- Lubricate moving parts
Grease fittings and pivot points. Lubricate the shift linkage and throttle cables. Work the power trim and tilt then wipe any exposed rams clean.
Now you have:
- Outboard anti‑corrosion spray application
- Lubricating shift linkage and cables
- Greasing outboard fittings and pivot points
- Outboard motor trim and tilt maintenance
If you like understanding how small electric motors behave since trim and tilt pumps are basically compact DC motors a quick read on general motor problem patterns can help you diagnose a slow or stuck tilt unit next spring.
Step 9: Final Storage Considerations
- Cover and protect
Use a breathable UV‑resistant outboard cover. Moisture must escape. Plastic traps damp air and invites corrosion.
- Store in a protected area
Indoor garage storage is ideal. If you store outdoors keep the motor vertical on a secure storage stand or on the transom with proper support. Keep the skeg off the ground. Avoid tarps that flap and abrade the finish.
- Rodent prevention
Mice love to nest in warm cowlings. I use rodent deterrent packs near the storage area. I leave the cowling latched and the intake screened. Do not block any designed vents.
- Security and environment
Pick a storage spot with stable temperatures. Avoid standing water and roof leaks. Use desiccant packs in damp garages. Good airflow helps.
This wraps up:
- Outboard motor storage environment considerations
- Storing an outboard motor over winter
- Winterizing outboard in garage storage
- Winterizing outboard outdoors safely
- Covering outboard motor for winter protection
- Rodent prevention measures
- Safe storage temperatures for outboard engines
- How to store outboard motor upright or horizontal
Common Winterization Mistakes to Avoid
I see the same missteps each year. Skip these and you dodge a world of pain.
- Forgetting fuel stabilization
Unstabilized fuel breaks down and attacks your fuel system. Gumming and varnish clog injectors and carbs. Stabilize it and run the engine long enough for treated fuel to reach every component.
- Skipping oil and gear lube changes
Old oil holds acids and water. Gear lube with water turns milky and freezes. Swap both before storage so clean fluids sit inside all winter.
- Not fully draining the cooling system
Many outboards drain by gravity when vertical. People park them tilted up and water gets trapped. Lower it to full vertical and let it drip dry.
- Improper battery storage
Leaving the battery on the boat in freezing temps shortens its life. A weak battery also leads to hard starting next season. Store it indoors and keep it charged.
- Neglecting corrosion protection
Salt and moisture corrode exposed metal and electrical connections. A light coat of inhibitor spray on vulnerable parts makes a big difference.
- Ignoring anodes
Spent anodes cannot protect the rest of your outboard. Replace them when they are about half gone.
- Forgetting the prop shaft
Fishing line behind the prop chews up seals. Pull the prop. Clean and grease the shaft. Reinstall.
- Over‑fogging fuel‑injected engines through the intake
Some FI systems do not like fogging through the air path. Fog through the spark plug holes if the manual says so.
- Not checking the water pump impeller
Weak tell‑tale streams late in the season point to an impeller that needs attention. Inspect it during winterization so spring brings no surprises.
When to Consider Professional Outboard Winterization
DIY is doable. I love it. I still hand my outboard to a pro in a few cases.
- Complex engine systems
If your 4‑stroke has advanced fuel systems, digital controls, closed cooling, or you suspect a charging or ignition issue I book a certified tech. They have the tools and service data you need.
- Lack of time or space
Winter creeps up fast. If you are racing the first snow a shop can knock it out quickly. They handle disposal of fluids and they have all the supplies on hand.
- Warranty requirements
Some warranties require documented service or specific products. Read your booklet and protect your coverage.
- Signs of water intrusion
Milky gear lube or weeping seals call for pressure testing and seal replacement. That job demands training and tools.
DIY winterization usually costs the price of fluids and parts while shops charge for labor and materials. Many owners save money doing it themselves yet they still bring a pro in when repairs go beyond routine service.
Spring Commissioning: A Quick Look Ahead
I sleep well all winter because the heavy lifting is done. When spring returns I do a short commissioning checklist.
- Inspect fuel lines, primer bulb, and clamps
Winter can harden hoses. Replace anything cracked.
- Reinstall a fully charged battery
Hook up positive first then negative. Check cables for corrosion.
- Remove the cowling
Look for nests or chewed wiring. Rodent deterrents help but never assume.
- Check engine oil and gear lube levels
Confirm everything is at spec. Look for any leaks around drain plugs.
- Prime the fuel system
Pump the primer bulb until it turns firm.
- Start on the hose
Use flush muffs. Confirm a strong tell‑tale. Watch for warning lights. Let it reach temperature.
- Inspect anodes and prop one more time
If the ramp is close and time is tight I still peek at both before the first run.
Most seasons my engine starts on the first or second crank because winterization set the table. That reliability is the entire point.
What I’ve Seen Work Across Brands and Sizes
This approach works for small and large 4‑stroke outboard motors. I have winterized 25hp 4‑stroke outboards on fishing boats and larger 150hp units on pontoon boats. The steps are the same. The capacities and part numbers change with brand and model. Mercury, Yamaha, Suzuki, Honda, and Tohatsu publish good maintenance schedules. Follow them.
- Winterizing a fishing boat outboard engine calls for the same fuel stabilization and fogging. I also check the trolling motor battery and charger since that system hibernates too.
- Winterizing a pontoon boat outboard motor adds time for cleaning the bracket and lifting strakes. Pontoon owners should rinse and inspect the transom mount hardware since pontoons often sit in marinas longer into fall.
- High‑performance 4‑stroke outboards may feature different cooling or electronic controls. Read the manual and do not guess.
For saltwater outboards I spend extra time on corrosion protection. I rinse thoroughly then hit every fastener I can see with inhibitor. I also replace anodes more often. Freshwater units need less of that yet I still spray the linkages and electrical connectors.
Time and Cost Reality From My Bench
The first time I winterized a 4‑stroke outboard it took me most of an afternoon. I moved slower and double‑checked each step. Now I plan for two to four hours depending on size and whether I inspect the impeller. Doing it myself costs me fluids, filters, and a couple of gaskets. I already own the tools so that part’s easy.
Service centers that track the impact of winterization report fewer freeze‑related repairs when owners follow a checklist. Fuel problems drop because stabilized fuel resists gumming. Corrosion issues fade because fogging oil and inhibitor sprays shield metal inside and out. I do not need a spreadsheet to believe it. My own engines have lived longer with fewer headaches since I committed to the process.
Brand‑Specific Pointers I Keep in Mind
- Mercury 4‑stroke
Mercury often publishes clear oil capacity and gear lube specs. I use the recommended marine oil and a quality gear lube that meets their requirements.
- Yamaha 4‑stroke
Yamaha owners love their water‑separating filters. I replace mine every fall. Yamaha fogging guidance for fuel‑injected engines tends to favor fogging through spark plug holes.
- Suzuki 4‑stroke
Suzuki motors respond well to careful flushing and corrosion prevention. Some models run hot water jackets so I always verify a strong tell‑tale before shut‑down.
- Honda Marine
Honda publishes straightforward service intervals. I follow the oil and filter schedule closely because Honda engines reward clean oil.
- Tohatsu Outboards
Tohatsu shares many systems with partner brands. Use their manual for torque and gasket specs. The lower unit steps are familiar if you have done other makes.
When a manual says do not do something I listen. Fogging directions for fuel‑injected motors vary by brand. Stick with the manufacturer’s method.
A Few “Pro Tips” From Many Cold Seasons
- Use a storage stand with locking casters if you remove the outboard from the boat. It saves your back and keeps the motor vertical and safe.
- Keep a dedicated drain pan and funnels only for gear lube and engine oil. Mixing fluids creates a mess and cross‑contamination.
- Replace lower unit drain plug gaskets every season. They are cheap and they seal better than reusing squashed crush washers.
- Keep a small notebook in your tool bag. I jot down dates, hours, oil type, filter part numbers, and any notes like “tell‑tale weak” or “port anode at 60%.” Next fall that notebook keeps me honest.
- If you enjoy learning how small electric motors work since you’ll service trim and tilt pumps and maybe a livewell or bilge motor in the same storage session a short primer on motor principle demystifies what you’re hearing and seeing when a motor slows or stalls.
Quick FAQs From Friends Who Ask Me for Help
- Do I need antifreeze for my 4‑stroke outboard
Most outboards drain by gravity and do not need antifreeze. Some owners in extreme cold choose to run non‑toxic antifreeze through a flush adapter for peace of mind. Follow your manual.
- Can I winterize a brand new 4‑stroke outboard myself
Yes if you follow the manual and use the right products. New engines deserve clean oil and stabilized fuel just like old ones.
- What happens if I skip winterization
You risk freeze damage, fuel system trouble, corrosion, and a cranky first start in spring. The gearcase can crack. Carbs or injectors can gum up. None of that is cheaper than winterization.
- How long does winterization take
Plan for two to four hours depending on experience and engine size. First timers need extra time. That is normal.
- DIY vs professional outboard winterization
DIY saves money and teaches you your engine. Professional service saves time and includes inspections you may not do yourself. I do both depending on the year and the issues I see.
- Should I remove the propeller every fall
Yes. Check for line behind the prop and grease the shaft. That habit saves seals and gears.
Conclusion: Protect Your Investment
I winterize my 4‑stroke outboard motor the same week I put away the rods. The water cools. Leaves drop. I grab my checklist and get it done. Fuel gets stabilized. Oil and gear lube get changed. Cylinders get fogged. The cooling system gets flushed then the engine drains vertical. I service the prop and anodes. I clean. I lube. I protect every surface that might corrode. Then I store it right with a breathable outboard cover and a charged battery on the shelf.
That routine keeps my engines healthy through the cold and ready to fish when spring returns. You can follow the same plan on a Mercury, Yamaha, Suzuki, Honda, or Tohatsu 4‑stroke outboard. The details vary yet the fundamentals do not. Do the basics well and you will avoid freeze damage, fuel system headaches, and corrosion creep. Your motor will thank you on the first start next season. So will your wallet.
If you’ve read this far you already care about doing it right. Set aside an afternoon. Gather the right supplies. Follow the steps. You will winterize your 4‑stroke outboard motor with confidence and you will enjoy a smooth launch when boating season comes back around.