How to Wire a Starter Motor: A Complete DIY Guide for Cars, Trucks & Small Engines
Table of Contents
- How to Wire a Starter Motor: A Complete DIY Guide for Cars, Trucks & Small Engines
- Who needs this guide right now?
- What is a starter motor and why does wiring matter?
- What safety steps should I take first?
- What tools and materials do I need?
- How does the starter circuit work?
- How do I wire a starter motor step by step?
- How do I test and troubleshoot a no‑crank condition?
- Why does grounding matter so much?
- How do push‑button, relay, and remote start wiring work?
- What about marine, motorcycle, tractor, and small engines?
- How does the inside of a starter motor work?
- Brand and type notes: Ford, Chevy, universal, and more
- Can I bypass safety switches for testing?
- Cost, time, and pro tips to finish strong
- Data you can use: Common issues and facts
- FAQ
- Summary: Key things to remember
- References
You turn the key. Nothing. That sinking feeling hits. I’ve been there. In this guide I show you how to wire a starter motor the right way. You’ll see clear steps, simple checks, and safe tips you can use today. Read on, because one clean fix can bring your car, truck, or small engine back to life.
Who needs this guide right now?
Problem: Your engine will not turn over. You hear a click or no sound at all. You’re dealing with a no-crank condition. The cause can be bad starter motor wiring, a weak automobile battery, or a loose ground wire.
Agitate: Each try drains your battery. The starter solenoid gets hot. You smell corrosion. You lose time. You feel stuck.
Solution: I’ll walk you through starter circuit components, ignition switch wiring to starter, starter relay wiring, neutral safety switch wiring, and the exact steps to connect the B-terminal, S-terminal, and M-terminal. I’ll also show you how to do a voltage drop test starter, a continuity test starter, and a starter current draw test with a multimeter. You’ll get simple words and clear pictures in your head. You’ll get it done.
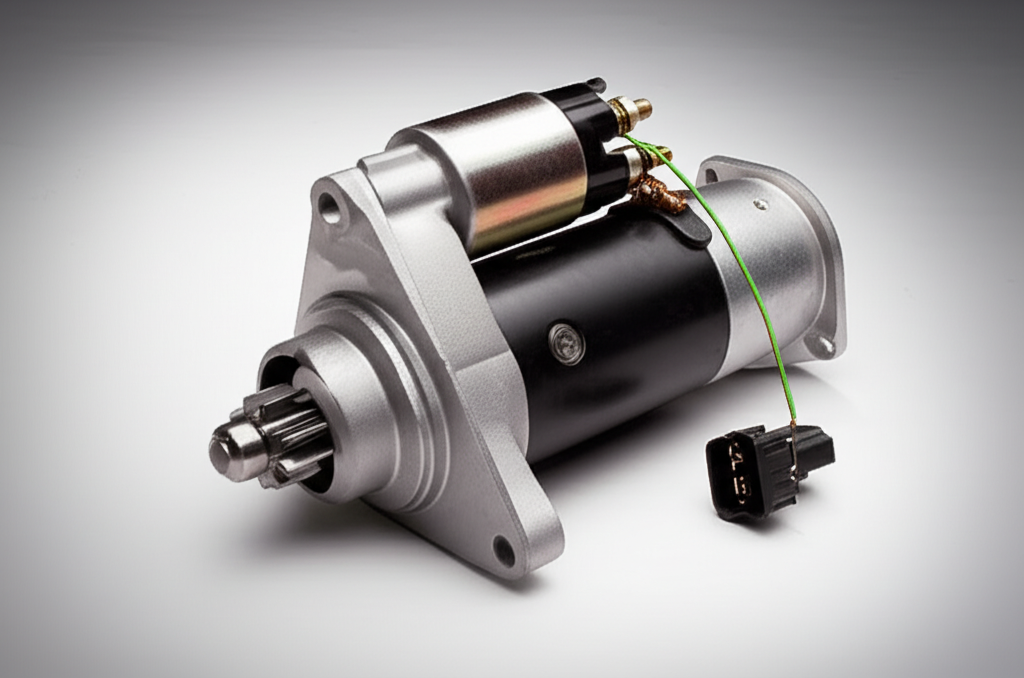
What is a starter motor and why does wiring matter?
A starter motor uses power from the automobile battery to spin the flywheel ring gear on the engine. The pinion gear throws out with a Bendix drive and grabs the ring gear. The starter solenoid acts like a big relay. It pulls in. It feeds heavy power to the motor. Then the overrunning clutch lets the motor freewheel when the engine fires.
Wiring matters because high current flows through the positive battery cable and the negative battery cable. Even a small bit of resistance can stop a crank. Poor starter ground wire. Loose insulated terminals. Bad fusible link. Wrong wire gauge for starter. Any of these can stop you cold. Good automotive electrical wiring keeps it safe and strong.
If you like to see how the guts work, look at the relationship of the stator and rotor. The build quality of the stator core and rotor affects torque. In fact, the quality of the stator core lamination and the fit of the rotor core lamination shape performance and heat. These parts use premium electrical steel laminations to cut losses and boost crank power.
What safety steps should I take first?
I don’t start any wiring job without a plan. You should not either. Here’s what to do first.
- Disconnect the battery. Always remove the negative (-) battery terminal first. Use a battery disconnect tool if you have one. This stops sparks at the battery terminal.
- Wear safety glasses and work gloves. Protect your eyes and hands.
- Secure the vehicle. Use the parking brake. Set wheel chocks. If you lift the car, set it on jack stands. Use a hydraulic jack only to lift. Never crawl under a car held by a jack alone.
- Avoid hot parts. The exhaust can burn you. The starter housing may be hot. Keep clear of live electrical circuit parts.
These starter safety precautions keep you safe. They also protect your wiring harness, fuse box, and circuit breaker from shorts.
What tools and materials do I need?
I keep a simple kit for DIY starter replacement guide and wiring.
- Hand tools: Wrenches (socket and open‑end), screwdrivers (flathead and Phillips), pliers.
- Electrical tools: Wire strippers, crimping tool, multimeter, and a test light. Jumper wires for testing help too.
- Wiring parts: Correct wire gauge, ring terminals, spade connectors, heat shrink tubing, and electrical tape. Use insulated terminals. Bring a battery charger if the battery is weak.
- Docs: Your service manual or a vehicle-specific wiring diagram. This shows ignition relay location, starter circuit diagram, and starter wiring color codes.
You may also need starter shims on some cars, and starter motor mounting bolts if the threads are worn. Keep some crimping electrical terminals on hand. Use proper wire gauge for starter since that motor pulls high amperage.
How does the starter circuit work?
Let’s break down the flow. Simple and solid.
- Battery power lives on the B-terminal (battery) of the starter solenoid. This comes from the positive battery cable. It is constant 12V on most cars. We call this constant power wire.
- The S-terminal (start signal) sees 12V only when you turn the ignition switch to Start. On many cars this signal goes through a neutral safety switch or clutch safety switch, then a starter relay. This is the start signal wire.
- The M-terminal (motor) feeds the internal windings of the starter motor. On some old models it sits outside.
Here is a quick map you can keep open.
| Solenoid Terminal | Name | What connects here | What it does |
|---|---|---|---|
| B | Battery | Heavy gauge cable from battery positive | Feeds constant power |
| S | Start Signal | Small gauge wire from ignition switch through relay/safety switch | Triggers solenoid |
| M | Motor | Internal or external link to starter motor windings | Drives the motor |
Power flows like this. Battery to B. Key to S. Solenoid closes. Power jumps from B to M. Motor spins. Pinion gear engagement turns the flywheel. The engine block and chassis ground complete the path through the ground strap and engine block ground.
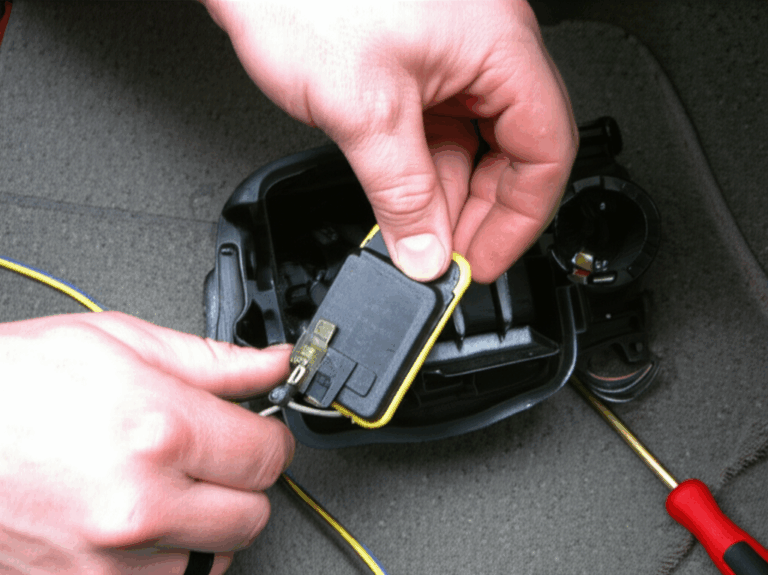
How do I wire a starter motor step by step?
I follow this simple plan for car starter wiring, truck starter wiring, and motorcycle starter wiring. It also fits marine starter motor wiring and small engine starter wiring with small tweaks.
1) Initial setup and ID
- Do all safety steps. Battery off. Car secure.
- Find the starter motor. Clean the area. Identify the B-terminal, S-terminal, and M-terminal. Some cars label them. Some don’t. Use the service manual if needed.
2) Connect main power to B
- Run the large positive battery cable to the B post. Use the right wire gauge. Clean the lug. Tighten the nut. No wobble. No corrosion. If you run a remote battery, route the cable away from heat.
3) Connect the S signal wire
- Find the small start signal wire from the ignition system. It may be a purple wire starter or a yellow wire starter on some GM cars. You may see a red wire starter feed for constant power in the harness. A black wire starter is often ground, yet always confirm. Use your diagram. Connect the S wire to the S post. Firm and clean.
4) Check the M motor link
- On most newer starters the M-terminal is inside. On older ones it sits outside. Make sure the M link is intact and tight.
5) Grounding
- The starter housing grounds through the starter motor mounting bolts to the engine block. Make sure those bolts are snug. Then check the engine block ground strap to the chassis ground and the battery negative. Replace any weak ground wire or frayed ground strap.
6) Final checks and reconnect
- Inspect all wires. Look for loose electrical connections. Wrap with heat shrink tubing where needed. Use electrical tape for extra seal. Reconnect the battery. Positive first. Negative last.
7) Test
- Turn the key. Listen for a strong crank. If it cranks slow, see the slow crank starter section. If it clicks only, see the clicking sound starter notes below. If it does nothing, jump to the no-crank condition section.
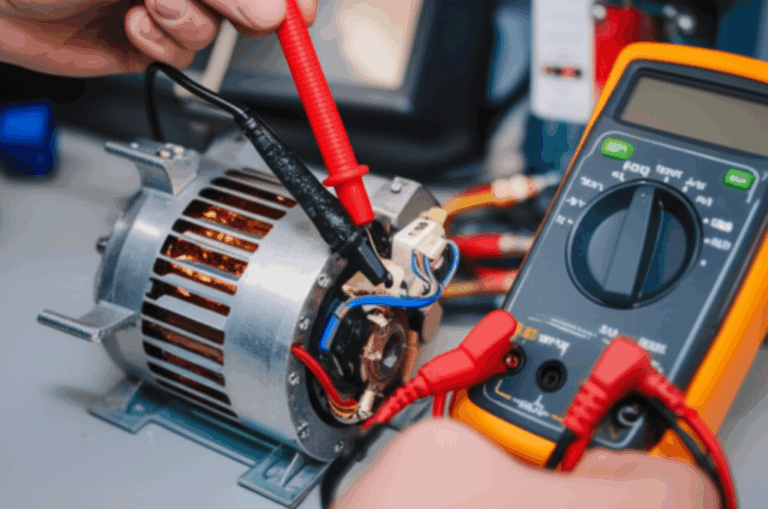
How do I test and troubleshoot a no‑crank condition?
You need a method. I use these checks. They find most common starter problems fast.
- Battery voltage test: Measure at the battery terminals with a multimeter. You want 12.6V at rest. If low, use a battery charger. No power means no start.
- Test for 12V at S-terminal: Have a helper turn the ignition switch to Start. Check the S post with a test light or meter. No 12V means a possible faulty ignition switch, bad starter relay, or a failed neutral safety switch. Check the fuse box starter circuit and any fusible link starter too.
- Voltage drop test starter: Put the meter across the positive cable from battery to starter solenoid while cranking. You should see less than 0.5V drop. Do the same on the ground side. A high drop means excessive resistance in cables or connections.
- Continuity test starter: With power off, check the start signal wire and grounds for open circuits.
If all checks pass yet it will not crank, you may have a failed starter motor or failed starter solenoid. Pull it and bench test starter motor. You can also check amperage draw starter during crank. High draw with slow spin points to internal motor issues.
Why does grounding matter so much?
The engine starting circuit needs a clean path back to the battery negative. Paint, rust, and oil block current. A weak ground can act like a bad battery. You hear a single click. The lights dim. The motor stalls.
Clean the engine block ground and the chassis ground. Add a fresh ground strap if you see green corrosion or broken strands. Tighten the starter motor mounting bolts. A solid ground helps every part of the charging system and the ignition system too.
How do push‑button, relay, and remote start wiring work?
Some builds use a push button start wiring setup. You add a momentary switch that feeds the S-terminal. Use a fused feed. Run the switch to the starter relay or direct to S on simple builds.
A starter relay wiring upgrade can protect the ignition switch. Old switches burn out when they feed the solenoid directly. A relay takes the load. You trigger the relay with the key. The relay then sends clean power to S. This fix helps on truck starter wiring and hot rod builds.
Remote start wiring adds another layer. Many kits tie into the start signal wire and the ECU on newer cars. Follow the kit guide. Use proper wiring harness taps and fuses.
What about marine, motorcycle, tractor, and small engines?
Boats need marine starter motor wiring rules. Use tinned wire. Use sealed heat shrink tubing. Keep splices above the bilge. The starter relay and solenoid should be marine grade. Salt kills bare copper fast.
Bikes and ATVs use motorcycle starter wiring that is compact. The path is the same. Battery to B. Switch to S. Motor to ground. Keep the negative cable clean at the engine block.
Farm gear uses tractor starter wiring. Mowers use lawn mower starter wiring. Generators use generator starter wiring. These often run simple circuits. You may not see a neutral safety switch. You may see a key switch wiring setup with a very small relay. Check the service manual. Use simple drawings to map wires.
How does the inside of a starter motor work?
Inside the housing, the armature, field coils or permanent magnets, brushes, and commutator turn electricity into spin. The solenoid operation pulls a plunger, moves the starter drive, and closes a heavy contact. The magnetic field starter force drives the armature starter operation. With field coils starter operation, the coils make a field when current flows. In a permanent magnet starter wiring design, magnets replace coils. The brushes starter operation pass current to the commutator starter operation. The overrunning clutch function protects the starter drive once the engine runs.
If you build or repair motors, you know materials matter. Good motor core laminations and tight stacks lower heat. The best use silicon steel laminations to cut eddy losses. Makers like Sinolami supply core lamination stacks, motor core laminations, and parts for many machines. They also provide transformer lamination core, ei core, ui lamination core, crgo lamination core, and crngo lamination for power gear. That quality keeps a motor strong on every start.
Brand and type notes: Ford, Chevy, universal, and more
You will see three common types of starters. Direct drive starter wiring. Gear reduction starter wiring. Permanent magnet starter wiring. Gear reduction types spin faster with less draw. They help on high compression engines.
For brand quirks:
- Ford starter wiring often uses a fender‑mounted relay that feeds the solenoid on the starter. You connect the positive cable to the relay, then a cable to the starter. The small wire to the relay comes from the key.
- Chevy starter wiring often mounts the solenoid on the starter body. The purple wire starter is the S wire on many older GM cars. The big red wire starter carries battery power to B.
- Universal starter wiring kits include a relay, fuse, and labeled wires. They help on custom applications & hot rods.
For trucks, use the relay upgrade if the switch runs hot. For car starter wiring, follow your diagram. For small engine starter wiring, keep it simple and sealed.
Can I bypass safety switches for testing?
Only for testing. Only with care. A neutral safety switch stops the car from starting in gear. Never bypass it for regular use. If you must test, you can jumper the two switch wires to see if it cranks. Keep your foot on the brake. Make sure the transmission stays in Park or Neutral. If the engine cranks, you found a bad switch or open wire.
For a manual car, a clutch safety switch may block the start. You can jumper it for a short test. Replace the bad switch. Safety switches save lives.
Cost, time, and pro tips to finish strong
A new or reman starter motor replacement cost runs $70 to $400+ for parts. Professional starter installation cost can add $100 to $300+ for labor. You can save with DIY if you follow the steps and test right.
Time wise, a simple swap takes an hour or two. Tough cars sit near the exhaust or under the intake. Plan for more time. Use jack stands. Bring extra ring terminals and heat shrink tubing. Keep a clean bench for a starter rebuild kit or starter brush replacement if you rebuild. When in doubt, do a bench test starter motor before you bolt it in.
If you want a deeper dive on how motors make torque, study the motor principle. A little theory helps you wire with confidence.
Data you can use: Common issues and facts
Here is a simple table of useful facts. These points guide your checks and your fix plan.
| Category | Data or note | What it means to you |
|---|---|---|
| Starter Motor Lifespan | 80,000 to 150,000 miles or 5–10 years in many cases | It’s a wear part. Plan for service. |
| DIY vs Pro Cost | Parts $70–$400+. Labor $100–$300+. Total $170–$700+ | DIY saves labor if you work safe. |
| Common Failure Causes | Electrical 40%, Mechanical 40%, Heat 20% | Clean wiring prevents many failures. |
| Electrical Resistance Impact | Even 0.5–1.0V drop can stop a crank | Do a voltage drop test on both sides. |
| Neutral Safety Switch | 15–20% of no‑crank cases on autos | Check the switch and its wiring early. |
| Wiring Harness Damage | Rodents. Heat. Abrasion. | Inspect the harness end to end. |
| Safety Incidents | Wrong gauge and bad disconnect lead to hazards | Use the right wire and disconnect the battery. |
| Post‑Repair Callbacks | Intermittent wiring is a top cause | Test. Tug. Wiggle. Confirm the fix. |
How do push‑button and key systems fit with modern cars?
Modern cars talk through the Engine Control Unit (ECU). The ECU reads the ignition switch. It checks the neutral safety switch or clutch switch. It closes the starter relay if all looks good. Some cars use smart keys and modules. Still, the basic path lives on. Battery to B. Key to S. Motor to ground.
If you add a push button start wiring kit, tie it into the start signal circuit. Keep the relay. Keep the fuses. Seal all splices. Mark wires with labels.
What common problems cause slow crank or clicking?
- Slow crank: Check insufficient battery charge. Check for excessive resistance with a voltage drop test starter. Inspect for corroded battery terminals. Thick oil and a tight engine can add drag in cold weather.
- Single click: The starter solenoid pulled in but the motor did not spin. Check for low amperage draw starter or high drop in the power path. Tap the starter with a wrench once to test for sticky brushes. Replace if needed.
- Spins but no engagement: The motor spins. The pinion gear does not bite. The Bendix drive or overrunning clutch may be bad. The flywheel ring gear may be damaged. Inspect both.
Company note: Why build quality inside motors matters
The quiet heroes inside a starter are the metal stacks that guide the magnetic field. Better laminations mean better starts. Makers like Sinolami deliver core lamination stacks that help motors run cool and strong. They build to tight specs with silicon steel laminations. That helps any starter motor function under heavy load. When you source parts for builds or repair, ask about lamination quality and stack accuracy.
Wiring color codes and terminal designations
Color codes vary by brand. Here are common notes you will see on many vehicles.
- GM often uses a purple wire starter for the S signal. The heavy red wire starter goes to B. You may also see yellow wire starter feeds on older cars.
- Ford routes the S signal to a fender starter relay. The big positive battery cable goes to the relay then to the starter.
- Many imports use different shades. Use your service manual and wiring diagram.
Keep these terminal designations in mind: B-terminal is battery. S-terminal is start signal. M-terminal is motor. The constant power wire feeds B. The start signal wire feeds S.
Bench testing and rebuild notes
A bench test tells you a lot. Clamp the starter in a vise. Use jumper cables. Ground the case. Feed 12V to B and jump S. The motor should spin strong. The Bendix drive should kick out fast. If not, a starter rebuild kit can help. You can do starter brush replacement. You can clean the commutator. You can test field coils and the armature for shorts with a meter.
You may also add or set starter shims on some GM cars. Shims adjust pinion gear engagement with the ring gear. Too tight and it grinds. Too loose and it slips.
When should I call a pro?
Call a pro when:
- You lack the space or tools.
- The car has complex ECU and security links.
- You tested well yet still have a no‑crank condition or a ghost fault.
A pro can scope amperage, check voltage, and read diagnostic data. That saves time when the fix hides in the harness.
PAS recap woven through your fix
- Problem: The engine will not crank. You face bad starter symptoms like clicks and dim lights.
- Agitate: You lose time. You worry about a big repair bill. Heat and corrosion can cause a fire if you guess wrong.
- Solution: Follow this DIY starter replacement guide. Use the right wire gauge. Connect B-terminal, S-terminal, and M-terminal right. Test with a multimeter. Do a voltage drop test. Fix grounds. Replace worn parts. If needed, buy quality parts built with strong laminations and good copper.
FAQ
Q: Which wire goes to the S-terminal?
A: The small start signal wire from the ignition switch goes to the S-terminal. It often passes through a neutral safety switch and a starter relay.
Q: Do I need a relay?
A: Many cars have one. It protects the ignition switch and cleans the S signal. Add a relay if you see heat at the switch or a long wire run.
Q: How do I know if the battery is the problem?
A: Do a battery voltage test and a starter current draw test. If the battery drops below 10V while cranking, charge or replace it.
Q: My starter spins but does not engage. Why?
A: The Bendix drive or overrunning clutch may be bad. The flywheel ring gear could be worn. Pull the starter and inspect.
Summary: Key things to remember
- Disconnect the battery first. Safety first.
- B is battery. S is start signal. M is motor. Get these right.
- Clean, tight, and correct gauge wires make or break the job.
- Ground the engine block well. Add a ground strap if needed.
- Test voltage drop on both power and ground sides.
- Use a relay if the switch runs hot or the run is long.
- Check safety switches before you blame the starter.
- Bench test the starter before install when in doubt.
- Good internal laminations and materials help starters live longer.
- When stuck, call a pro and save time.
References
- Manufacturer Service Manuals and Wiring Diagrams for specific vehicles
- Bosch Automotive Handbook, latest edition
- SAE guidance on automotive electrical systems
- AAA and independent shop data on starting and charging system failures
- Haynes and Chilton repair manuals for model‑specific procedures