The Ultimate Guide to Winterizing Your Inboard/Outboard Boat Motor: My Step-by-Step Playbook
Table of Contents
- Introduction: Why I Never Skip Winterization
- Tools and Supplies I Lay Out Before I Start
- Pre-Winterization Checks and Setup
- Step 1: Treat and Stabilize the Fuel System
- Step 2: Change Engine Oil and Protect Internals
- Step 3: Drain and Protect the Cooling System
- Step 4: Service the Sterndrive (Outdrive)
- Step 5: Battery and Electrical System Care
- Step 6: Freshwater, Head, and Generator Winterization
- Step 7: Final Checks, Storage, and Covering
- Common Winterization Mistakes I See All the Time
- Safety Tips and Winterization Hazards
- DIY vs. Pro Service: How I Decide
- Spring Start-Up After Winterization: What I Do
- When to Winterize a Boat and How Long It Takes
- My Final Take: Peace of Mind Beats Repair Bills
Introduction: Why I Never Skip Winterization
I learned this lesson the hard way. Years ago, a dock neighbor skipped draining his raw water cooling system. The first hard freeze hit. The next spring his I/O cracked at the block and he spent more than he wanted on a replacement. Watching that unfold impressed one thing on me. Winterization is not optional if you live where water turns to ice.
I winterize my inboard/outboard (I/O) to prevent freeze damage and corrosion. I also do it to avoid spring no-start headaches and to protect resale value. Whether you run a Mercury MerCruiser 3.0, a Volvo Penta sterndrive, or an older OMC Cobra, the fundamentals are the same. I’ll walk you through what I do from start to finish with a DIY approach. If you prefer a marine technician to handle it, you’ll still know what good winterization looks like.
This is the exact process I follow to winterize an inboard outboard boat motor. I built it over many seasons. It covers fuel, engine, raw water and closed cooling systems, sterndrive maintenance, electrical, and boat storage.
Tools and Supplies I Lay Out Before I Start
I gather everything in one place. That saves trips to the store and keeps me focused.
- Fluids I always use
- Marine fuel stabilizer rated for ethanol fuel
- Non-toxic propylene glycol RV/marine antifreeze for raw water systems
- Marine engine oil and a new oil filter
- Lower unit gear lube for the sterndrive
- Fogging oil for cylinder protection
- Filters I replace
- Oil filter
- Fuel filter
- Water separator filter
- Basic tools that make life easier
- Wrench set and screwdrivers
- Oil extractor pump
- Grease gun and marine grease
- Flush muffs or a winterization kit
- Drain buckets and rags
- A funnel and short length of hose
- Safety and cleanup
- Eye protection and gloves
- Spill pads or a tarp
- Fire extinguisher nearby
I also keep the owner’s manual handy. Model-specific drain locations and torque specs matter. Always check the manual for your MerCruiser, Volvo Penta, or other sterndrive details.
Pre-Winterization Checks and Setup
I do a quick health check before I touch a wrench.
- I run the engine to normal operating temperature. Warm oil drains faster. Warm water pumps better. Stabilizer needs time in the system.
- I listen for odd noises from the gimbal bearing or drive belt. If I hear a rumble or squeal, I note it for service.
- I check for fuel, water, or oil leaks. If I see anything wet where it shouldn’t be, I trace it now.
- I set up in a ventilated area. I never run a motor in a closed garage. Carbon monoxide is deadly.
- I tilt the sterndrive down for most of the service. That helps it drain later.
Once the boat sits safely chocked or on the trailer, I get to work.
Step 1: Treat and Stabilize the Fuel System
Ethanol fuel and long storage are not friends. I treat the fuel first.
- I fill the fuel tank to about 95 percent. That reduces condensation. I leave expansion room for temperature swings.
- I add a marine-grade fuel stabilizer. I follow the bottle for dosage and I treat for the full tank volume.
- I run the engine for 10 to 15 minutes on the hose with flush muffs or in the water. This pulls treated fuel through the carburetor or injectors. It also runs stabilizer through the water separator and fuel lines.
- I replace the fuel filter and the water separator filter. If water collects in the separator, I drain and change it. Dirty filters invite spring no-start problems.
Tip: If your boat sits for many months, ethanol can still cause issues. A stabilizer helps. So does starting with clean filters.
Step 2: Change Engine Oil and Protect Internals
Old oil holds acids and moisture. I never let that sit in my engine all winter.
- I warm the engine first. Then I extract the oil through the dipstick with an oil extractor pump. Some engines have a remote drain hose. Use whatever the manual specifies.
- I remove the old oil filter and install a new marine-grade filter. I lightly oil the gasket. I hand-tighten it to spec.
- I refill with the correct type and amount of marine engine oil. I check the dipstick. I top off if needed.
Fogging the engine protects the cylinder walls, rings, and valves from corrosion.
- I remove the spark plugs. I look at each plug for clues. Sooty black means rich. White can mean lean. Oily can mean oil consumption. I replace plugs if they are due.
- I spray fogging oil into each cylinder for a few seconds.
- I crank the engine briefly with the lanyard off or the ignition disabled. The goal is to spread the oil. I do not start it.
- I reinstall the spark plugs and reattach wires in the correct order.
Note for EFI: Some modern engines do not recommend heavy fogging through the intake while running. I follow the manufacturer’s guidance. When in doubt, fog through the spark plug holes and use a storage oil that meets the manual’s guidance.
I also lubricate linkages and moving parts:
- I grease zerk fittings for the gimbal bearing, steering, and shift linkages.
- I inspect the drive belt for cracks or glazing. I replace if needed.
- I check throttle and shift cables for smooth travel. A little cable lube goes a long way.
Step 3: Drain and Protect the Cooling System
This step prevents cracked blocks and manifolds. I slow down here and double-check my work.
First, I drain the raw water side. The locations vary by engine, but the process stays consistent.
- I locate all drain plugs. Common spots include the engine block, exhaust manifolds, raw water pump, oil cooler, and heat exchanger on closed systems. The manual calls them out.
- I place a bucket under the drains. I remove each plug. I let water empty completely.
- I gently probe each drain hole with a small wire. Scale or rust can block flow. I never force it. I let trapped water escape.
- I tilt the sterndrive down to help the exhaust side drain.
- I open the sea strainer and clean the basket. I check the raw water intake hose for soft spots or cracks.
Once the system drains, I protect it with antifreeze. I use non-toxic propylene glycol RV/marine antifreeze. I choose a burst protection rating that matches my climate. I use -50 for mild winters. I use -60 or -100 for severe cold.
Two methods work well for open cooling systems:
- Method 1: Ear muffs and a 5-gallon bucket
- I reinstall all drain plugs.
- I set up flush muffs on the sterndrive water intake.
- I draw antifreeze from a bucket using a short hose and a utility pump, or I use a gravity-fed winterization kit.
- I start the engine and watch the exhaust. I keep feeding antifreeze until I see a strong pink flow from both sides. I do not let the bucket run dry.
- I shut down and let the antifreeze settle.
- Method 2: Feed antifreeze through the intake hose
- I reinstall all drain plugs.
- I disconnect the large raw water intake hose at the thermostat housing or raw water pump inlet.
- I pour antifreeze through a funnel into the hose until I see it at the exhaust. This method works well if I cannot run the engine.
Closed cooling systems still need attention. The internal coolant loop usually uses ethylene glycol coolant similar to automotive coolant. I check the coolant level and strength with a tester. I top up or replace per the manual. Then I winterize the raw water side of the heat exchanger and exhaust manifolds with propylene glycol, same as above.
Finally, I look at the impeller:
- I remove and inspect the raw water pump impeller if the service interval is due. I replace it if the vanes are cracked, set, or missing pieces. An impeller spends all winter compressed in one position. Replacing it preemptively avoids spring overheating.
Step 4: Service the Sterndrive (Outdrive)
The sterndrive needs love just like the engine.
- I change the lower unit gear oil. I place a pan under the drive. I remove the upper vent plug and then the lower drain plug. I look at the oil as it drains. Milky oil means water intrusion. That calls for seal inspection and service.
- I refill the sterndrive from the bottom drain until gear lube weeps out the vent. I reinstall the vent plug. Then the drain plug. I torque them to spec with new gaskets if required.
- I inspect the bellows for cracks, tears, or stiffness. I check the exhaust, shift, and drive bellows. Any damage risks water entry and big repair bills.
- I grease the gimbal bearing and universal joints through the zerk fittings. I do not over-grease.
- I remove the propeller. I check for fishing line around the prop shaft. I inspect the prop for dings and bends. I clean and grease the shaft. I reinstall the prop or store it indoors.
- I examine zinc anodes. I replace them if they are over half gone. Anodes sacrifice themselves to protect your drive. I keep them fresh.
- I leave the outdrive trimmed all the way down for storage. That reduces stress on the bellows and helps any residual water drain.
Step 5: Battery and Electrical System Care
A weak battery fails in the spring. Moisture also takes a toll on electrical components.
- I shut off the battery switch. I disconnect the negative cable first. Then the positive.
- I clean the terminals. I apply dielectric grease to slow corrosion.
- I remove the battery from the boat. I store it in a cool dry place on a smart trickle charger. I avoid leaving it on concrete without a board under it.
- I inspect wiring, fuses, and connectors. I look for green corrosion at terminals. I clean and protect as needed.
- I tidy the shore power cord. I store it dry and coiled loosely. Moisture and salt creep into connections if you leave them in the bilge or cockpit.
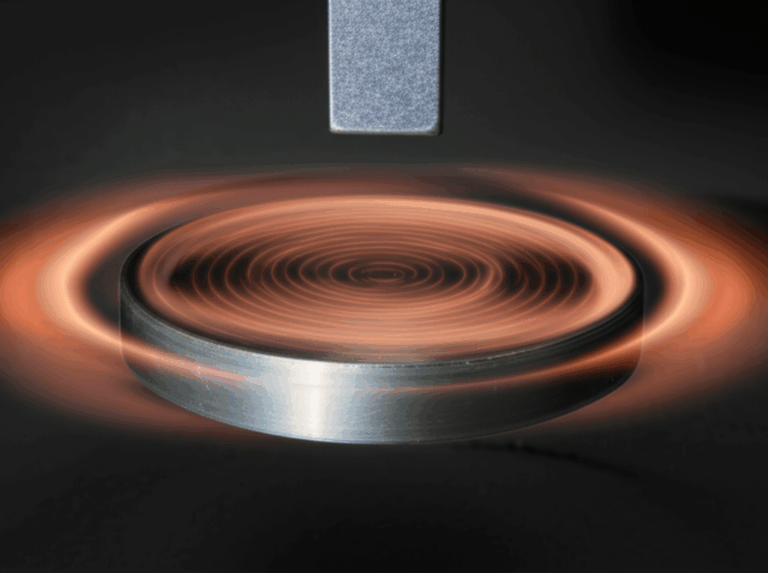
Small aside if you like to know how things work. Your alternator and starter rely on a stator and rotor inside. If moisture sneaks in, corrosion can damage windings and laminations. Curious how that works under the skin? I like this simple overview of the stator and rotor. Those parts use stacked electrical steel, and corrosion does them no favors. If you enjoy deeper dives, here is an explainer on electrical steel laminations. I keep my engine bay dry and ventilated to protect those internals.
Step 6: Freshwater, Head, and Generator Winterization
Most boats have more than an engine to protect.
- Freshwater system winterization
- I drain tanks fully. I open all faucets and showers. I run the pump until flow stops.
- I bypass the water heater if possible. I do not waste gallons of antifreeze filling it.
- I pump non-toxic propylene glycol through the system until pink flows from each faucet and the transom shower.
- I pour antifreeze into sink and shower drains to protect traps.
- Marine head and holding tank
- I pump out the holding tank at a proper facility.
- I run non-toxic antifreeze through the head intake and discharge. I follow the head manufacturer’s guidance.
- Generator winterization
- I treat the generator fuel system with stabilizer as I did for the main engine.
- I change oil if due. I fog the cylinders if the manufacturer recommends it.
- I winterize the generator’s raw water cooling side with propylene glycol like the main motor.
Step 7: Final Checks, Storage, and Covering
Once the mechanical steps are done, I set the boat up for a dry, clean winter.
- I clean and dry the bilge. I leave it spotless. Any water invites mildew and corrosion.
- I wipe down the engine and spray a light anti-corrosion protectant on exposed metal parts. I avoid belts and rubber.
- I remove food, valuables, and electronics. I store them inside.
- I clean the hull and apply wax if I have time. Spring goes faster when the hull is clean.
- I protect upholstery. I clean vinyl and use a conditioner. I prop cushions up so air can move around them.
- I add desiccant packs in cabins and lockers. I crack a few vents for airflow.
- I set pest deterrents in safe spots. Mice, spiders, and insects love dark storage. I block access points where I can.
- Covering
- Shrink wrap or a good boat cover works. Shrink wrap sheds snow and rain better. I add shrink wrap vents to allow moisture to escape.
- I avoid trapping wet gear under the cover. Moisture plus darkness equals mildew.
- Trailer and storage
- I check trailer tire pressure and condition. I block the trailer and take some weight off the tires.
- I grease the wheel bearings if due. I test the lights and wiring.
- I check bunks and rollers for wear. I ensure the boat rests correctly on the trailer.
- If I store on stands, I place them at proper lifting points. I level the boat and support it safely.
I label what I did and when I did it. I record parts, fluids, and filters. A short checklist saves me from guessing next year.
Common Winterization Mistakes I See All the Time
I keep a mental list of pitfalls. They are easy to avoid once you know them.
- Forgetting one or more block or manifold drains. One missed plug can crack an engine.
- Using automotive ethylene glycol in the raw water side. Use non-toxic propylene glycol for raw water systems.
- Running the engine on a garden hose with antifreeze poured into the muffs while city water still feeds the muffs. That dilutes your antifreeze. I either isolate to antifreeze only or use a proper winterization kit.
- Skipping fuel stabilizer. Untreated ethanol fuel gums injectors and carb jets.
- Leaving old oil in the crankcase. Acids and water sit against bearings and journals all winter.
- Not changing lower unit gear oil. Water in the lube freezes and damages gears and seals.
- Ignoring bellows and gimbal bearing. A cracked bellows floods the boat. A noisy gimbal bearing ruins a weekend.
- Leaving the battery in the boat without a maintainer. A dead battery dies faster in the cold.
- Sealing the boat tight without ventilation. Mildew moves in and does not leave quietly.
Safety Tips and Winterization Hazards
I treat safety as part of the job.
- I never run the engine in a closed space. Carbon monoxide kills quietly.
- I keep ignition sources away from fuel work. No smoking. No grinding. No open flames.
- I wear eye protection and gloves. Antifreeze splashes. Oil sprays. It happens fast.
- I handle antifreeze and waste oil responsibly. I recycle at approved sites. I never dump in the yard or storm drains.
- I secure the boat on stands or the trailer. I chock wheels. I avoid crawling under an unstable load.
DIY vs. Pro Service: How I Decide
I like doing my own winterization. It saves money and keeps me close to the boat. That said, I call a marine technician for certain items.
- I hire out if I suspect water intrusion in the sterndrive. Seal replacement needs tools and experience.
- I call a pro if I see milky gear lube or hear gimbal bearing growl.
- I ask for help on complex closed cooling service if I have never done it on that model.
- I lean on a pro if time runs short. Winter does not wait for my calendar.
Professional boat winterization services usually cost less than a fraction of a major repair. Paying for expertise can be smart if you are new to DIY or if your system is complex.
Spring Start-Up After Winterization: What I Do
Spring goes faster when I left good notes.
- I reinstall the battery. I clean and tighten connections. I check the charge.
- I inspect zinc anodes. I replace if needed.
- I lower the outdrive. I verify gear lube level.
- I remove any intake hose caps or block-off plates I used for winterization.
- I top off engine oil. I check the coolant level in closed systems.
- I reconnect fuel lines and vent hoses. I look for leaks.
- I prime the fuel system if needed. I crank and start. I watch water flow from the exhaust. I monitor temperatures. I check oil pressure.
- I take a short shakedown cruise in calm water. I bring tools and a phone. If something acts up, I fix it at the dock.
If a motor stumbles or refuses to start in spring, I do not panic. I walk through fuel, spark, and air. If you enjoy reading about systematic diagnosis, this general guide to approaching a motor problem lays out a helpful mindset even though it is not marine specific.
When to Winterize a Boat and How Long It Takes
I winterize before consistent overnight temps drop near freezing. I do not roll the dice with the first hard freeze.
How long does it take? My first time took most of a Saturday. Now I can winterize a single I/O in two to four hours if I have all supplies ready. Add time for freshwater systems, generator, and deep cleaning.
Extra Tips I Picked Up Over the Years
- Raw water intake winterization matters. I remove the hose at the seacock or strainer. I verify no water sits in low loops.
- I inspect the thermostat if the engine ran hot. Stuck thermostats make antifreeze circulation uneven.
- I check spark plugs and replace on schedule. A fresh set helps spring start-up.
- I look at exhaust manifolds and risers. If they are near end-of-life, I plan replacement in the off season.
- I store the shore power cord dry. I keep contact points clean and capped.
- I keep a small emergency toolkit on hand for winterization. Spare drain plugs. Extra hose clamps. A short length of raw water hose. Zip ties.
A Quick Word on Storage Choices
Indoor storage beats outdoor storage. Not everyone has that luxury. If you store outside:
- Use a quality cover or shrink wrap. Make sure water and snow slide off.
- Install shrink wrap vents or prop your cover for airflow.
- Keep the outdrive trimmed down.
- Check the boat after heavy storms. Catch small problems before they grow.
What to Do After You Finish
I document every step. I list:
- Date of winterization.
- Fluids used with types and quantities.
- Filters replaced with part numbers.
- Observations like “slight belt squeal” or “impeller replaced.”
- What I plan to address in spring.
A little paperwork now saves guesswork later. It also helps at resale because buyers love good records.
Frequently Asked Questions I Get From New Owners
- Can I use car antifreeze in the raw water system?
- I do not. I use non-toxic propylene glycol RV/marine antifreeze for raw water systems. It is safer and designed for this purpose.
- Do I really need to fog the engine?
- I do. It prevents cylinder and valve corrosion. I follow the engine manufacturer’s latest guidance, especially on fuel-injected models.
- Is stabilizer necessary if the tank is full?
- Yes. Ethanol fuel degrades. Stabilizer is cheap insurance.
- Should I change gear lube even if the boat only ran a little this season?
- Yes. Small amounts of water can wreak havoc if they freeze.
- Do I need to remove the battery?
- I do. I store it on a maintainer. It lasts longer and I avoid parasitic drain.
My Final Take: Peace of Mind Beats Repair Bills
Winterization is about prevention. You protect your engine from freeze damage. You block corrosion. You set yourself up for a smooth spring start and a longer engine life. The steps look long on paper. They go quickly once you have a routine.
I never skip stabilizing the fuel and circulating it. I never skip changing engine oil and fogging the cylinders. I never rush the raw water drain and antifreeze steps. I always service the sterndrive with fresh gear lube and a close look at bellows and anodes. Then I tidy the electrical system and battery, and I wrap up the rest of the boat with good ventilation.
If you follow this playbook, you will avoid the cracked blocks, milky gear lube surprises, and moldy interiors that spoil spring. Good prep makes boating season feel easy. That is the goal.
Count of internal links used: 3
- stator and rotor: https://nfdyzyo.top/stator-and-rotor/
- electrical steel laminations: https://sinolami.com/electrical-steel-laminations/
- motor problem: https://nfdyzyo.top/motor-problem/