What Are Motor Mounts For A Car? (Function, Types, Symptoms & Replacement)
Table of Contents
- Introduction: The Unsung Heroes of Engine Stability
- What Do Motor Mounts Do?
- Anatomy of a Motor Mount
- Types of Motor Mounts
- Symptoms of Bad Motor Mounts
- Why Motor Mounts Fail
- The Risks of Driving With Bad Motor Mounts
- How Many Motor Mounts Does a Car Have and Where Are They?
- DIY Checks vs. Professional Inspection
- Replacement: Process, Tools, Time, and Cost
- OEM vs. Aftermarket vs. Polyurethane: What I Choose and Why
- Preventing Motor Mount Failure
- Special Notes: EVs, Hybrids, and Active Mounts
- FAQs I Get All the Time
- Final Thoughts: Stability, Comfort, and Peace of Mind
Introduction: The Unsung Heroes of Engine Stability
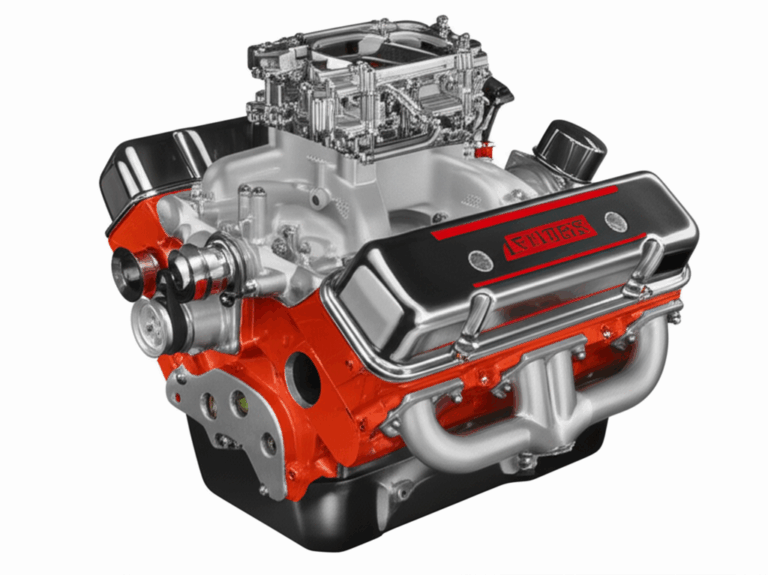
The first time I felt a motor mount fail I thought the transmission was dying. My small sedan shuddered at stoplights. The steering wheel buzzed like an electric toothbrush. Every shift hit with a dull thump. I popped the hood and revved the engine while a friend watched. The engine rocked like a boxer dodging a punch. That was my lesson. Motor mounts may be simple parts, yet they hold your entire powertrain steady and keep your car civilized.
In this guide I’ll explain what motor mounts do, what types you’ll see, how to spot bad motor mounts, and how replacement goes. I’ll share what I’ve learned after diagnosing plenty of vibrations, clunks, and mysterious cabin noises. I’ll keep it straight. Clear language, practical steps, no fluff.
What Do Motor Mounts Do?
Motor mounts (also called engine mounts) connect the powertrain to the chassis. Most cars use separate transmission mounts as well. Together they:
- Support the engine and transmission: They physically hold the powertrain in place on the subframe or engine cradle.
- Absorb vibrations: They isolate engine vibration from the chassis to reduce NVH (Noise, Vibration, Harshness).
- Dampen engine torque: When you accelerate or decelerate the engine tries to twist. Mounts resist that torque so the drivetrain stays aligned.
- Enhance ride comfort and safety: Less vibration gets into the cabin. The engine stays where it should so steering, shifting, and braking feel predictable.
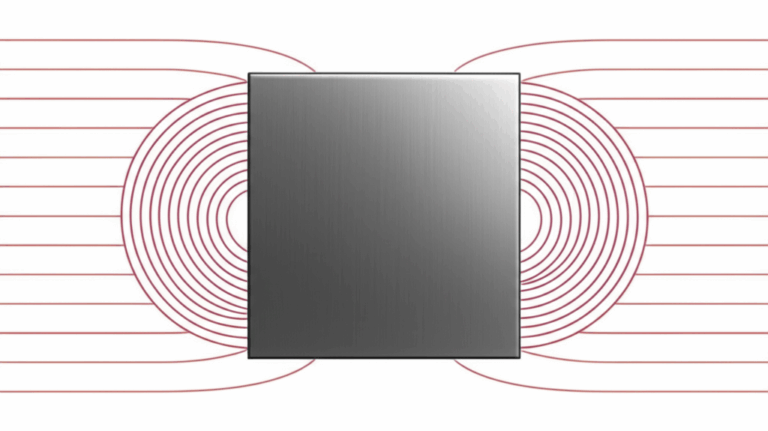
If you want the physics in one sentence, mounts resist the torque reaction that comes from the engine producing power. If you think back to the basic motor principle you know that torque on the crankshaft produces an equal and opposite reaction. Mounts soak up that reaction so the engine does not hop or slam against the subframe.
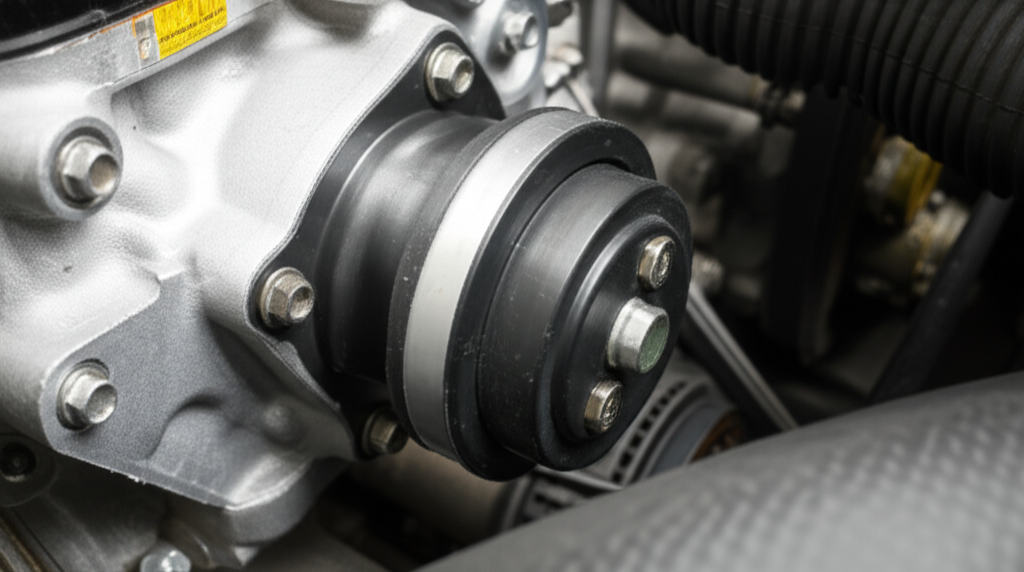
Anatomy of a Motor Mount
Most mounts share four core pieces:
- Metal brackets: One side bolts to the engine block or transmission case. The other side bolts to the chassis or subframe via an engine support bracket or frame rails.
- Rubber isolator: A thick rubber block or bushing that absorbs vibration.
- Hydraulic chamber (in hydraulic mounts): Fluid-filled cavities and internal valves that improve vibration isolation at idle and under load.
- Vacuum or electronic control (in active mounts): Some mounts use vacuum lines or electronic valves to change stiffness based on engine speed and load.
I like to think of a mount as a small shock absorber designed for lateral and torsional loads rather than vertical wheel motion. It is not a shock, yet the job is similar. Keep movement under control and keep harshness out of the cabin.
Types of Motor Mounts
I’ve worked with four main types. Each has a sweet spot.
1) Standard rubber mounts
- The most common design.
- Affordable and durable.
- Good vibration isolation at most RPM.
- Typical for daily drivers and older cars.
- If you want a quiet cabin you will like these.
2) Hydraulic motor mounts
- Fluid-filled with internal passages.
- Excellent at dampening low-frequency vibrations and idle shake.
- Common on luxury and performance cars with higher NVH standards.
- When these fail you often see a motor mount fluid leak.
3) Active/vacuum-controlled mounts
- Electronically or vacuum controlled.
- Adjust stiffness in real time based on load or RPM.
- Work with engine management to reduce NVH peaks.
- Found on modern premium vehicles and some turbo models.
4) Solid or polyurethane mounts
- Rigid design, sometimes aftermarket upgrades.
- Polyurethane motor mounts and solid mounts reduce engine movement for sharper throttle response.
- You trade isolation for rigidity. Cabin vibrations go up, especially at idle.
- Great for track cars, less ideal for daily commuting.
If you’ve ever asked solid motor mounts vs. hydraulic you now see the trade. Hydraulic wins on comfort. Solid wins on precision. Rubber sits in the middle and fits most people.
Symptoms of Bad Motor Mounts
When mounts fail they stop isolating vibration and they stop restraining engine movement. Here’s what I look and listen for.
- Excessive engine vibration: You feel it in the steering wheel, floorboard, and seats. The cabin buzzes at idle. The car may shudder when the AC compressor engages.
- Loud clunking or thumping noises: You hear it during acceleration, braking, or shifting. It sounds like the engine or transmission hits the subframe.
- Engine movement (rocking or jumping): With the hood open, have a helper hold the brake and give the throttle a short blip. Watch for excessive engine rocking. That is a classic engine rev test for mounts.
- Jerking or shuddering during shifts: Especially on automatics. The transmission mount works with the engine mounts. If one is gone the other gets overloaded.
- Visible damage or leaking fluid: Cracked rubber, torn isolators, separated metal plates, or fluid stains near hydraulic mounts.
- Misaligned drivetrain components: You may feel vibrations under load because the driveshaft angle or CV joints sit out of alignment. Accelerated wear follows.
Note the nuance. Car shaking when accelerating can also point to misfire, unbalanced tires, or a failing inner CV joint. I rule those out before I condemn mounts. It saves money and guesswork.
Why Motor Mounts Fail
Mounts are wear items. They live a hard life near heat and oil. These are the usual suspects.
- Age and wear: Rubber gets hard and brittle. It cracks and loses elasticity over time.
- Heat exposure: Engine heat and exhaust heat bake rubber. Heat speeds up degradation.
- Heavy impacts or accidents: A curb hit or crash can tear a mount or bend a bracket.
- Aggressive driving: Repeated hard launches and abrupt braking load mounts. Torque peaks tear weak spots.
- Fluid leaks: Oil, coolant, or power steering fluid swells and softens rubber. Hydraulic mounts can lose fluid through failed seals.
- Manufacturing defects: Uncommon yet possible. I have seen a mount split at low miles.
In my experience most failures land in the age, heat, and fluid leak bucket. I fix leaks first or the new mounts age quickly.
The Risks of Driving With Bad Motor Mounts
I don’t panic when a mount starts to go. I schedule it. I also don’t ignore it. Here is why.
- Accelerated wear elsewhere: A rocking engine stresses the transmission mount, driveshaft, CV joints, exhaust system, and even the serpentine belt and accessories.
- Reduced safety: Sudden engine shifts can upset the car during hard braking or quick lane changes. You lose some control and predictability.
- Harshness and noise: NVH climbs. The cabin feels cheap and tiring. Long trips become a chore.
- In extreme cases: A mount can separate and let the engine drop or shift hard. Catastrophic engine detachment is rare, yet significant powertrain movement in a collision is a real risk.
If your car clunks on every shift or the engine rocks like crazy do not wait months. That is false economy.
How Many Motor Mounts Does a Car Have and Where Are They?
Most front-wheel-drive cars use three to four mounts. A typical setup:
- A front motor mount and a rear motor mount on or near the subframe.
- A passenger side motor mount near the timing cover or accessory drive.
- A driver side motor mount integrated with the transmission mount.
- A torque strut mount (often called a dogbone) that limits fore-aft rocking.
Rear-wheel-drive cars can use three to five mounts depending on the engine cradle and transmission crossmember. Some SUVs use a top motor mount that connects to an upper engine bracket. Others rely on bottom motor mounts only.
Typical motor mount locations:
- Top or side mounts near the engine block.
- Bottom mounts bolted to the subframe or engine cradle.
- A transmission mount at the rear of the transaxle or on the crossmember.
Many folks ask what do motor mounts look like. Think of a metal bracket with a thick rubber block or a sealed can full of fluid with two studs or bolt holes. That’s the gist.
DIY Checks vs. Professional Inspection
I use three simple checks before I order parts.
1) Visual inspection
- Look for cracked rubber, collapsed mounts, separated metal, or fluid stains.
- Check engine support brackets and the chassis connection points for cracks or loose bolts.
- Inspect the subframe and engine cradle for damage or corrosion.
2) Pry bar test
- With the engine off, carefully apply a small pry bar to the engine at the mount point. You want to see controlled movement, not a loose jump.
- Be gentle. You do not want to tear good rubber. If you are not confident skip this one.
3) Brake-torque or engine rev test
- With the parking brake set and your foot firmly on the brake, shift into drive and give a short throttle blip. Watch for excessive engine movement. Repeat in reverse.
- Listen for thumps, clunks, or knocking.
If you are unsure, ask a pro. A professional motor mount inspection often includes a road test, a chassis ear for noise, and a better view on a lift. I follow shop procedures and I do not skip safety.
Replacement: Process, Tools, Time, and Cost
Some mounts take 45 minutes. Others take five hours. It depends on access. Here is what to expect.
Tools and support
- Floor jack and a thick wood block to support the oil pan or transmission case.
- An engine support bar for top support on some cars.
- Socket set with extensions, wobble joints, and a torque wrench.
- Penetrating oil and thread locker as needed.
- Service manual for engine mount bolt torque specs and order of operations.
Process overview
- Support the engine or transmission before you loosen anything.
- Remove parts that block access. This might include the intake, battery tray, splash shields, or a cross brace.
- Loosen mount bolts and nuts. Raise or lower the engine slightly to relieve tension.
- Remove the old mount. Compare the new part to the old one.
- Install the new mount loosely. Set the engine back into its neutral position. Then torque fasteners to spec in the correct sequence.
Time and difficulty
- Easy: Top or side mounts in open engine bays can be DIY friendly.
- Moderate: Lower mounts near the subframe need more time and patience.
- Hard: Some luxury cars and V6/V8 models are tight. A subframe drop or engine/transmission support from above may be required.
Cost to replace one motor mount
- Small 4-cylinder: Often $150 to $400 per mount including parts and labor.
- V6/V8 luxury or performance cars: $300 to $800 per mount is common.
- Some vehicles require intake or subframe removal. Labor climbs fast.
Shops sometimes recommend replacing all mounts together when one fails. They share age and wear. I balance cost and benefit. If one mount is shot and the others look tired I usually do the set so I do not pay for labor twice.
OEM vs. Aftermarket vs. Polyurethane: What I Choose and Why
- OEM motor mounts: Best fit and NVH tuning. Pricier. I pick OEM if I want the original ride feel.
- Aftermarket motor mounts: Cheaper and often fine for daily use. Quality varies. Read reviews and ask a trusted mechanic.
- Polyurethane or solid mounts: Strong and precise. Less vibration isolation. I use these on track cars or if I want sharp throttle response and I accept more cabin buzz.
Warranty matters. Some aftermarket mounts offer shorter warranties. If your car is known for early mount failure (certain Honda Civic motor mounts or Toyota mounts come to mind) pay attention to design updates and warranty terms.
Preventing Motor Mount Failure
You cannot make mounts immortal. You can help them last.
- Fix fluid leaks early. Oil and coolant are rubber killers.
- Avoid abusive launches. High torque loads rip weak mounts.
- Keep idle smooth. Misfires shake mounts to death. Solve the cause first.
- Inspect mounts during oil changes. Look for cracks and sag.
- Replace worn mounts before they fail completely. You protect the transmission mount and exhaust system from stress.
I also keep an ear out for new thumps over bumps. A thumping noise over bumps can be suspension bushings yet a loose or torn mount can add a nasty knock when the engine shifts on impact.
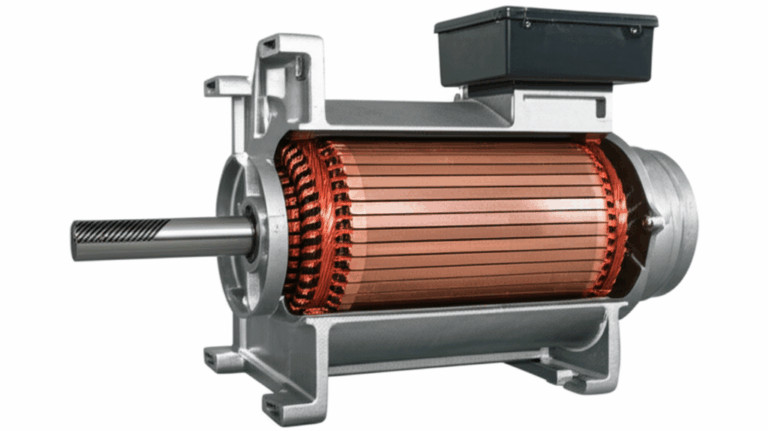
Special Notes: EVs, Hybrids, and Active Mounts
Electric vehicles do not have the same vibration signature as combustion engines. The powertrain still needs secure mounting though.
- EVs often use fewer mounts with specific tuning for high-frequency whine rather than low-frequency rumble.
- Rotor and stator balance matter. Poor alignment of the stator and rotor can feed vibration into the body even if the mounts are perfect.
- Material quality in the motor stack influences NVH. Better electrical steel laminations and tight tolerances help reduce acoustic noise at certain speeds.
- Hybrids add complexity. The engine still mounts like a normal car. The electric motor adds unique harmonics that engineers address with active mounts and tuned bushings.
Active mounts shine here. They change stiffness based on vehicle speed and load. They cancel out specific frequencies. Your ears notice the difference.
FAQs I Get All the Time
What is the purpose of motor mounts?
- They support the engine and transmission, isolate vibration, and control torque movement. That protects drivetrain stability and improves ride comfort.
How many motor mounts does my car have?
- Most cars have three to five. Typical locations include a front motor mount, rear motor mount, side mounts, and a transmission mount. Some cars add a torque strut mount up top.
What are the signs of a failing motor mount?
- Engine shudder and excessive engine vibration at idle. Clunking during acceleration, braking, or shifting. Visible engine rocking. Fluid leaks from hydraulic mounts. Misaligned drivetrain components that create new noises.
What happens if I do not replace bad motor mounts?
- You get accelerated wear. Transmission damage is possible. Driveshaft and CV joint issues become more likely. The exhaust system can crack. The serpentine belt can walk if the engine moves too much. Safety takes a hit during emergency maneuvers.
How long do motor mounts last?
- Many last 5 to 7 years or 50,000 to 100,000 miles. I have seen mounts last far longer on highway-driven cars. Aggressive driving, heavy engines, high heat, and leaks shorten life.
Are hydraulic mounts better than rubber?
- For comfort yes. Hydraulic motor mounts isolate idle vibrations well. They cost more and can leak. For budget builds rubber mounts are solid.
Are solid or polyurethane mounts worth it?
- For performance, yes. You get greater rigidity and sharper response. For daily driving you will feel more vibration in the cabin. It is a trade.
How do I check motor mounts at home?
- Do a visual inspection. Try a gentle pry bar test. Use the brake-torque test and watch for engine rocking. If you are unsure ask a mechanic for a professional motor mount inspection.
What about torque specs?
- Always use your service manual for engine mount bolt torque specs. Over-tightening can deform the isolator. Under-tightening can let the engine shift and loosen fasteners.
Can bad mounts cause gear shifting problems?
- Yes. Excessive movement can misalign shift linkages and strain the transmission mount. You might feel jerking during shifts or delayed engagement.
Do all thumps mean mounts are bad?
- No. Thumps over bumps often point to suspension bushings, struts, or sway bar end links. Diagnose with a full inspection so you do not throw parts at the problem.
Do I need to replace all mounts at the same time?
- Not always. If one fails and the others look new, replace the bad one. If the set is the same age and two show cracks I replace them together. It saves labor and avoids repeat visits.
Are aftermarket mounts safe?
- Yes when you pick quality brands. OEM mounts often have better NVH tuning. Aftermarket can save money. Check ratings and warranty.
How hard is DIY replacement?
- It ranges from easy to hard. Some mounts sit on top and take an hour with hand tools. Others require a subframe drop or engine support bar. If you lack the tools or space it is worth paying a pro.
Deep Dive: Diagnostics and Edge Cases
When a car shakes at idle I do not jump straight to mounts. I check these first:
- Engine misfire: A rough idle from misfire can feel identical to a bad mount. Fix the misfire then reassess NVH.
- Exhaust contact: A sagging exhaust hanger can let the pipe hit the subframe or body. It sounds like a mount yet the fix is cheap.
- Transmission mount vs. engine mount: If you feel a thump when shifting into drive or reverse the transmission mount sits high on the suspect list.
- Accessory drive issues: A bent pulley or failing harmonic balancer creates vibration that mounts cannot hide.
Once I rule those out I focus on mounts. I look at typical motor mount locations for that vehicle. I check the top mount first because it is easy to see. I use a mirror and a flashlight for the lower mounts. I also look for uneven engine height. A collapsed mount changes the engine angle enough to notice.
I like the pry bar test yet I use it sparingly. I never pry against thin aluminum. I never jam the bar into the rubber. You can turn a good mount into a bad one with a heavy hand.
Material and Design Notes: Why Stiffness Matters
Engine mount stiffness affects:
- Vibration isolation efficiency: Softer isolates better at idle but can allow more movement under torque.
- Engine mount stiffness vs. engine torque: High-torque engines need stiffer mounts to control rocking.
- Flexible mount design vs. rigid mount design: Flexible isolates, rigid controls. Engineers find a balance for each car.
- NVH across the RPM range: You want low idle shake and stable acceleration without droning.
Mount material properties matter too:
- Rubber composition and durometer drive isolation and longevity.
- Hydraulic design and internal valving shape the frequency response.
- Polyurethane resists oil and heat better yet transmits more vibration.
That is why a cheap aftermarket mount can feel harsh or too soft. The tuning is not trivial. You pay for the right compound and internal design.
Case Example: When One Bad Mount Fools You
I once chased a clunk on a midsize SUV. It thumped under load and banged on upshifts. The top mount looked fine. The transmission mount looked okay. The rear bottom motor mount hid behind the subframe. We lifted the engine a hair and the rear mount fell apart. The rubber had split around the center sleeve so it looked intact at rest. Once replaced the thump vanished and the cabin went quiet. Lesson learned. Do not trust only what you can see without unloading the mount.
Subframe, Engine Cradle, and Chassis Connection
Mounts do not work alone. They tie into:
- The subframe or engine cradle which carries the load.
- Chassis connection points and frame rails which must be solid and rust free.
- Engine support brackets which need straight geometry and proper bolt torque.
If the subframe is bent or rusted no new mount will solve your NVH. Fix structure first. Then isolate with good mounts.
Telltale Noises and What They Mean
- Clunk when shifting from park to drive: Transmission mount or a front/rear mount with torn rubber.
- Knock when lifting off the throttle: Torque strut mount or dogbone bushing.
- Thump over bumps with engine load: Mount allows the engine to contact the firewall or a crossmember.
- Buzz at a specific RPM: A hard contact point somewhere. Heat shield, exhaust hanger, or a collapsed mount that changed clearances.
Use your ears. Sounds under your feet often trace to lower mounts near the subframe. Sounds up by the dash can be the upper mount or firewall contact.
Benefits After Replacement
Every time I finish a mount job I notice three things right away:
- Smoother acceleration and deceleration. The drivetrain feels tied down.
- Quieter cabin. The steering wheel and seats stop buzzing. You can hear your music again.
- Restored engine stability. Shift quality improves. The car feels new again.
People underestimate how much joy a quieter cabin brings. NVH drains your energy. Good mounts give it back.
Safety and Torque: Do Not Wing It
I never guess at torque values on engine mount bolts. Over-torque can squash the isolator and tear threads. Under-torque can loosen bolts and let the engine shift. I always use a manual for engine mount bolt torque specs and the torque sequence. I also replace single-use stretch bolts when the manual says so. Thread locker is not a universal fix. Use it only where the manufacturer calls for it.
Wrapping Up the Costs and Planning
If your car has one bad mount I budget for at least $250 to $400 on a small car. If two or three are weak I plan for $600 to $1,200 depending on access and parts. Luxury cars go higher. I also plan time without the car. Some shops need a few hours. Others need most of a day because of subframe or intake removal.
I ask for OEM or high-quality aftermarket quotes and I compare. I ask about warranty. I ask if the shop recommends a set replacement and why. Good shops explain their diagnosis and show you the failed mount before they toss it.
A quick note on EV NVH sources
Even with perfect mounts EVs can sing at certain speeds because of electromagnetic forces and gear whine. Engineers fight those with better rotor balance, gear design, and tighter motor stacks. That is where precise materials and stacks like quality electrical steel laminations help. You may never see these parts, yet you feel the benefits when your cabin stays calm.
Final Thoughts: Stability, Comfort, and Peace of Mind
I used to ignore small vibrations because I was busy. Then I learned small shakes turn into big bills. Motor mounts are not glamorous yet they keep your engine where it belongs and your cabin quiet. When you feel new buzzing at idle or you hear a clunk with each shift do not panic. Check the basics. Inspect the mounts. Confirm the cause. Replace what is worn. You will get smoother acceleration, a quieter cabin, and a car that feels solid again.
Here is my short playbook:
- Notice new vibrations early and listen for patterns.
- Verify the source with simple checks and a proper inspection.
- Fix leaks before installing new mounts.
- Use correct torque specs on reassembly.
- Choose mounts that match your goals. Comfort or performance. OEM or performance poly.
- Drive away with a calmer car and a calmer mind.
You do not need to be a mechanic to understand motor mounts. You just need to know what they do, how they fail, and what to do next. I hope this guide gives you that confidence.
Resources for deeper understanding:
- For torque reaction fundamentals see the motor principle.
- For EV vibration sources study the role of the stator and rotor.
Stay safe. Keep it smooth. And enjoy the drive.